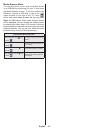
Инструкция для PHILIPS 22PFL2807H

(скачивание инструкции бесплатно)
Формат файла: PDF
Доступность: Бесплатно как и все руководства на сайте. Без регистрации и SMS.
Дополнительно: Чтение инструкции онлайн
background image

English

   - 26 -

Timeshift Recording 

Press 


(PAUSE) button while watching a broadcast 

for switching to timeshifting mode. In timeshifting 

mode, the programme is paused and simultaneously 

recorded to the connected USB disk. Press   (PLAY) 

button again to watch the paused programme from 

the stopped moment. You will see the timeshift gap 

between the real and the timeshifted programme in 

the info bar. 

Instant Recording

Press 

 button to start recording an event instantly 

while watching a programme. You can press 


button on the remote control again to record the next 

event on the EPG. In this case, an OSD will be 

displayed, indicating the programmed events for 

recording. Press   (STOP) button to cancel instant 

recording. 

Note

: Switching to a different broadcast or source; and 

viewing Media Browser are not available during the recording. 

While recording a programme or during the timeshifting, a 

warning message appears on the screen if your USB device 

speed is not sufficient.

Watching Recorded Programmes 

In the main menu, use “ ” or “ ” buttons to select 

Media Browser 

and press

 OK

. Highlight 

Recordings 

Library

 item by using “ ” or “ ” button and press 

OK

 button to enter. Recordings Library will then be 

displayed. Select a recorded item from the list (if 

previously recorded) by using 

” / “ ” 

button. Press 

OK

 button to view 

Play Options

. Select an option by 

using 

” / “ ”

 or OK buttons.

Note: Viewing main menu and menu items will not be available 

during the playback.

Press   (STOP) button to stop a playback and return 

to Recordings Library.

Slow Forward

If you press   (PAUSE) button while watching 

recorded programmes, slow forward feature will be 

available. You can use 

 button to slow forward. 

Pressing 

 button consecutively will change slow 

forwarding speed.

Recording Configuration

Select Recording Configuration item in the Settings 

menu to configure recording settings. 

Format Disk

: You can use Format Disk feature for 

formatting the connected USB disk. 

IMPORTANT

: Note that ALL the data stored on the 

USB disk will be lost and then the disk format will 

be converted to FAT32 if you activate this feature. If 

your USB disk malfunctions, you can try formatting 

the USB disk. In most cases formatting the USB disk 

will restore normal operation; however, ALL the data 

stored on the USB disk will be lost in such a case. 

Note: 

If  “USB  is  too  slow”  message  is  displayed  on  the 

screen while starting a recording, try restarting the recording. 

If you still get the same error, it is possible that your USB 

disk does not meet the speed requirements. Try connecting 
another USB disk.

Software Upgrade

Your TV is capable of finding and updating new 

software upgrades over broadcast channels (if 

available). For broadcast channels search, TV looks 

the available channels stored in your settings. So 

before software upgrade search, it is advised to auto 

search and update all available channels.

1) Software upgrade search via user 

interface

• It is possible manually to check if there is a new 

software upgrade for your TV set.

• Simply navigate on your main menu. Choose 

Settings

 and select 

Other Settings

 menu. In 

Other Settings

 menu navigate on to the 

Software 

Upgrade

 item and press 

OK

 button to open 

Upgrade Options

 menu.

• In 

Upgrade Options

 menu select 

Scan for upgrade


and press 

OK

 button.

• If a new upgrade is found, it starts to download the 

upgrade. A progress bar indicates the remaining 

download progress. When download completes 

with success a message is displayed for reboot to 

activate new software. Press OK to continue with 

the reboot operation.

2) 3 AM search and upgrade mode

• If 

Automatic scanning 

in 

Upgrade Options

 menu 

is enabled, TV wakes up at 03:00 and searches 

broadcast channels for new software upgrade. If new 

software is found and downloaded successfully, with 

next power up TV opens with new software version.

Note on reboot operation

: Reboot is the last step in software 

upgrade operation if download of new software is finished 

successfully. During reboot TV makes final initialization. In reboot 

sequence panel power is closed and front led indicates the activity 

with blinking. Around 5 minutes later TV restarts with new software 

activated. The TV may start in first time installation mode.

• If your TV fails to restart in 10 minutes, unplug power 

for 10 minutes and re-plug again. TV should open 

with new software safely. If you still can not get 

TV working, please kindly repeat unplug and plug 

sequence a few times more. If your set still can not 

operate, please call the service personnel to fix the 

problem for you.

Caution: While led is blinking during reboot do not unplug 

your TV’s power. Doing this may cause your TV not to 

re-open again and can only be fixed by service personnel.

1
2
3
4
5
6
7
8
9
10
11
12
13
14
15
16
17
Оглавление инструкции
  • Страница 1 из 18
    Register your product and get support at www.philips.com/welcome User manual Mode d'emploi Manuale utente Manual del usuario Manual do utilizador
  • Страница 2 из 18
    General Operation Contents TV Control switch & Operation.............................. 16 General Operation................................................. 16 TV Menu Features and Functions......................... 21 Specifications...............................................................28
  • Страница 3 из 18
    Viewing remote control 1. Standby 2. Stop (in Media Browser mode) 3. Play (in Media Browser mode) / Play-Slideshow (in Media Browser) 4. Rapid reverse (in Media Browser mode) 5. AV / Source selection 6. TV 7. Electronic programme guide(in DVB channels) 8. Navigation buttons (Up/Down/Left/Right) 9.
  • Страница 4 из 18
    Viewing the Connections Connector Type Cables Device Scart Connection (back) VGA Connection (back) SIDE AV PC/YPbPr Audio Connection (side) Side Audio/Video Connection Cable (Supplied) PC Audio Cable (Not supplied) HDMI Connection (back) SPDIFF Connection (back) SIDE AV Side AV Connection (side) AV
  • Страница 5 из 18
    Aerial Installation Switching On/Off To Switch the TV On • Connect the power cord to the 220-240V AC, 50 Hz. • Press STANDBY touch button. Then the standby LED lights up. • To switch on the TV from standby mode either: • Press the “ ” button, CH- or CH+ or a numeric button on the remote control. •
  • Страница 6 из 18
    Media Browser Menu You can play photo, music, and movie files stored on a USB disk by connecting it to your TV and using the Media Browser screen. To do this, perform the following: Connect a USB disk to one of the USB ” inputs located on the side of the TV. Press “ button and select Media Browser
  • Страница 7 из 18
    TV Menu Features and Functions Picture Menu Contents Mode For your viewing requirements, you can set the related mode option. Picture mode can be set to one of these options: Cinema,Game,Dynamic and Natural. Contrast Sets the lightness and darkness values of the screen. Brightness Sets the
  • Страница 8 из 18
    TV Menu Features and Functions Sound Menu Contents Volume Adjusts volume level. Equalizer: Classic and User. Press the “ ” button to return to the previous menu. Equalizer menu settings can be changed manually only when the Equalizer Mode is in User. Balance This setting is used for emphasizing
  • Страница 9 из 18
    TV Menu Features and Functions Settings Menu Contents Conditional Access Controls conditional access modules when available. Language Configures language settings (-may change depending on the country selected) Preferred and current settings will be available. Current settings can be changed only
  • Страница 10 из 18
    Software Upgrade To ensure that your TV always has the most update information, you can use this setting. In order for the proper operation, please ensure that the TV is set to standby mode. Application Version Displays application version. Hard of Hearing If the broadcaster enables any special
  • Страница 11 из 18
    Electronic Programme Guide (EPG) Some, but not all channels send information about the current and next programmes. Press the “ to view the EPG menu. ” button Up/Down/Left/Right: Navigate EPG. OK: Displays programme options. INFO: Displays, in detail information on programme selected. GREEN:
  • Страница 12 из 18
    Timeshift Recording Press (PAUSE) button while watching a broadcast for switching to timeshifting mode. In timeshifting mode, the programme is paused and simultaneously recorded to the connected USB disk. Press (PLAY) button again to watch the paused programme from the stopped moment. You will see
  • Страница 13 из 18
    2. Check the AV cables and connections if you have tried to connect a device. Troubleshooting & Tips Image persistence - ghosting Please note that ghosting may occur while displaying a persistent image (still or paused image). LED TV’s image persistence may disappear after a short time. Try turning
  • Страница 14 из 18
    Specifications TV BROADCASTING PAL/SECAM B/G D/K K’ I/I’ L/L’ DIGITAL RECEPTION DVB-T MPEG2 DVB-T MPEG4 HD DVB-T MHEG-5 Engine (for UK only) DVB-C MPEG2 DVB-C MPEG4 HD RECEIVING CHANNELS VHF (BAND I/III) UHF (BAND U) HYPERBAND NUMBER OF PRESET CHANNELS 10000 CHANNEL INDICATOR On Screen Display RF
  • Страница 15 из 18
    Supported DVI Resolutions When connecting devices to your TV’s connectors by using DVI to HDMI cables (not supplied), you can refer to the following resolution information. Index Resolution Frequency 1 640x400 70Hz 2 640x480 60Hz-66Hz-72Hz -75Hz 3 800x600 56Hz-60Hz-70Hz-72Hz -75Hz 4 832x624 75 Hz 5
  • Страница 16 из 18
    AV and HDMI Signal Compatibility Source Supported Signals Available PAL 50/60 O EXT NTSC 60 O (SCART) RGB 50 O RGB 60 O PAL 50/60 O NTSC 60 O Side AV YPbPr HDMI1 480I 60Hz O 480P 60Hz O 576I 50Hz O 576P 50Hz O 720P 50Hz O 720P 60Hz O 1080I 50Hz O 1080I 60Hz O 1080P 50Hz O 1080P 60Hz O 480I 60Hz O
  • Страница 17 из 18
    All registered and unregistered trademarks are the property of their respective owners. Specifications are subject to change without notice. Philips and the Philips’ shield emblem are registered trademarks of Koninklijke Philips Electronics N.V. and are used under license from Koninklijke Philips
  • Страница 18 из 18