1
English
EN
Contents
1 Safety
2
2 Your car entertainment system
3
Introduction 3
Playable media
3
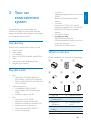
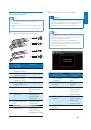
What's in the box
3
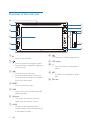
Overview of the main unit
4
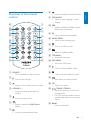
Overview of the remote control
5
3 Install the car entertainment system
6
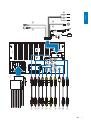
Connect wires
7
Mount into the dashboard
10
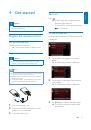
4 Get
started
11
Prepare the remote control
11
Turn on
11
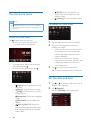
Use the home menu
12
Set the date and time
12
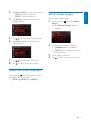
Adjust the screen brightness
13
Switch display designs
13
5 Play from hard media
14
Load a disc
14
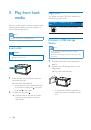
Connect a USB storage device
14
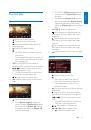
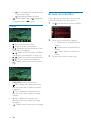
Control play
15
%URZVHUHFRUGHGÀOHV
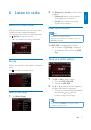
6 Listen to radio
17
Switch to radio mode
17
Set up
17
Tune to a radio station
17
Store radio stations in memory
18
Tune to a preset radio station
18
Use RDS related features
18
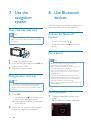
7 Use the navigation system
20
Insert the map data card
20
Navigate your road trip
20
8 Use Bluetooth devices
20
Activate the Bluetooth function
20
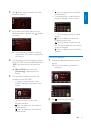
Pair a device
20
Play audio from a connected device
22
Make a call
23
9 Adjust
sound
25
Adjust the volume level
25
Mute sound
25
Enable the MAX Sound feature
25
Enable the DBB sound effect
25
Enable the FullSound effect
25
Select a preset sound equalizer
25
Others 26
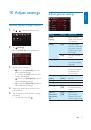
10 Adjust settings
27
Access system setup menus
27
Adjust general settings
27
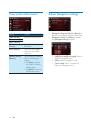
View system information
28
Adjust Navigation settings
28
Adjust Bluetooth settings
29
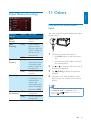
11 Others
29
Play external audio/video input
29
Use buttons on the steering wheel
30
Set the rear view camera
30
Reset the system
30
Replace the fuse
30
8SJUDGHWKHÀUPZDUH
12 Product information
32
13 Troubleshooting
33
General 33
About Bluetooth device
33
14 Notice
34
Compliance 34
Care of the environment
34
Trademark notice
35
Copyright 35