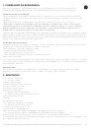
Страница 4 из 65 24h fig. 16c fig. 16d fig. 16e fig. 16f fig. 16g fig. 16h fig. 17a fig. 17b NEW CLICK fig. 17c fig. 17d fig. 17e fig. 18a CLICK fig. 18b fig. 18c fig. 18d fig. 18e fig. 19a fig. 19b fig. 19c fig. 19d CLICK 24h fig. 19e fig. 19f fig. 19g fig. 20
Страница 5 из 65 1. CONSEILS DE SÉCURITÉ Pour votre sécurité, cet appareil est conforme aux normes et réglementations applicables (Directives Basse Tension, Compatibilité Electromagnétique, Environnement,...). FR CONDITIONS D’UTILISATION • Votre aspirateur est un appareil électrique : il doit être utilisé dans les
Страница 6 из 65 Accessoires standard : 17. Sacs a- Sac papier* (réf. ZR0039 01) b- Sac textile* c- Sac Wonderbag Compact* (réf. WB3051.20-30-40)) 18. Flexible avec crosse et variateur mécanique de puissance 19. Tube télescopique* 20. Tubes* 21. Suceur parquet* 22. Suceur tous sols 23. Suceur ameublement* 24.
Страница 7 из 65 - Pour les parquets et sols lisses : utilisez le suceur (22) en position brosse sortie - fig.5. ou utilisez directement le suceur parquet* (21). - Pour les recoins et les endroits difficiles d’accès : utilisez le suceur fente convertible en brossette* (24) en position suceur plat. - Pour les
Страница 8 из 65 CHANGEZ LE MICROFILTRE* (réf : ZR0039 01) FR Important : Changez le microfiltre* ZR0039 01 tous les 6 changements de sac. • Ouvrez le couvercle (9) de votre aspirateur -fig. 14. • Retirez la grille de protection du moteur (12)- fig. 17a. • Retirez le microfiltre* (13)-fig.17b, et conservez la
Страница 9 из 65 - Cassette HEPA* : changez la cassette HEPA* (14a) (réf. ZR0045 01)et replacez-la dans son logeFR ment ou lavez la cassette filtre HEPA* (14b) (réf. ZR0042 01) selon la procédure. - Microfiltre* : retirez le microfiltre* et remplacez-le par un nouveau (réf. ZR0039 01). • Le variateur électronique
Страница 10 из 65 1. SAFETY RECOMMENDATIONS • For your safety, this appliance complies with all enforceable standards and regulations (Low Voltage Directives, Electromagnetic Compatibility, Environment, etc.). EN CONDITIONS FOR USE • Your vacuum cleaner is an electrical device: it must be used under normal
Страница 11 из 65 Standard accessories: 17. Bags a – Paper bag* (ref. ZR0039 01) b – Textile bag* c – Wonderbag Compact bag* (ref. WB3051.20-30-40) 18. Flexible hose with grip and mechanical power regulator 19. Telescopic tube* 20. Tubes* 21. Hardfloor tool* 22. All floor tool 23. Furniture tool* 24. Slot tool
Страница 12 из 65 IMPORTANT Always switch off and unplug your vacuum cleaner before changing the accessories. EN CONNECTING THE CORD AND STARTING THE APPLIANCE • Unwind the power cord completely, plug your vacuum cleaner in – fig. 6 and press the On/Off pedal (2) – fig. 7 . • Set the suction power: - using the
Страница 13 из 65 • Open the lid (9) of your vacuum cleaner – fig. 14. • Remove the motor protection grid (12) - fig. 17a. • Remove the microfilter* (13) - fig.17b, and keep the motor protection grid (12). • Throw the microfilter* (13) in the bin -fig. 17c. • Place a new microfilter * (13) on the motor protection
Страница 14 из 65 - Microfilter*: Remove the microfilter* and replace it with a new one (ref. ZR0039 01). • The electronic power regulator* is in the minimum position: increase the power using the electronic power regulator* (unless you are cleaning fragile fabrics). • The mechanical power regulator on the grip is
Страница 15 из 65 1. CONSEJOS DE SEGURIDAD Por su seguridad, este aparato cumple las normas y reglamentos aplicables (Directivas Base Tensión, Compatibilidad Electromagnética, Medio ambiente...). ES CONDICIONES DE USO • Su aspiradora es un aparato eléctrico, por lo que debe utilizarse en las condiciones normales de
Страница 16 из 65 Accesorios estándar:v 17. Bolsas a- Bolsa de papel* (ref. ZR0039 01) b- Bolsa de tela* c- Bolsa Wonderbag Compact* (ref. WB3051.20-30-40) 18. Tubo flexible con tobera y variador mecánico de potencia 19. Tubo telescópico* 20. Tubos* 21. Cepillo aspirador para parqué* 22. Cepillo para todo tipo de
Страница 17 из 65 - Para los rincones y los lugares de difícil acceso: utilice la boquilla con ranura convertible en cepillo* (24) en posición boquilla plana. - Para los muebles: utilice la boquilla con ranura convertible* (24) o la boquilla para muebles* (23). ES ATENCIÓN Apague y desconecte siempre la aspiradora
Страница 18 из 65 • Abra la tapadera (9) de la aspiradora-fig. 14. ES • Retire la rejilla de protección del motor (12) - fig. 17a. • Retire el microfiltro* (13) - fig.17b, y guarde la rejilla de protección del motor (12). • Tire el microfiltro* (13) en un cubo de la basura-fig. 17c. • Coloque un nuevo microfiltro
Страница 19 из 65 • El variador electrónico de potencia* se encuentra en posición mín.: aumente la potencia con el variador electrónico de potencia* (salvo en caso de que vaya a aspirar tejidos frágiles). • El variador mecánico de potencia de la tobera está abierto: cierre el variador mecánico de potencia. ES EN
Страница 20 из 65 1. CONSELHOS DE SEGURANÇA Para a sua segurança, este aparelho está em conformidade com as normas e regulamentos aplicáveis (Directivas de Baixa Tensão, Compatibilidade Electromagnética, Meio ambiente...). PT CONDIÇÕES DE UTILIZAÇÃO • O seu aspirador é um aparelho eléctrico: deve ser utilizado nas
Страница 21 из 65 Acessórios standard: 17. Sacos a – Saco de papel* (ref. ZR0039 01) b – Saco têxtil* c – Saco Wonderbag Compact* (ref. WB3051.20-30-40) 18. Tubo flexível com cruzeta e variador mecânico de potência 19. Tubo telescópico* 20. Tubos* 21. Escova parquet* 22. Escova para todo o tipo de solos 23. Escova
Страница 22 из 65 - Para os cantos e locais de difícil acesso: utilize a escova para fendas convertível em escova pequena* (24) na posição escova plana. - Para os móveis: utilize a escova pequena da escova para fendas convertível* (24) ou a escova para móveis* (23). PT ATENÇÃO Desligue sempre o aspirador e retire a
Страница 23 из 65 • Abra a tampa (9) do aspirador – fig. 14. PT • Retire a grelha de protecção do motor (12) – fig. 17a. • Retire o microfiltro* (13) - fig.17b, e conserve a grelha de protecção do motor (12). • Deite o microfiltro* (13) no lixo – fig. 17c. • Coloque um novo microfiltro (13) sobre a grelha de
Страница 24 из 65 Microfiltro*: retire o microfiltro* e substitua-o por um novo (ref.: ZR0039 01). • O variador electrónico de potência* está na posição min: aumente a potência com a ajuda do variador electrónico de potência* (excepto no caso de estar a aspirar tecidos frágeis). • O variador mecânico de potência da
Страница 25 из 65 1. CONSIGLI DI SICUREZZA Per garantire la sicurezza degli utilizzatori, questo apparecchio è conforme alle norme e ai regolamenti applicabili (Direttive Bassa Tensione, Compatibilità elettromagnetica, Ambiente,…). IT CONDIZIONI D’UTILIZZO • Questo aspirapolvere è un apparecchio elettrico: deve
Страница 26 из 65 Accessori standard: 17. Sacchetti a- Sacchetto di carta* (rif. ZR0039 01) b- Sacchetto in tessuto* c- Sacchetto Wonderbag Compact* (ref. WB3051.20-30-40) 18. Flessibile con impugnatura e variatore meccanico di potenza 19. Tubo telescopico* 20. Tubi* 21. Spazzola parquet* 22. Spazzola pavimenti 23.
Страница 27 из 65 - Per gli angolini e i punti difficili da raggiungere: utilizzare la bocchetta a lancia convertibile in spazzola* (24) in posizione bocchetta piatta. - Per i mobili: utilizzare la spazzolina della bocchetta a lancia convertibile* (24) o la bocchetta imbottiti* (23). IT ATTENZIONE Prima della
Страница 28 из 65 • Aprire il coperchio (9) dell’aspirapolvere – fig. 14. IT • Togliere la griglia di protezione del motore (12) - fig. 17a. • Togliere il microfiltro* (13) - fig.17b, e mettere da parte la griglia di protezione del motore (12). • Gettare il microfiltro (13) nella pattumiera-fig. 17c. • Collocare un
Страница 29 из 65 - Microfiltro*: estrarre il microfiltro* e sostituirlo con uno nuovo (rif. ZR0039 01). IT • Il variatore elettronico di potenza* è in posizione min: aumentare la potenza usando il variatore elettronico di potenza* (a meno che si stiano aspirando tessuti delicati). • Il variatore meccanico di
Страница 35 из 65 63> D@ 3;B@FEC:@ =6D3;:>6:D3: =6 gEC;@<:3 EL 0 7Y[MZ_R _[Y QRMW_T \gU1V^T] _T] XNOL] L 1RVh^_R _TY KY_N^T 0 :XKPZ_R NY T UK^T _[` NW\[^_[1M[` RMYNV T WN_JXXTXT PVN _[Y _g2[ QN2KQ[` 2[` ^W[`2MSR_R PVN bNXVJ WNV 1[WK_R] b\T^V1[2[VL^_R _[ NW\[^_f1V[ ^_T UK^T _T] O[g\_^N] 2\[] _N 1K^N RVW PVN _N Zg
Страница 36 из 65 1. VEILIGHEIDSTIPS Dit apparaat is voor uw veiligheid conform de toepasselijke normen en regelgeving (Leidraden Laag Spanning, Elektromagnetische Compatibiliteit, Milieu,...). NL GEBRUIKSVOORWAARDEN • Uw stofzuiger is een elektrisch apparaat: het dient in normale gebruiksomstandigheden gebruikt te
Страница 38 из 65 - Voor parketten en gladde vloeren: gebruik de zuigmond (22) in de stand met de borstel naar buiten - fig.4. of gebruik meteen de zuigmond parket* (21). NL - Voor kleine hoekjes en moeilijk bereikbare plekken: gebruik de zuigmond met tot borstel om te vormen spleet *(24) in de vlakke zuigmond
Страница 39 из 65 b) Indien uw stofzuiger met een textiele stofzak is uitgerust* : NL • Neem de stofzakbeugel (15) uit het stofzakcompartiment (8)- fig.16a, en haal vervolgens de textiele stofzak * (17b) uit de beugel (15) door deze over de glijders te schuiven (16) - fig.16b. • Open de ritssluiting van de stofzak -
Страница 40 из 65 INDIEN UW STOFZUIGER NIET START • Het apparaat krijgt geen stroom: zorg ervoor dat het apparaat op juiste wijze aangesloten is. NL INDIEN UW STOFZUIGER NIET ZUIGT • Een accessoire of de slang is verstopt: ontstop het accessoire of de slang. • Het deksel sluit niet goed: controleer of de
Страница 41 из 65 GARANTIE • Dit apparaat is uitsluitend bestemd voor huishoudelijk gebruik; in het geval van oneigenlijk geNL bruik of van gebruik niet conform met de gebruiksaanwijzing kan het merk niet aansprakelijk worden gesteld en wordt de garantie nietig verklaard. • Lees de gebruiksaanwijzing aandachtig door
Страница 42 из 65 1. SICHERHEITSHINWEISE Um Ihre Sicherheit zu gewährleisten, entspricht dieses Gerät den gültigen Normen und Bestimmungen (Niederspannung, elektromagnetische Verträglichkeit, Umweltverträglichkeit...). DE ANWENDUNGSBEDINGUNGEN • Ihr Staubsauger ist ein elektrisches Gerät: er darf nur unter normalen
Страница 43 из 65 14.a- HEPA Filterkassette* (Art.-Nr. ZR0045 01), für Papierbeutel geeignet DE b- HEPA Filterkassette* (Art.-Nr. ZR0042 01), für Stoffbeutel* geeignet Ihr Staubsauger ist entweder mit einem Mikrofilter* oder mit einer HEPA Filterkassette* ausgestattet. 15. Beutelhalterung für Wonderbag Compact *
Страница 44 из 65 • Für Staubsauger mit Teleskop-Saugrohr* (19): drücken Sie den Einstellknopf nach vorne, ziehen DE Sie die gewünschte Länge heraus und lassen Sie den Knopf los - Abb. 3a. Ansonsten werden die beiden Rohre* (20) durch leichtes Drehen miteinander verbunden - Abb. 3b. • Stecken Sie das gewünschte
Страница 45 из 65 b) Für Staubsauger mit einem Stoffbeutel* : • Entnehmen Sie den Staubbeutelhalter (15) aus dem Beutelfach (8) - Abb. 16a und nehmen Sie den DE Stoffbeutel (17b) aus dem Halter (15), indem Sie ihn aus den Rinnen herausziehen (16) - Abb. 16b. • Machen Sie den Beutel an seinem Reißverschluss auf -
Страница 46 из 65 REINIGUNG DES STAUBSAUGERS • Wischen Sie das Gehäuse des Geräts und die Zubehörteile mit einem angefeuchteten weichen Tuch ab und trocknen Sie sie. • Reiben Sie den Deckel mit einem trockenen Tuch ab - Abb. 20. • Verwenden Sie keine aggressiven oder scheuernden Reinigungsmittel. DE 6. PANNENHILFE
Страница 47 из 65 Wenn das Problem weiterhin besteht, muss der Staubsauger zum nächstgelegenen zugelassenen Kundendienstcenter von Rowenta gebracht werden. Die Liste der zugelassenen Kundendienstwerkstätten erfahren Sie vom Verbraucherservice von Rowenta , dessen Kontaktdaten Sie auf der beiliegenden,
Страница 59 из 65 1. GÜVENLİK ÖNERİLERİ Güvenliğiniz açısından, bu cihaz aşağıda belirtilen hususlara yönelik normlar ve resmi düzenlemelere uygun olarak üretilmiştir. (Düşük Gerilim, Elektromanyetik Uyumluluk, Çevre Direktifleri...). TR KULLANIM KOŞULLARI • Cihazınız elektrikli bir cihazdır: Normal kullanım
Страница 60 из 65 18. Mekanik güç ayarlı ve tutacaklı esnek hortum 19. Teleskobik boru* 20. Borular* 21. Parke ucu* 22. Tüm zeminler için uç 23. Mobilya ucu* 24. Fırçaya dönüştürülebilir aparat* * 25. Turbo fırça* 26. Mini turbo fırça* TR 3. İLK KULLANIM ÖNCESİ ÜRÜNÜN AMBALAJINDAN ÇIKARILMASI • Cihazı ambalajından
Страница 61 из 65 ONEMLI Aksesuarlarını değiştirmeden önce, elektrik süpürgenizi daima durdurun ve fişini prizden çıkarın. TR KORDONUN TAKILMASI VE CİHAZIN ÇALIŞTIRILMASI • Sarılı olan kordonu sonuna dek açın – şekil 6 ve Çalıştırma/durdurma pedalı (2) üzerine basın – şekil 7. • Vakum gücünü ayarlayın: - Elektronik
Страница 62 из 65 • Motor koruma ızgarasını (12) kilitleyin – şekil 17e. • Kapağı (9) kapamadan önce, motor koruma ızgarasının (12) düzgün bir şekilde yerleştirilmiş olduğundan emin olun. TR KAĞIT TORBALAR VE WONDERBAG COMPACT İLE UYUMLU HEPA* (REF: ZR0045 01) FİLTRE KARTUŞUNUN DEĞİŞTİRİLMESİ Önemli: HEPA filtre
Страница 63 из 65 TORBA DOLULUK GÖSTERGESİ KIRMIZI İSE • Torba doymuş: kağıt torbayı* (17a) veya Wonderbag Compact* (17c) torbayı değiştirin veya kumaş torbayı* (17b) boşaltın. TR KAPAK KAPANMIYORSA (11b detektörü) • Torbanın ve torba desteğinin (15) takılı olduğunu veya düzgün yerleştirilmiş olduklarını kontrol