Scanning
_ 65
Set Scan Button tab
Scan Destination
•
Available Destination List:
Shows the list of applications currently
linked to scanned images in the PC’s registry. Select the program
you want to use and click the right arrow and add to
Front Panel
Destination List
.
•
Front Panel Destination List:
Shows the list of applications to
open scanned image.
You can choose only one application to open scanned image from
the
Available Destination List
.
•
Add Application:
Allows you to add application you want to use to
Available Destination List
.
•
Remove Application:
Allows you to remove an item added by the
user in the
Available Destination List
.
•
File Format:
Allows you to select the form of scanned data to be
saved. You can choose among
BMP
,
JPEG
,
and
TIFF
.
Scan Property
•
Computer ID:
Shows the ID of your computer.
•
Save Location:
Allows you to choose the location of the default
saving folder.
•
Resolution:
Allows you to choose the scan resolution.
•
Scan Color:
Allows you to choose the scan color.
•
Scan Size:
Allows you to choose the scan size.
•
ADF Duplex:
Automatically scans both sides. If your model does
not support this option, it will be grayed out.
•
Show Preview:
Checking this box allows you to preview applied
scan options. You can modify the options before scanning.
•
Default:
Allows you to go back to default options.
Change Port tab
Local Scanner
Select when your machine is connected via USB port.
Network Scanner
Select when your machine is connected via network port.
•
Auto detection on the network:
Automatically detects your
machine.
•
IP or Host name:
Enter in your machine’s IP address to detect your
machine.
Scan Assistant
When you press
Quick Scan
in Samsung Scan and Fax Manager, the
Scan Assistant
window appears.
Scan Assistant
allows you to adjust
scan settings and start the scanning process.
•
Favorites
: Allows you to save the current preferences settings for
future use. When you save
Favorites
, all current scan settings are
saved. To use a saved setting, select it from the
Favorites
drop
down list. The machine is now set to scan according to the setting
you selected. To delete saved setting, select it from the
Favorites
drop down list and click
Delete
. To set a favorite as startup, select
the favorite you want to set as startup, then click the
Set as default
button.
•
Scan settings
: The following scan options are available.
-
Image Type
: Allows you to chose the proper color settings for
image scanning.
-
Resolution
: Allows you to choose the image resolution.
-
Document Size
: Allows you to choose the proper size of the
scanned image.
-
Document Source
: Allows you to choose the device (scan
glass) you want to scan with.
-
Prompt for additional pages
: If this check box is checked, you
can scan pages continuously. This option is useful when you
scan multi-page documents and/or when
Document Source
is
set to
Flatbed
(platen glass). In this case a sequence of scanned
images is processed as a single document.
-
Pages to Scan
: Allows you to specify how many pages are to be
scanned. This option is available when
Document Source
is set
to
ADF
(Document feeder).
•
Preference
: The following scan options are available.
-
Auto crop image after preview
: If this option is checked, the
scanning area will be automatically adjusted to the image size.
-
Preview on program start
: If this option is checked, the
scanning area will be selected automatically as shown in the
preview.
-
Blank page detection
: This operation automatically detects
whether the scanned image is blank or not.
-
Delete page
: Blank pages will be deleted at the end of the
scanning process.
-
Separate files
: Blank page will work as a scan job separator.
That is, when multiple pages are scanned at once a blank
page will divide scanned image sequence into parts. Each
part will be treated as a separate document (group).
-
Start from scanner
: If this option is checked, scanning process
is managed using scanner touch screen rather than from the
computer. The option is not available for some scanner models.
•
Advanced
: In the
Advanced
mode, additional options such as
Image Adjustment
,
Image Enhancement
, and
Additional
Settings
are available.
-
Image Adjustment
: Allows you to perform some transformations
of the scanned image. These transformations include automatic
adjustment of image size, straightening and rotation.
-
Image Enhancement
: Allows you to remove various defects of
the image and improve its quality.
-
Additional settings
: Allows special processing of scanned
images. These transformations include stitching several partial
image scans into a single image, processing of scanned books
and watermark stamping.
Click the
Help
button from the lower-left corner of the window and
click on any option you want to know about. Then a pop up window
appears with information about that option's feature which is
provided from the
Scan Assistant
.
SCANNING WITH TWAIN-ENABLED SOFTWARE
If you want to scan documents using other software, you will need to use
TWAIN-compliant software such as Adobe Photoshop.
Follow the steps below to scan with TWAIN-compliant software.
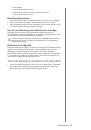
1.
Make sure that the machine is connected to your computer and powered
on.
2.
Place a single original face down on the scanner glass (See "Loading
3.
Open an application such as Adobe Photoshop.
4.
Open the TWAIN window and set the scan options.
5.
Scan and save your scanned image.