36
GB
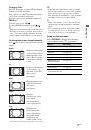
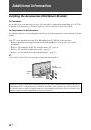
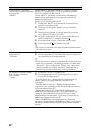
Checking the Network
Connection
Enter the respective (alphanumeric) values for
your router. The items that need to be set may
differ, depending on the Internet service
provider or the router. For details, refer to the
instruction manuals that have been provided
by your Internet service provider or supplied
with the router.
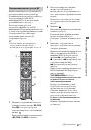
1
Press
HOME
.
2
Press
G
to select “Settings.”
3
Press
F
/
f
to select “Network Settings”,
then press .
4
Select “Network”, then press .
5
Select “IP Address settings”, then press
.
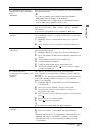
6
Select an item, and press .
When you select “DHCP (DNS
automatic)”
Go to step 7.
When you select “DHCP (DNS manual)”
Set “Primary DNS”/“Secondary DNS”
using
F
/
f
/
g
and the number buttons.
When you select “Manual”
Set the following items using
F
/
f
/
g
and
the number buttons.
• IP Address
• Subnet Mask
• Default Gateway
• Primary DNS/Secondary DNS
If your ISP has a specific proxy server
setting
Press
OPTIONS
, then press
F
/
f
to select
“Proxy Set-up” and press . Then enter
the settings.
7
Press .
8
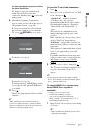
Select “Test”, then press .
9
Select “Yes”, then press .
The network diagnostic starts.
When the message “Connection
successful.” appears, press
RETURN
repeatedly to exit.
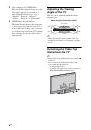
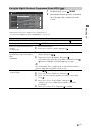
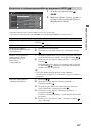
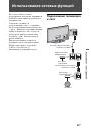
Adjusting the Server
Display Settings
You can select home network servers to be
displayed on the Home Menu.
Up to 10 servers can be displayed on the Home
Menu automatically.
1
Set the server to allow connections from
the TV.
For details on settings on the server, refer
to the Operating Instructions supplied
with the server.
2
Press
HOME
.
3
Press
G
/
g
to select “Settings.”
4
Press
F
/
f
to select “Network Settings”,
then press .
5
Select “Server Display Settings”, then
press .
6
Select the server you want to display on
the Home Menu, then press .
7
Select “Yes”, then press .
To set the server not to be displayed on
the Home Menu
In step 7, press
F
/
f
to select “No”, then press
.
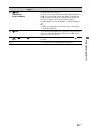
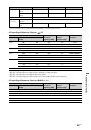
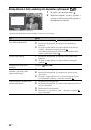
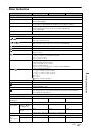
Available Options (on the connected
server settings display)
Option
Description
Delete All
Deletes all connected
servers.
Update List
Updates the server list to
the latest information.
Information
Displays information
about the connected server
currently selected.
Delete
Deletes the connected
server currently selected.
 1
1
 2
2
 3
3
 4
4
 5
5
 6
6
 7
7
 8
8
 9
9
 10
10
 11
11
 12
12
 13
13
 14
14
 15
15
 16
16
 17
17
 18
18
 19
19
 20
20
 21
21
 22
22
 23
23
 24
24
 25
25
 26
26
 27
27
 28
28
 29
29
 30
30
 31
31
 32
32
 33
33
 34
34
 35
35
 36
36
 37
37
 38
38
 39
39
 40
40
 41
41
 42
42
 43
43
 44
44
 45
45
 46
46
 47
47
 48
48
 49
49
 50
50
 51
51
 52
52
 53
53
 54
54
 55
55
 56
56
 57
57
 58
58
 59
59
 60
60
 61
61
 62
62
 63
63
 64
64
 65
65
 66
66
 67
67
 68
68
 69
69
 70
70
 71
71
 72
72
 73
73
 74
74
 75
75
 76
76
 77
77
 78
78
 79
79
 80
80
 81
81
 82
82
 83
83
 84
84
 85
85
 86
86
 87
87
 88
88
 89
89
 90
90
 91
91
 92
92
 93
93
 94
94
 95
95
 96
96
 97
97
 98
98
 99
99
 100
100
 101
101
 102
102
 103
103
 104
104
 105
105
 106
106
 107
107
 108
108
 109
109
 110
110
 111
111
 112
112
 113
113
 114
114
 115
115
 116
116
 117
117
 118
118
 119
119
 120
120
 121
121
 122
122
 123
123
 124
124
 125
125
 126
126
 127
127
 128
128
 129
129
 130
130
 131
131
 132
132
 133
133
 134
134
 135
135
 136
136
 137
137
 138
138
 139
139
 140
140
 141
141
 142
142
 143
143
 144
144
 145
145
 146
146
 147
147
 148
148
 149
149
 150
150
 151
151
 152
152
 153
153
 154
154
 155
155
 156
156
 157
157
 158
158
 159
159
 160
160
 161
161
 162
162
 163
163
 164
164
 165
165
 166
166
 167
167
 168
168
 169
169
 170
170
 171
171
 172
172
 173
173
 174
174
 175
175
 176
176
 177
177
 178
178
 179
179
 180
180
 181
181
 182
182
 183
183
 184
184
 185
185
 186
186
 187
187
 188
188
 189
189
 190
190
 191
191
 192
192
 193
193
 194
194
 195
195