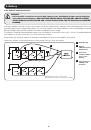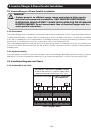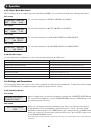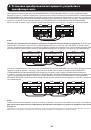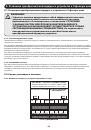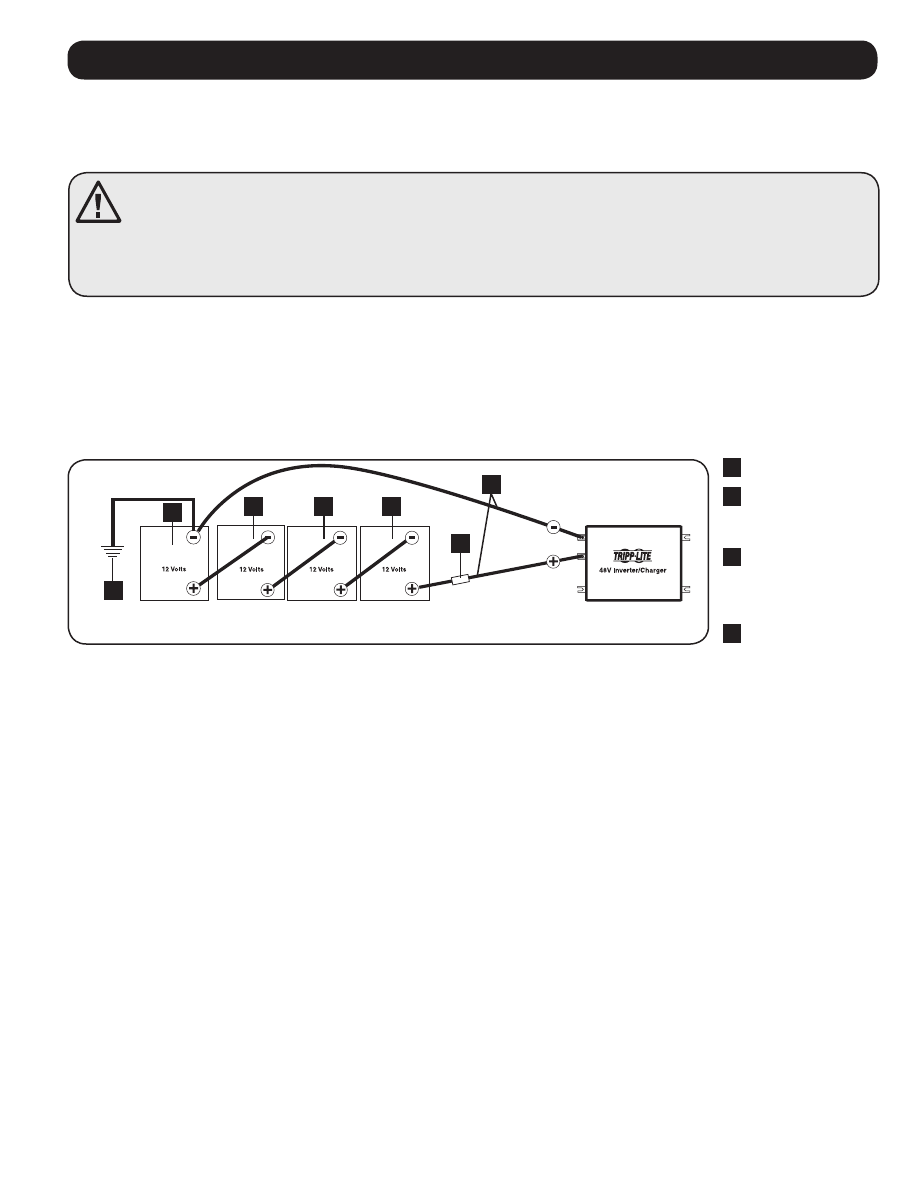
Multiple Battery Connection
(Total Battery Bank Capacity: 200 Amp-Hours @ 48VDC)
1
2
2
2
2
4
3
7
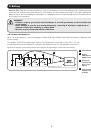
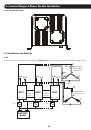
3. Battery
•
Connect Fuse:
Tripp Lite recommends that you connect your battery to your Inverter/Charger’s DC terminals with wiring that
includes a fuse and fuse block within 18 inches of the battery. The fuse’s rating must equal or exceed the Minimum DC Fuse
Rating shown on the Inverter/Charger’s nameplate. See diagrams below for proper fuse placement. The battery wire with the
fuse should not be grounded.
WARNING!
• Failure to properly ground your Inverter/Charger to an earth ground may result in a lethal electrical
shock hazard.
• Never attempt to operate your Inverter/Charger by connecting it directly to output from an
alternator rather than a battery or battery bank.
• Observe proper polarity with all DC connections.
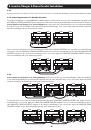
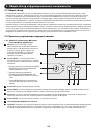
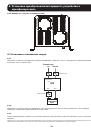
3.4.2 Connect the Batteries
When connecting batteries, your Inverter/Charger’s Nominal DC Input Voltage must match the number of batteries multiplied
by their voltage.
For example, a 48V DC Inverter/Charger requires four 12V batteries connected in series (48 = 4 x 12).
Contact Tripp Lite technical support for assistance with additional series or series/parallel connections.
Figure below illustrates a 48V Inverter/Charger with a negative grounded battery system using 12V batteries.
1
Earth Ground
2
Battery
(200 Amp-hours @
12VDC/each)
3
Fuse Block
(mounted within
18 in. of the
battery)
4
Large Diameter
Cabling to Fit
Terminals