9
D
DE
E
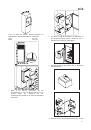
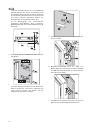
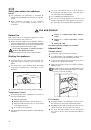
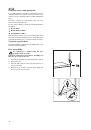
Wechsel des Türanschlags beim
Gefrierfach
Nachdem Sie den Türanschlag draußen gewechselt
haben, müssen Sie es auch beim Gefrierfach tun.
Gehen Sie bitte in der Reihenfolge der nachstehenden
Beschreibung und Abbildungen vor:
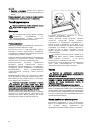
Mit Hilfe eines Schraubenziehers drücken Sie die
innere Zunge des unteren Scharnierträgers ein.
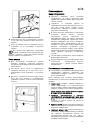
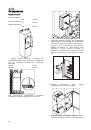
Den unteren Scharnierträger zusammen mit der
Gefrierfachtür auskippen und den Scharnierträgen
entfernen.
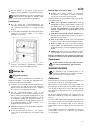
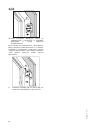
Den winkelförmigen Abdeckstopfen entfernen und
auf gegenüberliegende Seite einsetzen.
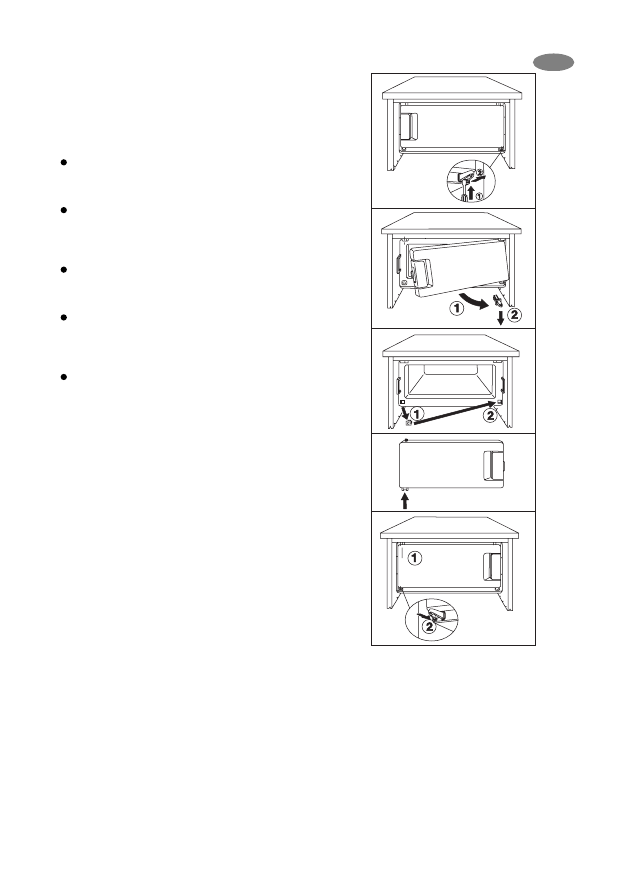
Gefrierfachtür um 180° drehen dann den unteren
Scharnierträger auf den unteren Bolzen der
Gefrierfachtür aufsetzen.
Den oberen Bolzen der Gefrierfachtür in die freie
Öffnung einlegen dann den unteren Scharnierträger
zusammen mit der Gefrierfachtür bis zur Einrastung
eindrücken.
Sie können diesen Türwechsel auch von Fachleuten
durchführen lassen. Benachrichtigen Sie bitte die
nächste Kundendienststelle. Die entstehenden Kosten
sind von Ihnen zu übernehmen.