27
MO-002_v04
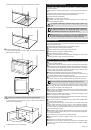
Setting the clock
After connecting the microwave oven to the mains the display will show
“0:00”
and the
buzzer will make a single sound.
1
Press the
Clock/Kitchen Timer
button. The hour digits will start flashing and the clock
indicator
will appear on the display.
2
Turn the knob to set the hour. You can set the digits from 0 to 23 by turning the knob in
the
direction or from 23 to 0 by turning the knob in the
direction.
3
Press the
Clock/Kitchen Timer
button. The minute digits will start flashing.
4
Turn the knob in the
or
direction to set the minutes. You can set the digits
from 0 to 59 (the
) direction).
The digits from 0 to 59 or from 59 to 0 will appear on the display.
5
Press the
Clock/Kitchen Timer
button to finish setting the time. The clock indicator
and the ring around the knob will go out. The
“:”
symbol will light and the set time will
appear on the screen.
The setting will last as long as the microwave oven is connected to the mains (and the
electricity supply is maintained).
In order to change the clock setting, repeat the steps 1-5.
If you press the
Stop/Clear
button while setting the time, the previous setting will be
automatically restored.
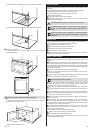
Microwave cooking
1
Press the
Micro./Grill/Combi.
button to select the required power level. The display
will show P100. The indicators
,
will light.
2
To select the required power, e.g.
P80
, press the
Micro./Grill/Combi.
or turn the knob
in the
or
direction, until the display shows
P80
.
3
Press the
Start/+30SEC./Confirm
button to confirm the selected microwave power
and turn the knob in the
or
direction to set the cooking time. The cooking time
ranges from 0:05 (5 seconds) to 95:00 (95 minutes) and it can be increased by turning the
knob in the
direction or decreased by turning it in the
direction. You can start
decreasing the value from 95:00. The maximum cooking time is 95 minutes.
4
Press the
Start/+30SEC./Confirm
button to start cooking.
EXAMPLE
In order to set the cooking time for 20 minutes at 80% microwave power, complete the
following steps:
1
Press the
Micro./Grill/Combi.
button. The display will show
P100
and the symbols
,
.
2
To select the required microwave power
P80
, press the
Micro./Grill/Combi.
button
again or keep turning the knob in the
or
direction until the display will show
P80
.
3
Press the
Start/+30SEC./Confirm
button to confirm the selected microwave power,
the display will show
P80
.
4
Turn the knob in the
or
direction to set the cooking time for 20:00
(20 minutes). The set time will appear on the display.
5
Press the
Start/+30SEC./Confirm
button to start cooking.
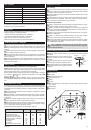
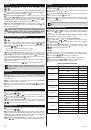
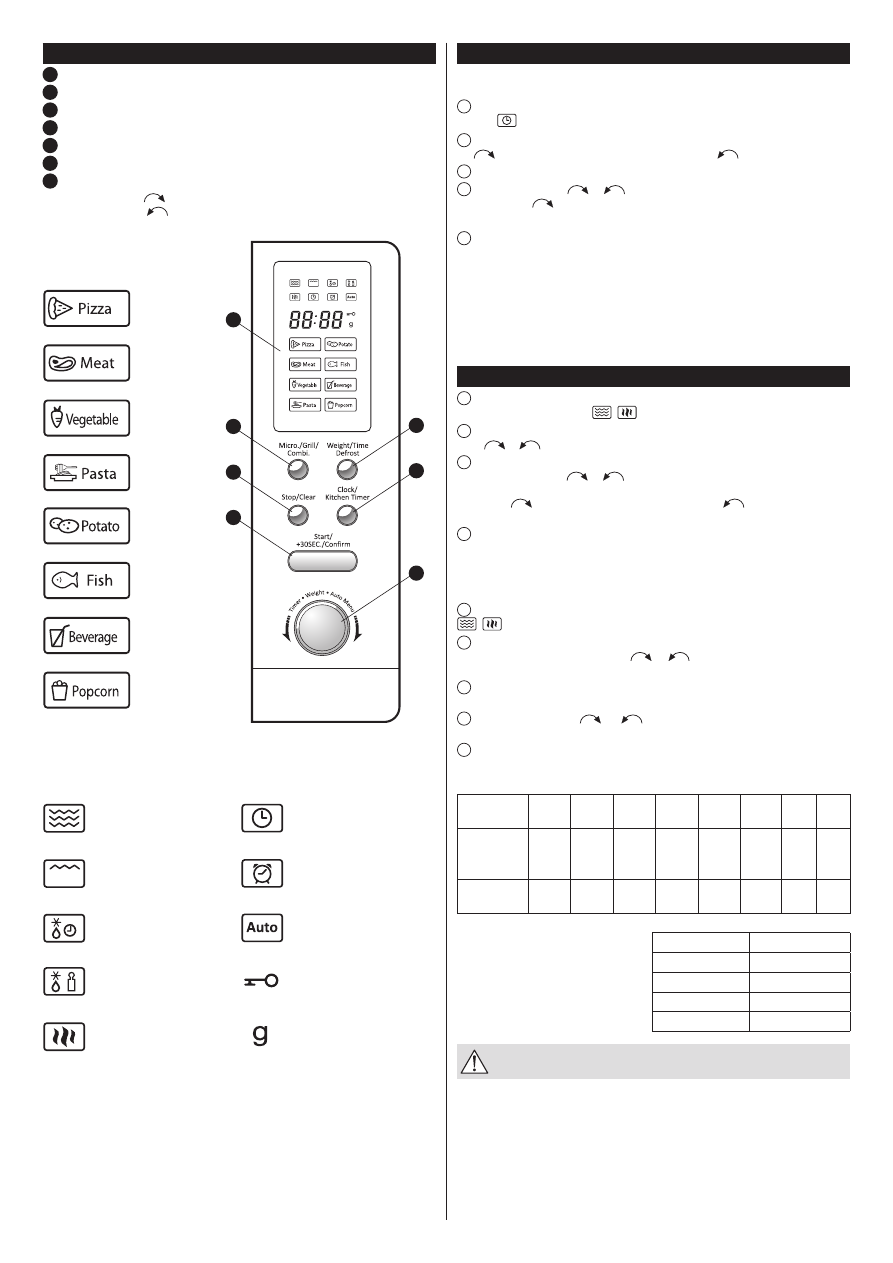
MICROWAVE POWER TABLE
Display
P100
P80
P50
P30
P10
G
C-1
C-2
Microwave
power
100%
Very
high
80%
High
50%
Medium
30%
Low
10%
Very low
0%
55% 36%
Grill power
-
-
-
-
-
100% 45% 64%
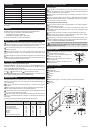
Note:
The table on the right shows how time
settings can be changed for different time
values.
0 – 1 minute
every 5 seconds
1 – 5 minutes
every 10 seconds
5 – 10 minutes
every 30 seconds
10 – 30 minutes
every 1 minute
30 – 95 minutes
every 5 minutes
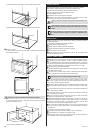
Do not use the grill rack �or microwave cooking� Always take out the grill
rack �rom the inside o� the oven be�ore microwave cooking.
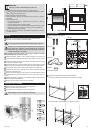
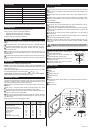
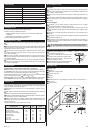
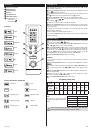
Control panel
1
Display: clock + indicators
2
Micro./Grill/Combi.
3
Weight/Time Defrost
4
Stop/Clear
5
Clock/Kitchen Timer
6
Start/+30SEC./Confirm
7
Value adjustment knob:
Value increase
–
Value decrease
–
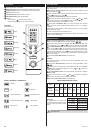
AUTO MENU
(Pizza)
(Meat)
(Vegetables)
(Pasta)
(Potatoes)
(Fish)
(Drinks)
(Popcorn)
Microwaves
Grill
Defrosting by time
Defrosting by weight
Microwave power
Clock
Kitchen timer
Automatic cooking
Child lock
Weight in grams
DISPLAY: INDICATORS – SIGNALLING
1
2
4
6
3
5
7