Инструкция для ARISTON CM5 GS16

(скачивание инструкции бесплатно)
Формат файла: PDF
Доступность: Бесплатно как и все руководства на сайте. Без регистрации и SMS.
Дополнительно: Чтение инструкции онлайн
background image

20

GB

*

 Only available in certain models.

A

S

!

 If the flame is accidentally extinguished, switch off

the burner and wait for at least 1 minute before
attempting to relight the oven.

Adjusting the temperature

To set the desired cooking temperature, turn the
OVEN control knob in an anticlockwise direction.
Temperatures are displayed on the control panel and
may vary between MIN (140°C) and MAX (250°C).
Once the set temperature has been reached, the
oven will keep it constant by using its thermostat.

Grill

To light the grill, bring a flame or gas lighter close to
the burner and press the OVEN control knob while
turning it in a clockwise direction until it reaches the

d

 position. The grill enables the surface of food to

be browned evenly and is particularly suitable for
roast dishes, schnitzel and sausages. Place the
rack in position 4 or 5 and the dripping pan in
position 1 to collect fat and prevent the formation of
smoke.

!

 The grill is fitted with a safety device and it is

therefore necessary to hold the OVEN control knob
down for approximately 6 seconds.

!

 If the flame is accidentally extinguished, switch off

the burner and wait for at least 1 minute before
attempting to relight the grill.
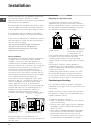
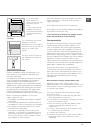
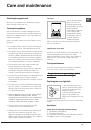
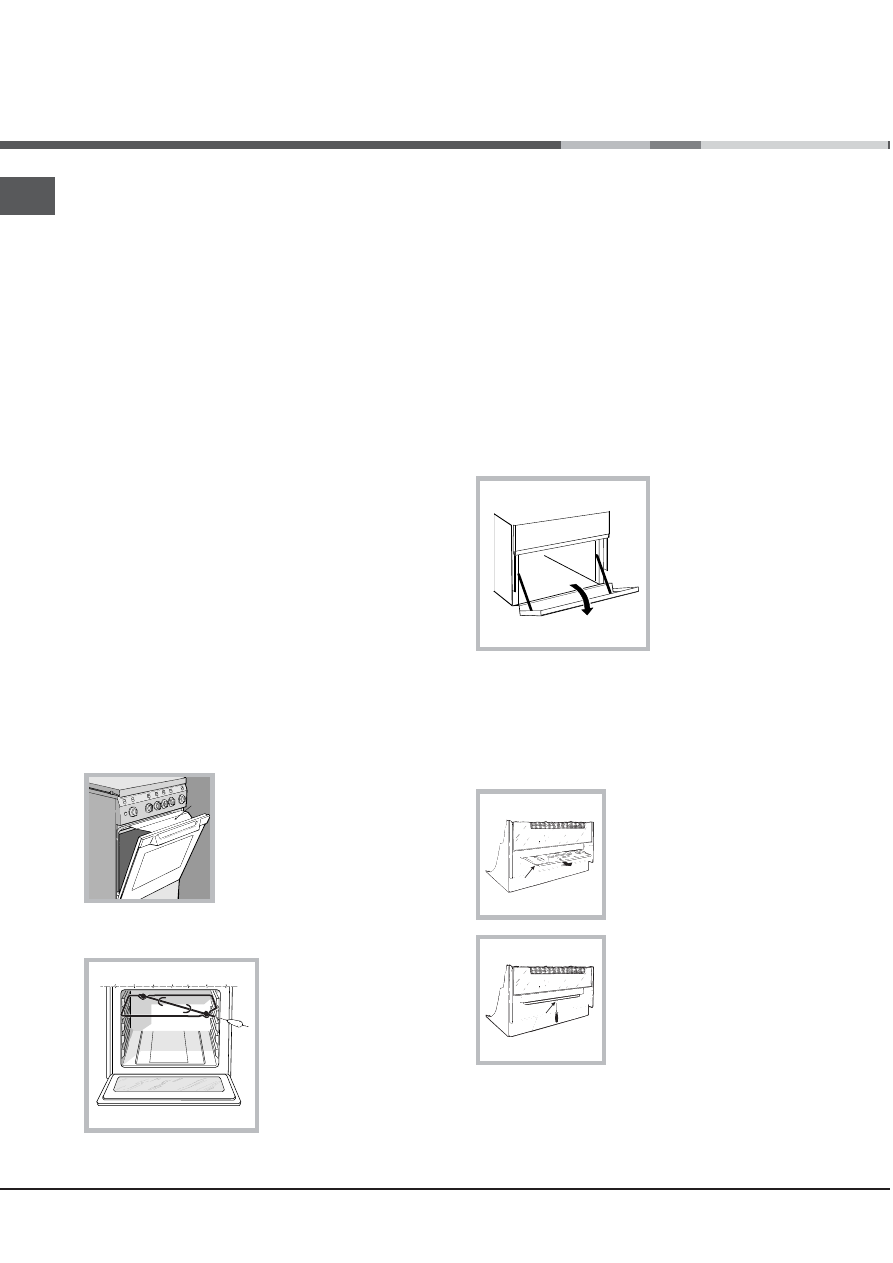
!

 When using the grill, leave

the oven door ajar, positioning
the deflector D between the
door and the control panel
(

see figure) in order to prevent

the knobs from overheating.
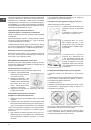
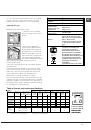
Turnspit

To operate the
rotisserie (

see diagram)

proceed as follows:
1. Place the dripping
pan in position 1.
2. Place the rotisserie
support in position 4
and insert the spit in the
hole provided on the
back panel of the oven.

3. Acitvate the function by pressing the TURNSPIT
button.

Oven light

The light may be switched on at any moment by
pressing the OVEN LIGHT button.

Timer*

To activate the Timer proceed as follows:
1. Turn the TIMER knob in a clockwise direction 

4

for almost one complete revolution to set the buzzer.
2. Turn the TIMER knob in an anticlockwise direction

5

 to set the desired length of time.
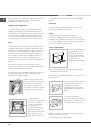
Lower compartment*

There is a compartment
underneath the oven
that may be used to
store oven accessories
or deep dishes. To open
the door pull it
downwards (

see figure).

!

 The internal surfaces of the compartment (where

present) may become hot.

!

 Do not place flammable materials in the lower oven

compartment.

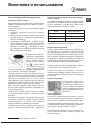
In gas cooker models, there is
a sliding protection layer A
that shields the lower
compartment from the heat
generated by the burner (

see

figure).

To remove the sliding
protection remove the screw S
(

see figure). To replace it, lock

it in place with the screw S.

!

 Before using the oven make sure that the sliding

protection is fixed correctly.

D

1
2
3
4
5
6
7
8
9
10
11
12
13
14
15
16
17
18
19
20
21
22
23
24
Оглавление инструкции
  • Страница 1 из 25
    Руководство по эксплуатации КОМБИНИРОВАННАЯ (ГАЗОВАЯ) ПЛИТА Содержание RS РУССКИЙ, 1 GB English, 13 Установка, 2-5 Размещение и выравнивание Подключение к электросети Подключение к газу Настройка на различные типы газа Технические характеристики Характеристики горелок и жиклеров Описание
  • Страница 2 из 25
    Установка RS ! Перед установкой и подключением вашего нового оборудования внимательно прочитайте данное руководство: в нем содержатся важные сведения по установке, безопасной эксплуатации и обслуживанию оборудования. ! Сохраните руководство как источник справочной информации по оборудованию и для
  • Страница 3 из 25
    дует увеличить до 700 мм, если навесные шкафы сделаны из горючих материалов (см. рис.). • Шторы / жалюзи не должны находиться позади плиты или на расстоянии менее 200 мм от ее боковых сторон. • Вытяжки устанавливаются согласно их инструкциям по установке. Выравнивание Плита снабжена регулируемыми
  • Страница 4 из 25
    RS ! Если хотя бы одно из приведенных выше требований не удается выполнить, или, если плита должна устанавливаться по правилам, относящимся к бытовым приборам класса 2 подкласса 1 (установка между двумя шкафами), то согласно действующим стандартам для подключения газа должны использоваться только
  • Страница 5 из 25
    Настройка гриля Замена жиклера горелки гриля: 1) отверните винт «V» и снимите горелку (см. рис.); RS Комбинированная плита Изделие: Торговая марка: Торговый знак изготовителя: Габаритные размеры духового шкафа / Объем: 2) специальным торцевым ключом для жиклеров или 7 мм торцевым ключом (см. рис.)
  • Страница 6 из 25
    Описаниеизделия Внешний вид RS Рабочая поверхность плиты Газовые конфорки Поддерживающая решетка для посуды Панель управления Позиции (уровни духовки) Направляющие для решетки / противня (поддона) 5 4 3 2 1 Решетка духовки Противень (поддон) Регулируемые ножки Регулируемые ножки Панель управления
  • Страница 7 из 25
    Включение и использование Использование рабочей поверхности Практические рекомендации по использованию газовых горелок Зажигание газовых горелок Для наиболее эффективной работы газовых горелок и экономного потребления газа используйте только посуду с крышками и плоским дном. Также посуда должна
  • Страница 8 из 25
    RS Регулировка температуры Освещение духовки Чтобы установить желаемую температуру, вращайте рукоятку управления духовкой против часовой стрелки. Значения температуры показаны на панели управления и могут варьироваться в диапазоне от 140 °С (MIN) до 250 °С (MAX). При достижении заданной температуры
  • Страница 9 из 25
    Аналоговыи таимер* Часы с таймером в стиле Кантри Порядок выставления текущего времени Духовой шкаф должен быть подключен к сети электропитания. Потяните за рукоятку и поверните ее по часовой стрелке до установления правильного времени. ! Программер электрически запитан, тем не менее в случае
  • Страница 10 из 25
    Предупреждения и рекомендации RS ! Оборудование разработано и изготовлено в соответствии с международными нормами безопасности. Внимательно прочитайте настоящие предупреждения, приводимые в целях вашей безопасности. Основные правила безопасности • Данные указания касаются только стран, указанных в
  • Страница 11 из 25
    Обслуживание и уход Отключение оборудования Уход за крышкой плиты Если плита оснащена стеклянной крышкой*, очищайте ее с помощью теплой воды, не используйте абразивные средства. Чтобы очистить площадь за рабочей поверхностью плиты, снимите крышку — откройте ее полностью и потяните вверх (см. рис.).
  • Страница 12 из 25
    Информация для потребителя Изделие: Комбинированная (газовая) плита Торговая марка: Торговый знак изготовителя: Модели: C 34SG17RU/HA C 34SG37RU/HA CM5 GS11 RFH CM5 GS16 RFH Изготовитель: Indesit Company Страна-изготовитель: Польша Номинальное значение напряжения электропитания или диапазон
  • Страница 13 из 25
    Operating Instructions COOKER GB RS РУССКИЙ, 1 English, 13 Contents Installation, 14-17 Positioning and levelling Electrical connections Gas connection Adapting to different types of gas Technical data Table of burner and nozzle specifications Description of the appliance, 18 Overall view Control
  • Страница 14 из 25
    Installation GB ! Before operating your new appliance please read this instruction booklet carefully. It contains important information concerning the safe installation and operation of the appliance. ! Please keep these operating instructions for future reference. Make sure that the instructions
  • Страница 15 из 25
    420 mm. 420 mm. Min. 600 mm. Min. Min. min. 650 mm. with hood min. 700 mm. without hood HOOD • Do not position blinds behind the cooker or less than 200 mm away from its sides. • Any hoods must be installed according to the instructions listed in the relevant operating manual. Levelling If it is
  • Страница 16 из 25
    GB ! If one or more of these conditions is not fulfilled or if the cooker must be installed according to the conditions listed for class 2 - subclass 1 appliances (installed between two cupboards), the flexible steel hose must be used instead (see below). 3. While the burner is alight, quickly
  • Страница 17 из 25
    5. Turn the knob from the MAX position to the MIN position quickly or open and shut the oven door, making sure that the burner is not extinguished. TECHNICAL DATA Oven dimensions (HxWxD) Volume Useful measurements relating to the oven compartment Power supply voltage and frequency Adapting the
  • Страница 18 из 25
    Description of the appliance GB Overall view Gas burner Hob grid Containment surface for spills GUIDE RAILS for the sliding racks position 5 position 4 position 3 position 2 position 1 Control panel GRILL DRIPPING PAN Adjustable foot Adjustable foot Control panel OVEN control knob Hob BURNER
  • Страница 19 из 25
    Start-up and use Using the hob Practical advice on using the burners Lighting the burners For the burners to work in the most efficient way possible and to save on the amount of gas consumed, it is recommended that only pans that have a lid and a flat base are used. They should also be suited to
  • Страница 20 из 25
    GB ! If the flame is accidentally extinguished, switch off the burner and wait for at least 1 minute before attempting to relight the oven. 3. Acitvate the function by pressing the TURNSPIT button. Oven light Adjusting the temperature To set the desired cooking temperature, turn the OVEN control
  • Страница 21 из 25
    Analogue timer* Clock with Country Style timer How to reset the correct time The oven must be plugged in. Pull the knob and turn it clockwise until you set the correct time. ! The programmer is electrically powered, therefore in the event of a power shortage, it will stop working for the entire
  • Страница 22 из 25
    Precautions and tips GB ! This appliance has been designed and manufactured in compliance with international safety standards. The following warnings are provided for safety reasons and must be read carefully. • If the appliance breaks down, under no circumstances should you attempt to repair the
  • Страница 23 из 25
    Care and maintenance Switching the appliance off The cover If the cooker is fitted with a glass cover, this cover should be cleaned using lukewarm water. Do not use abrasive products. It is possible to remove the cover in order to make cleaning the area behind the hob easier. Open the cover fully
  • Страница 24 из 25
    01/2012 - 195086501.03 XEROX FABRIANO GB 24
  • Страница 25 из 25