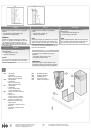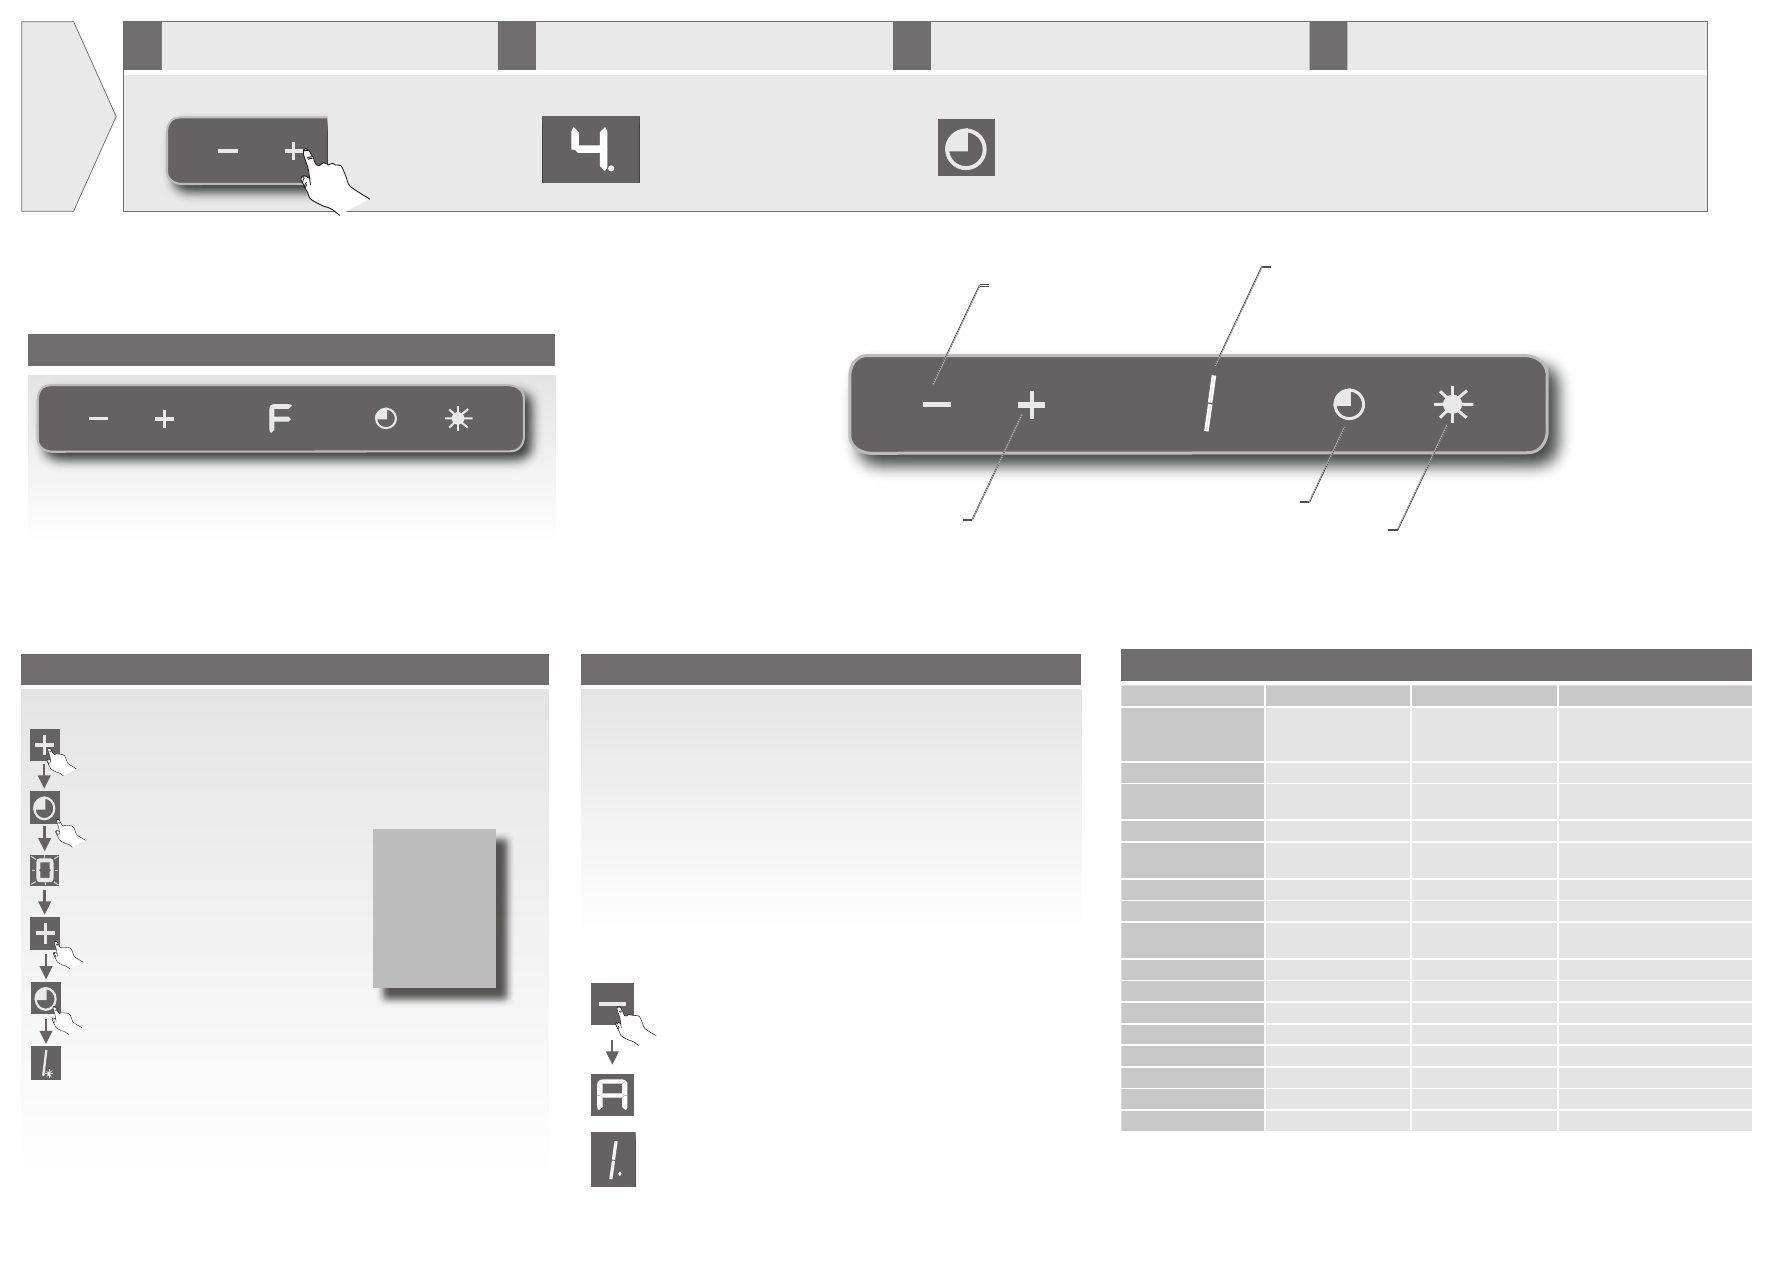
Grease filter cleaning indicator
Activate the autofunction*
(only certain models)
Increase speed
Timer
Light
Reduce speed
Display
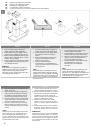
Using
the
cooker
hood
step by step
1
Start the extractor fan a few minutes before
you start cooking.
2
Use turbo as necessary.
3
Use the timer as necessary.
4
When you have finished cooking
• Press the plus button to start the extractor fan and select a
suitable power level. (1-4, where 4 is turbo).
• Press the plus button to select turbo (power level 4). The
extractor fan returns to level 3 after 10 minutes.
• If you want the extractor fan to stop after a certain time, use the
timer the set the desired interval. See the other side for instructions.
• To completely remove all steam and odours, the extractor fan
should be left running for at least ten minutes after you have
finished cooking.
• The timer function can be used to automatically turn off the
extractor fan after a set time.
Use the timer
Models
CW4624/CW4924
CW4944
CW4664/CW4964/CI4964
Type
Wall-mounted, 60/90 cm
Wall-mounted
Wall-mounted: 60/90 cm
Island: 90 cm (control panel on
both sides)
Colour
StainlessSteel/Black
StainlessSteel
StainlessSteel
Ljudnivå, DB(A), min/
max
45,7/59.8
41,7/58.9
41,3/57,4
Motor/m
3/h
Standard/850
Brushless/850
Standard/850
Light
2x3W LED (adjustable)
2x3W LED (adjustable)
LED II (fixed) 2x3W/4x3W
(Island)
Power settings
4
4
4
Turbo power setting
Yes
Yes
Yes
Timer for delayed auto
off
10-90
10-90
10-90
Filter cleaning indicator
Yes
Yes
Yes
Active Odour Control
No
Yes
No
Filter
5-layer aluminium
5-layer aluminium
5-layer aluminium
External fan motor
Yes
Yes
Yes
Electrical connection, V
230
230
230
Frequency, Hz
50
50
50
Fuse, A
10
10
10
Charcoal filter
Yes
Yes
Yes
Technical specifications
When the auto function is activated the fan starts and stops automati-
cally during cooking. This function removes food odours and adjusts the
power setting as necessary.
When you activate the auto function for the first time there shouldn’t
be any food odours, steam, strong smells or scents near the fan. The
reason for this is that when the auto function is first activated the fan
registers its surroundings in order to be able to properly detect odours
and smells in the future.
If you want to recalibrate the fan you must first reset the auto function.
This is done by cutting the power to the fan for 30 seconds (pull out
the plug and then reconnect it to the power socket).
Activate the auto function as follows:
1. Press and hold the minus button for 2 seconds.
2. An ”A” appears on the display. The auto function is now activated.
3. As of now a dot after the power setting indicates that the auto fun-
ction is activated.
4. If you find that the fan doesn’t adjust to food odours quite correctly
you can use the plus and minus buttons to fine-tune the function
when the fan is running.
5. Turn off the auto function by pressing and holding the minus button
for 2 seconds. The dot will disappear from the display.
Display Time (min)
1
= 10
2
= 20
3
= 30
4
= 40
5
= 50
6
= 60
7
= 70
8
= 80
9
= 90
The timer is used to turn off the extractor fan af-
ter a certain time, which you set. Do as follows:
1. Start the extractor fan and select the power
level.
2. Press the timer button.
3. Zero flashes on the display.
4. Press the plus button to set the time (see the
table on the right).
5. Press the timer button. The display stops flas-
hing and now shows the selected power level.
6. A dot flashes to indicate that the timer is
activated.
7. If you want to cancel the timer, press the timer
button once.”
2 S
ec
*
Active Odour Control
TM
After 240 hours of operation the letter ”F” will appear on the display. This means it is time to clean
the grease filter.