english
– 2 –
english
english
– 3 –
english
english
– 4 –
english
english
– 1 –
english
english
– 6 –
english
english
– 7 –
english
english
– 5 –
english
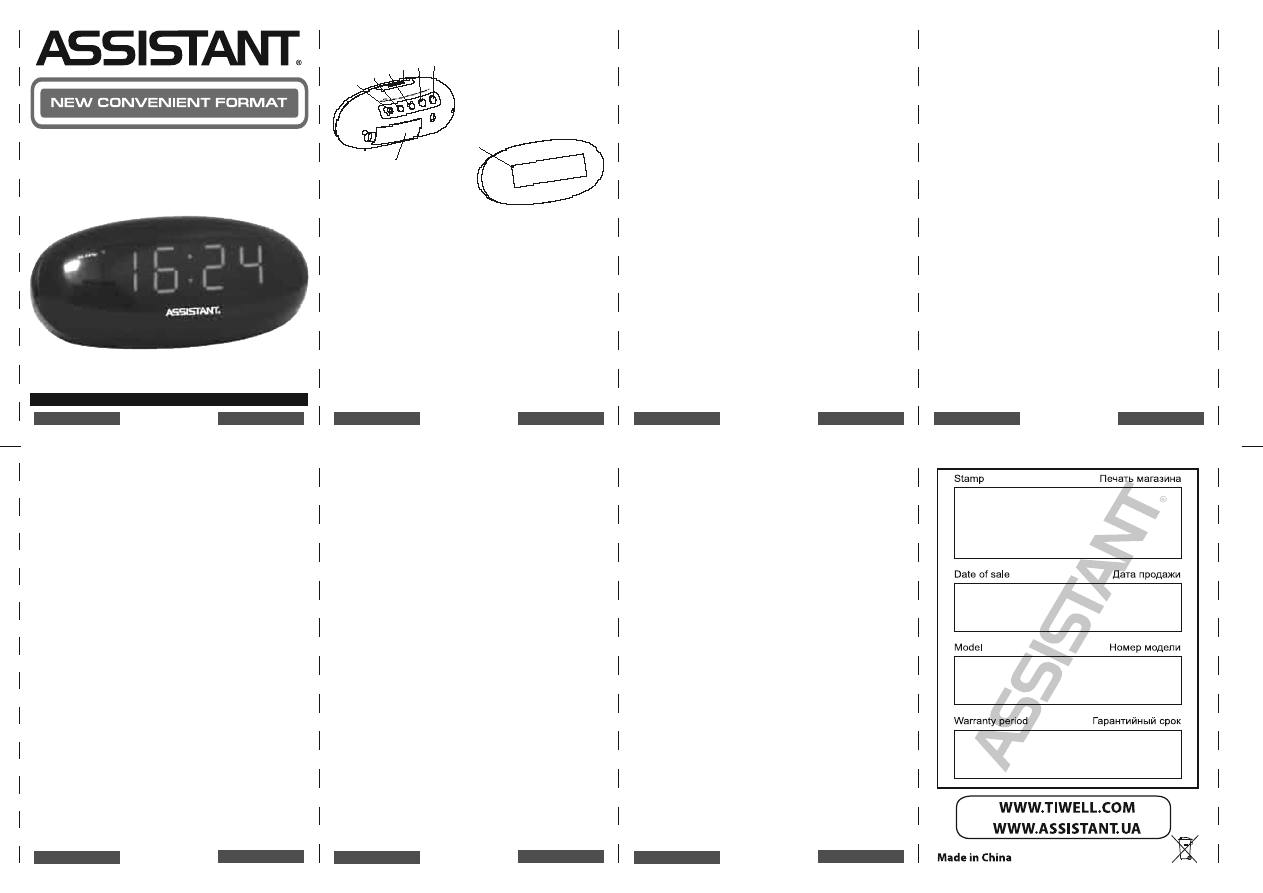
LED CLOCK
Model АН-1024
OPERATION MANUAL
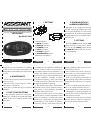
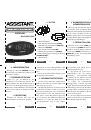
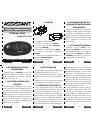
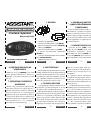
1. BUTTONS
7
6 5
3 2
8
4
1
1. Alarm indicator
2.
[HOUR]
set button
3.
[MINUTE]
set button
4.
[SNOOZE]
button
5.
[TIME]
set button
6.
[ALARM]
set button
7.
[ALARM ON/OFF]
switch
8. Battery Compartment
2. BLINKING DISPLAY/
ALARM ON INDICATOR
When the clock is plugged in, the display
will blink on and off meaning the incorrect
time is being displayed. You should always
check the time when this is indicated. When
the Alarm Indicator is on, the alarm will sound
at the time set.
3. SET TIME
Press the
[TIME]
button and the
[HOUR]
button until the correct hour is displayed,
then release the
[HOUR]
button and press
the
[MINUTE]
button until the correct min-
utes are displayed.
4. SET ALARM
Press and hold the
[ALARM]
button and
the
[HOUR]
button or
[MINUTE]
button as
above.
5. TO OPERATE ALARM
Slide the
[ALARM ON/OFF]
switch to “ON”
position. The alarm will sound at the time set.
To shut off the alarm, slide the
[ALARM ON/
OFF]
switch to “OFF” position.
6. SNOOZE
Press
[SNOOZE]
button to activate snooze
and get extra 8-9 minutes of sleep.
7. BATTERY BACK UP
Insert one 9V battery into the battery com-
partment on the back-side of the clock. The
battery will hold the alarm and time settings
until power is restored. If there is no battery
and the power is interrupted, the display will
flash and the alarm and the time will need to
be reset.
8. MAINTENANCE
A soft cloth or a paper towel can be used to
clean your clock.
Do not use any corrosive cleanser or chem-
ical solutions on the clock.
Keep the clock clean and dry to avoid any
problems.
9. SAFETY INSTRUCTIONS
1. The apparatus shall not be exposed to
dripping or splashing. No objects filled with
liquids, such as vases, shall be placed on the
apparatus.
2. Ventilation - The appliance should be sit-
uated so that its location or position does
not interfere with its proper ventilation. For
example, the appliance should not be placed
on a bed, sofa, rug, or similar surface that may
block the ventilation openings; or, placed
in a built-in installation, such as a bookcase
or cabinet that may impede the flow of air
through the ventilation openings.
3. The appliance should be situated away
from heat sources such as radiators, heat reg-
isters, stoves, or other appliance (including
amplifiers) that produce heat.
4. Power-Cord Protection - Power supply
cords should be routed so that they are not
likely to be walked on or pinched by items
placed upon or against them, paying partic-
ular attention to cords at plugs, convenience
receptacles, and the point where they exit
from the appliance. Disconnect from mains
supply when not in use.
5. To avoid the risk of electric shock, do not
remove the cover of the apparatus. There are
no user serviceable parts inside.
6. Do not operate this product if the mains
lead is damaged. The mains lead must be re-
placed by the manufacturer or its appointed
agent.
7. Please read the instruction manual be-
fore use and retain for future reference.
8. The rating label is on the unit’s bottom.
9. During electro static discharge, the prod-
uct may auto reset then adjust the mode to
return normal operation.
10. Where the mains plug is used together
with the disconnect device, such disconnect
device shall remain readily operable.