12
XENYX QX1202USB/QX1002USB User Manual
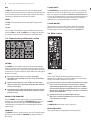
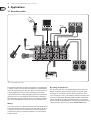
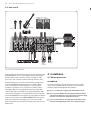
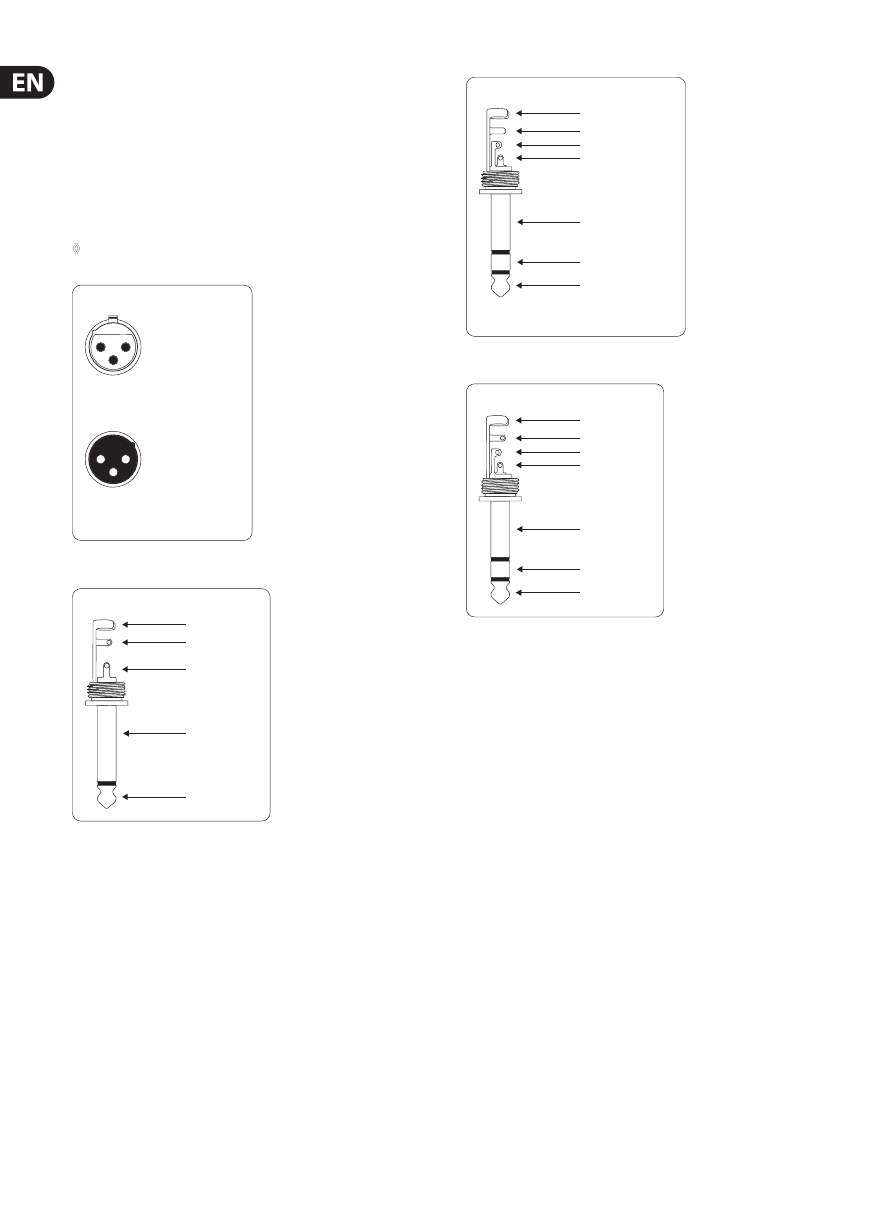
4.2 Audio connections
You will need a large number of cables for different applications. The illustrations
below show how the connectors should be wired. Be sure to use only
high-grade cables.
Please use commercial RCA cables to connect the 2-Track inputs and outputs.
You can, of course, also connect unbalanced equipment to the balanced inputs/
outputs. To do this, use either mono plugs or stereo plugs with the ring and
sleeve bridged (pins 1 and 3 in the case of XLR connectors).
◊
Caution! Never use unbalanced XLR connectors (PIN 1 and 3 connected)
on the MIC input connectors when using the phantom power supply.
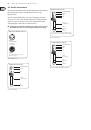
output
For unbalanced use, pin 1 and pin 3
have to be bridged
1 = ground/shield
2 = hot (+ve)
3 = cold (-ve)
input
1
2
3
1
2
3
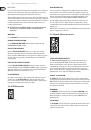
Balanced use with XLR connectors
Fig. 4.1: XLR connections
Fig. 4.2: ¼" mono plug
strain relief clamp
sleeve
tip
sleeve
(ground/shield)
Unbalanced ¼" TS connector
tip
(signal)
strain relief clamp
sleeve
ring
tip
sleeve
ground/shield
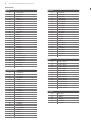
For connection of balanced and unbalanced plugs,
ring and sleeve have to be bridged at the stereo plug.
Balanced ¼" TRS connector
ring
cold (-ve)
tip
hot (+ve)
Fig. 4.3: ¼" stereo plug
strain relief clamp
sleeve
ring
tip
sleeve
ground/shield
¼" TRS headphones connector
ring
right signal
tip
left signal
Fig. 4.4: Stereo plug for headphones connection