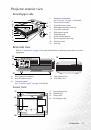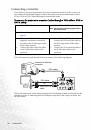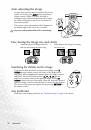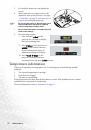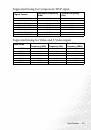
Introduction
13
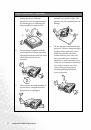
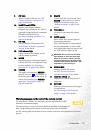
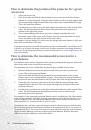
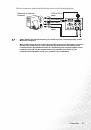
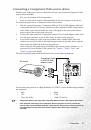
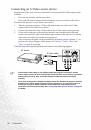
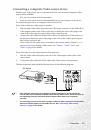
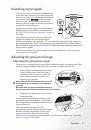
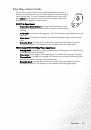
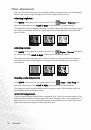
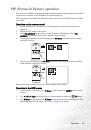
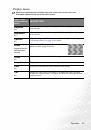
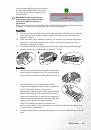
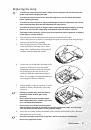
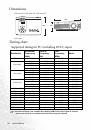
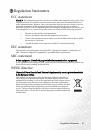
Controls and functions
Projector
1.
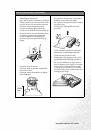
Focus ring
Adjusts the focus of the projected image. See
"Fine-tuning the image size and clarity" on page
32
for details.
2.
Zoom ring
Adjusts the size of the image. See
the image size and clarity" on page 32
for details.
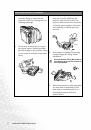
3.
Temperature warning light
Lights up or flashes if the projector's
temperature becomes too high. See
for details.
4.
Power indicator light
Lights up when the projector is in standby mode
or under operation. See
for details.
5.
Exit
Exits and saves the menu settings.
6.
Left/
Right
Correct keystoning at the top or bottom of the
projected image.
When the on-screen menu is activated, moves
the selection focus left or right, or make
adjustments.
See
"Correcting keystone" on page 34
and
for details.
7.
Power
Turns the projector on or off. See
down the projector" on page 40
for
details.
8.
Source
Sequentially selects the input signal
Analog RGB, DVI-A, DVI-D,
Analog YPbPr, S-Video, or
Composite Video. See
for details.
9.
Menu
Turns on the on-screen display
control menu.
When the on-screen menu is
activated, moves the selection focus
down.
See
for details.
10.
Lamp indicator light
Indicates the status of the lamp.
Lights up or flashes when the lamp
has developed a problem. See
for details.
11.
Blank
Used to hide the screen image. You
can press Blank on the projector or
remote control to bring the image
back. See
for details.
12.
Auto
Automatically determines the best
picture timings for the displayed
image. See
for details.
7
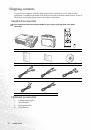
8
6
4
11
10
3
5
12
9
2
1
6
I