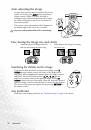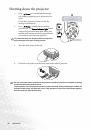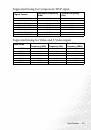
Connection
22
Connection
When connecting a signal source to the projector, be sure to:
1.
Turn all equipment off before making any connections.
2.
Use the correct signal cables for each source.
3.
Ensure the cables are firmly inserted.
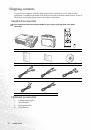
In the connections shown below, some cables may not be included with the projector (see
"Shipping contents" on page 10
). They are commercially available from electronics stores.
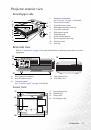
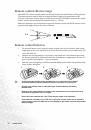
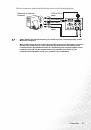
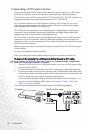
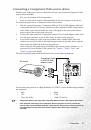
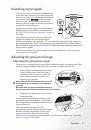
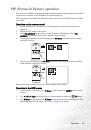
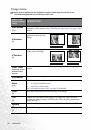
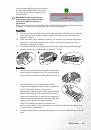
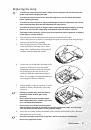
Connecting a computer or monitor
Connecting a computer
The projector provides VGA and DVI input sockets that allow you to connect it to a
notebook or desktop computer.
Additionally, you can also connect the projector to a computer via the USB cable so you can
perform paging operations of the application on the PC or notebook. (see
To connect the projector to a notebook or desktop computer (either through a
VGA cable or VGA to DVI-A cable):
•
With a VGA cable
•
With a VGA to DVI-A cable
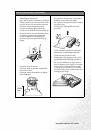
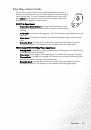
1.
Take the supplied VGA cable and
connect one end to the D-Sub
output socket of the computer.
2.
Connect the other end of the VGA
cable to the D-Sub/Comp. In signal
input socket on the projector.
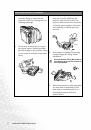
1.
Take a VGA to DVI-A cable and
connect the VGA end to the D-Sub
output socket of the computer.
2.
Connect the DVI end of the VGA to
DVI-A cable to the DVI-I signal
input socket on the projector.
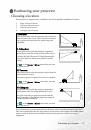
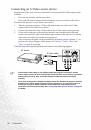
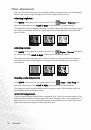
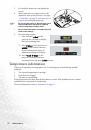
3.
If you wish to use the remote paging function (see
), take the supplied USB cable and connect the larger end to the USB port
of the computer, and the smaller end to the USB socket on the projector.
4.
If you wish to make use of the projector speakers in your presentations, take a
suitable audio cable and connect one end of the cable to the audio output socket of
the computer, and the other end to the PC Audio socket of the projector.
Once connected, the audio can be controlled by the remote control (Volume +/-)
or projector On-Screen Display (OSD) menus. See
, and
for details.