Maintenance
49
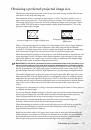
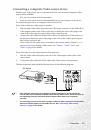
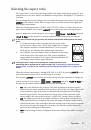
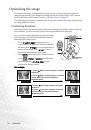
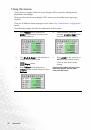
A warning message like the one pictured to
the right will be displayed for 10 seconds
every 300 hours of use to remind you to
clean the filters.
IMPORTANT: Please ensure that the
projector is properly shutdown before
removing the filters for cleaning or
replacement.
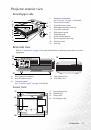
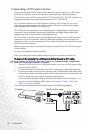
This projector has two concealed filters. One is fitted behind the front vent grill (see item 7
on page
), and the other is on the left side (see item 16 on page
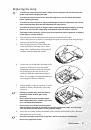
Front filter
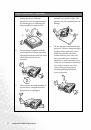
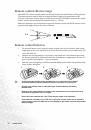
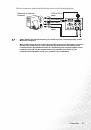
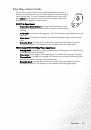
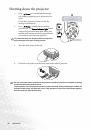
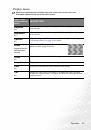
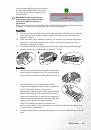
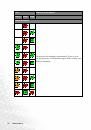
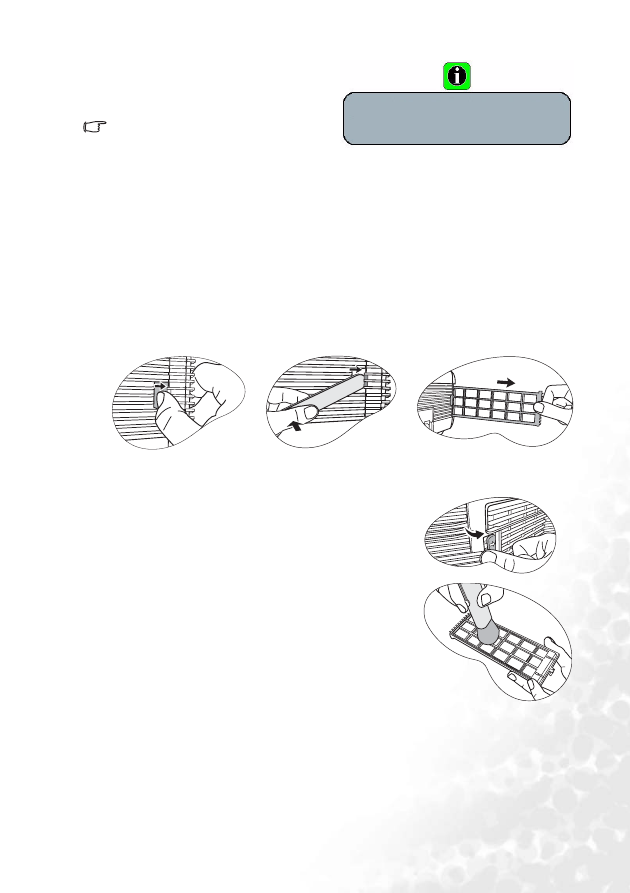
1A. Access to the front dust filter is located on the right side of the projector towards the
front edge. Use your thumb or finger to pull it out from the side as illustrated in
diagram 'A' below.
1B. If the front filter proves difficult to remove, you should use a broad flat implement
(like an ice-cream stick) to gently lever the filter away from the projector case as
illustrated in diagram 'B' below.
1C. Carefully pull the filter cartridge out from the side of the projector while keeping it
parallel with the front as illustrated in diagram 'C' below
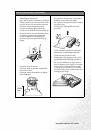
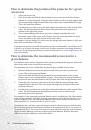
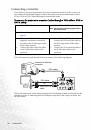
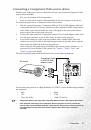
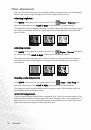
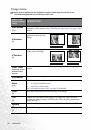
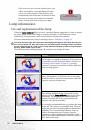
Rear filter
2.
Access to the rear dust filter is located on the left side
of the projector towards the rear. Use your thumb or
finger to pull it out from the side as illustrated below.
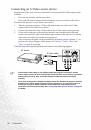
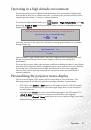
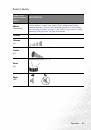
3.
To clean the filters, use a small vacuum cleaner
designed for computers and other office equipment,
or use a soft brush (such as a clean artist's
paintbrush) to gently sweep the dust away. Refit and
align the filter sponge to sit snugly within the filter
frame for the front filter, so that no obvious gaps are
visible around the edges between the edge of the filter
sponge and the plastic filter frame housing.
If the dirt is difficult to remove or the filters are
broken, replace them. Contact your dealer or visit BenQ website at www.BenQ.com
for more service information.
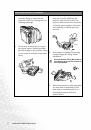
4.
Carefully refit the filters to the projector then press the covers back until they click into
place.
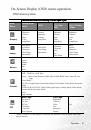
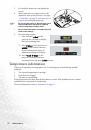
Please check if the filter is clean. Please clean the
filter by using a small vacuum or brush if the filter is
dirty.
Press Exit to confirm.
A.
B.
C.