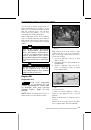
MAINTENANCE PROCEDURES
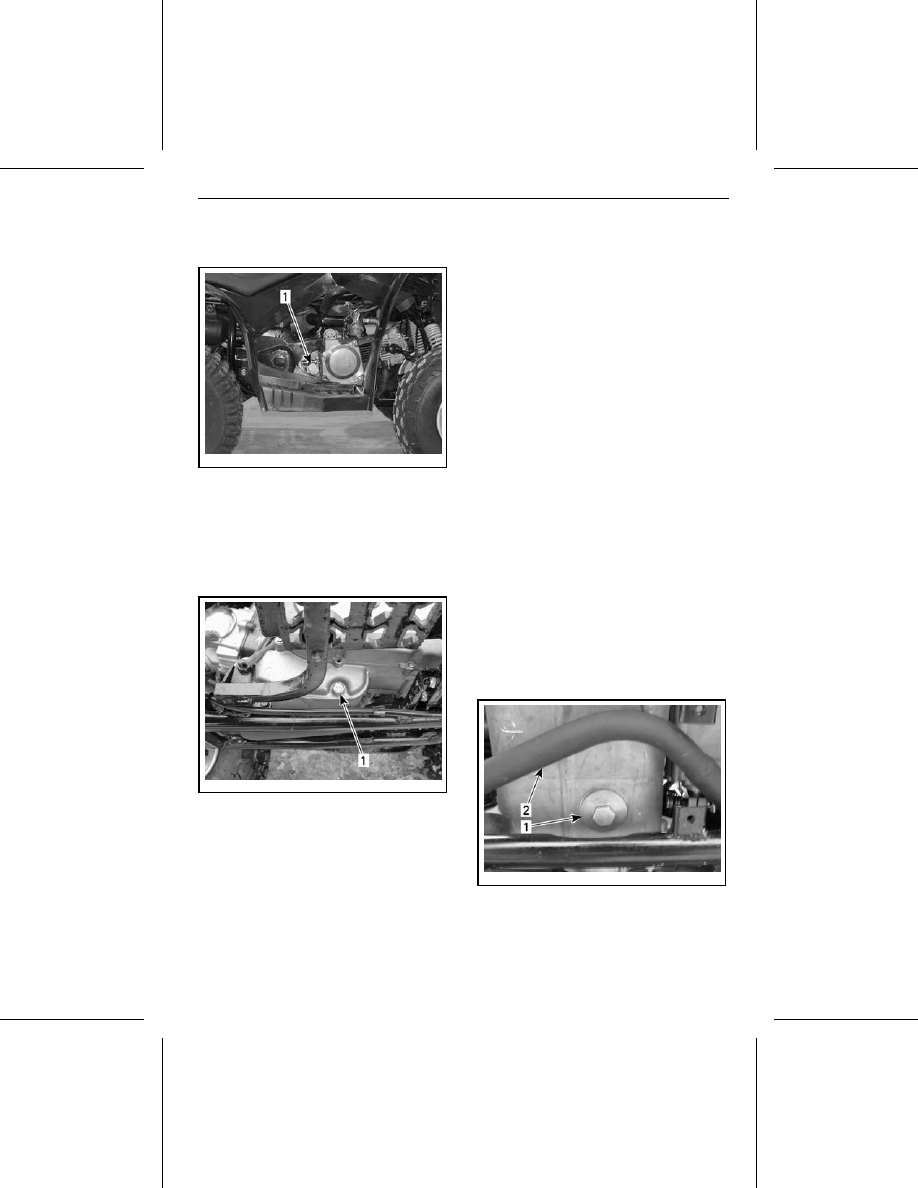
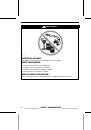
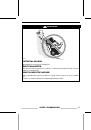
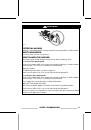
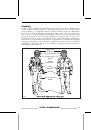
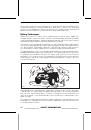
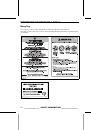
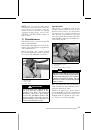
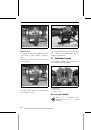
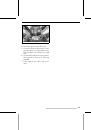
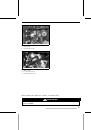
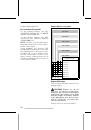
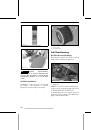
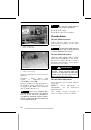
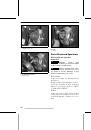
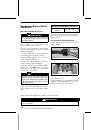
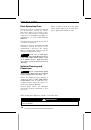
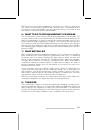
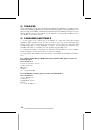
Remove dipstick.
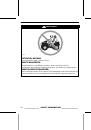
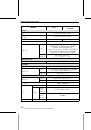
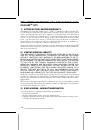
vmo2008-008-021_a
TYPICAL — RH SIDE OF ENGINE
1. Dipstick
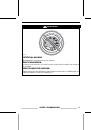
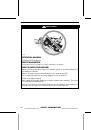
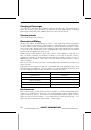
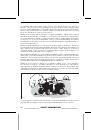
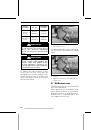
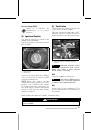
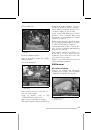
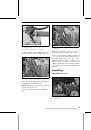
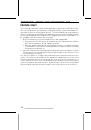
Clean the drain plug area.
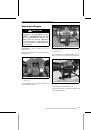
Place a drain pan under the engine
drain plug area.
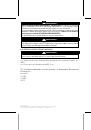
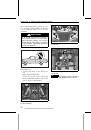
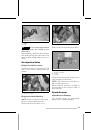
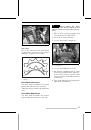
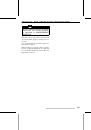
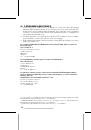
Unscrew drain plug.
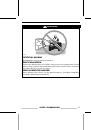
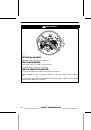
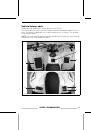
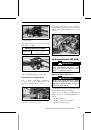
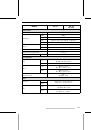
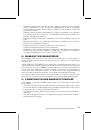
vmo2008-008-044_a
LH SIDE OF ENGINE
1. Drain plug
Allow sufficient time for all the oil to
flow out of the engine.
Clean
oil
strainer,
refer
to
OIL
STRAINER
in this subsection.
Wipe off any oil spillage on engine.
Reinstall oil strainer, spring, and O-ring.
Install and torque strainer cover to
42 N•m ± 4 N•m (31 lbf•ft ± 3 lbf•ft).
Clean drain plug washer and check it's
condition, replace it if necessary.
Clean engine and drain plug contact
surfaces,
then reinstall drain plug
and torque it to 22.0 N•m ± 2.2 N•m
(16 lbf•ft ± 2 lbf•ft).
Refill engine with the specified quan-
tity of recommended engine oil. Refer
to
SPECIFICATIONS
for capacity.
Start engine and let idle for a few min-
utes. Ensure oil strainer and drain plug
areas are not leaking.
Stop engine. Wait a few minutes to
allow the oil to flow down into the
crankcase, then recheck oil level. Ad-
just oil level if necessary.
Dispose of the used oil as per your local
environmental regulations.
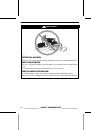
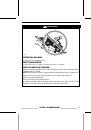
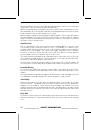
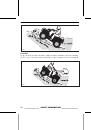
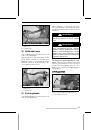
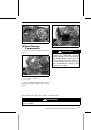
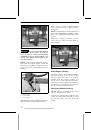
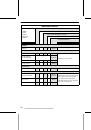
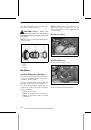
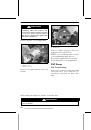
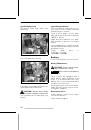
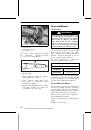
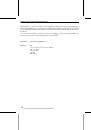
Oil Strainer
Oil Strainer Cleaning
Remove oil strainer and spring for
cleaning (if necessary), refer to
MAIN-
TENANCE SCHEDULE
for details.
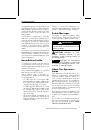
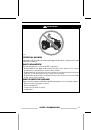
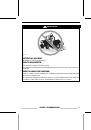
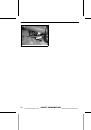
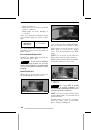
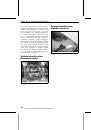
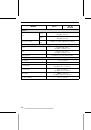
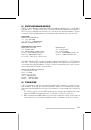
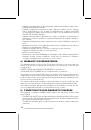
vmo2008-008-045_a
UNDERNEATH ENGINE
1. Oil strainer cover
2. Exhaust pipe
_______________
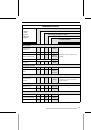
85
 1
1
 2
2
 3
3
 4
4
 5
5
 6
6
 7
7
 8
8
 9
9
 10
10
 11
11
 12
12
 13
13
 14
14
 15
15
 16
16
 17
17
 18
18
 19
19
 20
20
 21
21
 22
22
 23
23
 24
24
 25
25
 26
26
 27
27
 28
28
 29
29
 30
30
 31
31
 32
32
 33
33
 34
34
 35
35
 36
36
 37
37
 38
38
 39
39
 40
40
 41
41
 42
42
 43
43
 44
44
 45
45
 46
46
 47
47
 48
48
 49
49
 50
50
 51
51
 52
52
 53
53
 54
54
 55
55
 56
56
 57
57
 58
58
 59
59
 60
60
 61
61
 62
62
 63
63
 64
64
 65
65
 66
66
 67
67
 68
68
 69
69
 70
70
 71
71
 72
72
 73
73
 74
74
 75
75
 76
76
 77
77
 78
78
 79
79
 80
80
 81
81
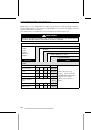 82
82
 83
83
 84
84
 85
85
 86
86
 87
87
 88
88
 89
89
 90
90
 91
91
 92
92
 93
93
 94
94
 95
95
 96
96
 97
97
 98
98
 99
99
 100
100
 101
101
 102
102
 103
103
 104
104
 105
105
 106
106
 107
107
 108
108
 109
109
 110
110
 111
111
 112
112
 113
113
 114
114
 115
115
 116
116
 117
117
 118
118
 119
119
 120
120
 121
121
 122
122
 123
123
 124
124
 125
125
 126
126
 127
127
 128
128
 129
129
 130
130
 131
131
 132
132
 133
133
 134
134
 135
135
 136
136
 137
137
 138
138
 139
139
 140
140
 141
141
 142
142
 143
143
 144
144