16
GB
!
If the oven is too hot, the pyrolytic cycle may not start.
Wait for the oven to cool down.
!
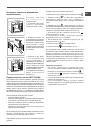
The programme may only be started once the oven door
has been closed.
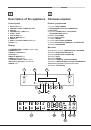
To activate the Fast Clean programme:
1. Switch the control panel on by pressing the
button.
2. Press the
, the display will show the text “Piro”, “nor”
and the default duration of 1:30 h (normal cycle) alternately.
3. Press button
, then turn the TIMER knob to adjust the
default cleaning level. There are 3 different levels to choose
from, each with a pre-set duration which cannot be modified:
1. Economy (ECO): turn the knob towards “
”. Duration
1 hour.
2. Normal (NOR): initial level. Duration 1 hour and 30
minutes.
3. Intensive (INT): turn the knob towards “ ”. Duration 2
hours.
4. Press the
button to confirm.
5. Press the
button to begin the cleaning cycle.
An end time for the FAST CLEAN cycle (as for a normal
cooking cycle) may be programmed (see Programming the
automatic cleaning end time).
!
The desired Fast Clean mode will be confirmed and started
automatically if the CLOCK icon button is not pressed within
10 seconds from selecting the cooking time.
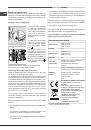
Safety devices
• the door locks automatically as soon as the temperature
reaches a high value; the
icon lights up on the display;
• pressing the
button cancels the cleaning cycle t any
time;
• if a malfunction occurs, the heating elements will be
switched off;
• once the oven door has been locked, you cannot change
the duration and end time settings.
Programming the automatic cleaning end time
1. Press the
button twice: the
icon and the
numerical digits on the display will begin to flash.
2. Turn the TIMER knob towards “
” and “ ” to adjust the
cleaning end time value.
3. Once you have reached the desired end time, press the
button again. The display will show the duration, the
cleaning end time and the set cleaning level alternately.
4. Press the
button to activate the programmed mode.
Programming has been set when the and
buttons
are illuminated.
5. Once cleaning has finished, “END” appears on the display
and a buzzer sounds.
• For example: it is 9:00 a.m. and the Economy (ECO)
FAST CLEAN level has been selected, with the default
duration of 1 hour. 12:30 is scheduled as the end time.
The programme will start automatically at 11:30 a.m.
To cancel programming press the
button.
Once the automatic cleaning cycle is over
Before you can open the oven door, you will have to wait
for the
icon to switch off: this indicates the oven
temperature has dropped to an acceptable level. You will
notice some white dust deposits on the bottom and the sides
of your oven; remove these deposits with a damp sponge
once the oven has cooled down completely. Alternatively,
you can make use of the already heated oven, in which
case it is not necessary to remove the deposits, they are
completely harmless and will not affect your food in any way.
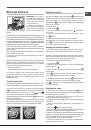
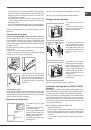
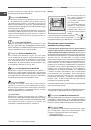
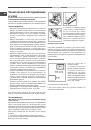
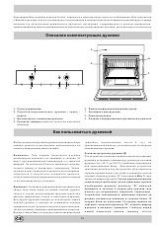
NOTICE
Do not place
or rest anything
on the open door
Make sure that the racks
and dripping pans have been
inserted fully before closing the door
Please read the manual
carefully for information
regarding the automatic
cleaning (pyrolytic) cycle
GB