EN
6
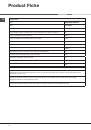
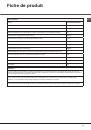
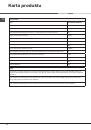
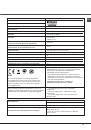
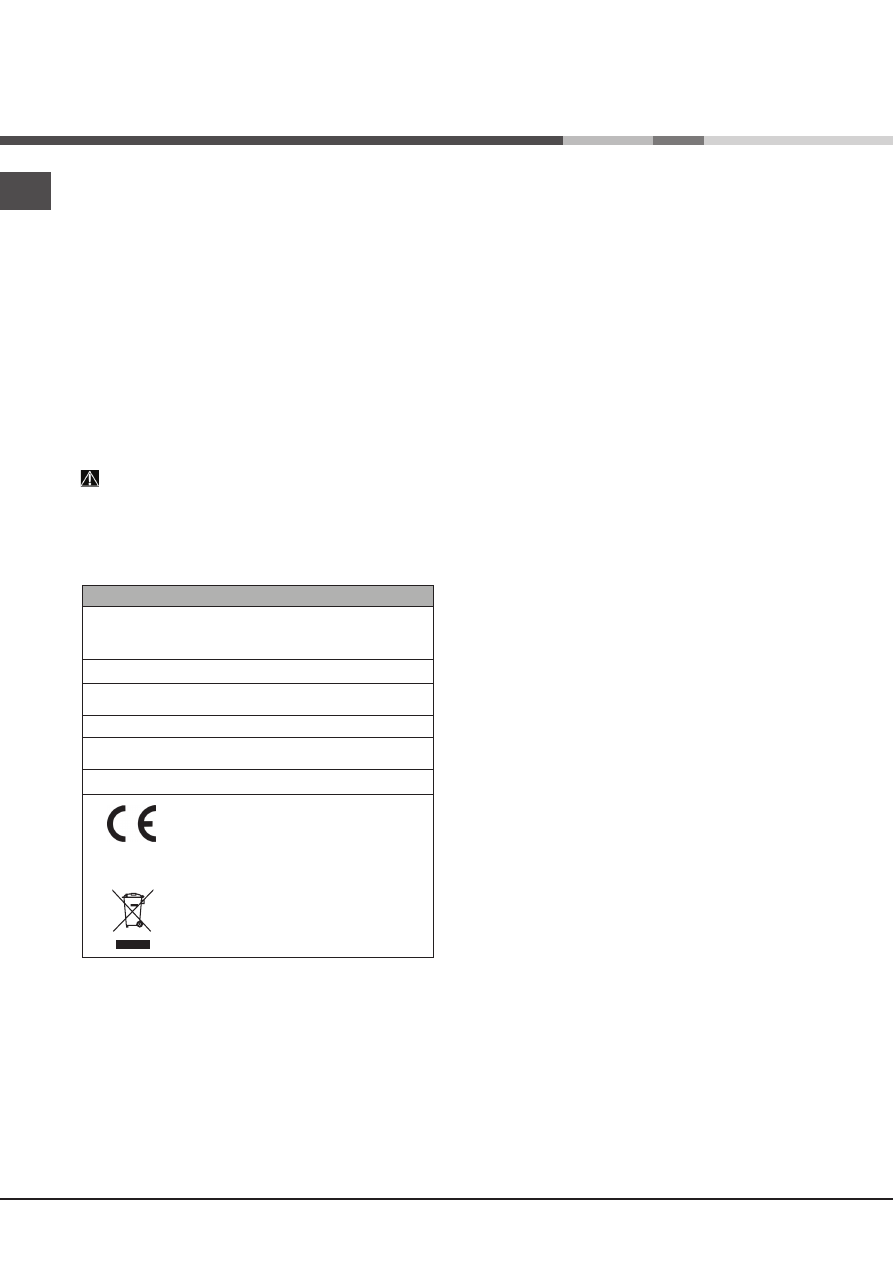
Technical data
Dimensions
width 59.5 cm
height 82 cm
depth 57 cm
Capacity
15 standard place-settings
Water supply pressure
0,05 ÷ 1MPa (0.5 ÷ 10 bar)
7,25 – 145 psi
Power supply voltage
See appliance data plate
Total absorbed power
See appliance data plate
Fuse
See appliance data plate
This dishwasher conforms
to the following European
Community Directives:
-2006/95/EC (Low Voltage)
-2004/108/EC (Electromagnetic
Compatibility)
-2009/125/EC (Comm. Reg.
1016/2010) (Ecodesign)
-97/17/EC (Labelling)
-2012/19/EC (WEEE)
*
Only available in selected models.
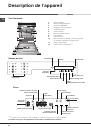
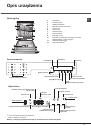
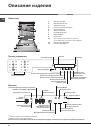
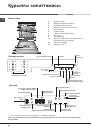
The control panel features a “Touch Control” system;
press the symbols lightly with your fingertips to activate
the command.
The symbols in the key to the wash cycles (to the left of the
control panel) DO NOT light up.
Wash cycles are selected by pressing the P symbol.
The machine has a buzzer/set of tones
(depending on the
dishwasher model
)
to inform the user that a command has
been implemented: power on, cycle end etc.
The symbols/indicator lights/LEDs on the control panel/
display may vary in colour and may have a flashing or fixed
light
(depending on the dishwasher model)
.
The display provides useful information concerning the type
of wash cycle, drying/wash-cycle phase, remaining time,
temperature etc.
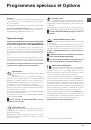
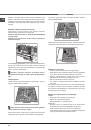
Anti-condensation strip
*
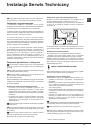
After installing the dishwasher, open the door and stick the
adhesive transparent strip under the wooden shelf in order
to protect it from any condensation which may form.
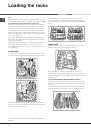
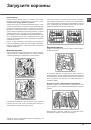
Advice regarding the first wash cycle
After the installation, remove the stoppers from the racks and
the retaining elastic elements from the upper rack, if any.
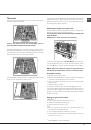
Immediately before the first washing, completely fill the salt
dispenser with water and add only then approximately 1
kg of salt (see chapter entitled Rinse aid and refined salt).
The water may overflow: this is normal and is not a cause
for concern. Select the water hardness value (see chapter
entitled Rinse aid and refined salt). - After the salt has been
poured into the machine, the LOW SALT indicator light*
switches off.
If the salt container is not filled, the water softener and
the heating element may be damaged as a result.