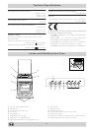
Инструкция для INDESIT K6G52S/R

(скачивание инструкции бесплатно)
Формат файла: PDF
Доступность: Бесплатно как и все руководства на сайте. Без регистрации и SMS.
Дополнительно: Чтение инструкции онлайн
background image

14

Important

This appliance is intended for nonprofessional use within the

home.

These instructions are only for those countries whose sym-

bols appear in the booklet and on the serial no. plate of the
appliance.

3 This owner’s manual is for a class 1 appliance (installed

independently) or class 2, subclass 1 appliances (in-
stalled between two cabinets).

Before using your appliance, read the instructions in this

owner’s manual carefully since it provides all the information
you need to ensure safe installation, use and maintenance.
Always keep this owner’s manual close to hand since you
may need to refer to it in the future.

When you have removed the packing, check that the appli-

ance is not damaged. If you have any doubts, do not use the
appliance and contact your nearest Ariston Service Centre.
Never leave the packing components (plastic bags, polysty-
rene foam, nails, etc.) within the reach of children since they
are a source of potential danger.

The appliance must be installed only by a qualified techni-

cian in compliance with the instructions provided. The manu-
facturer declines all liability for improper installation, which
may result in personal injury and damage to property.

The electrical safety of this appliance can only be guaran-

teed if it is correctly and efficiently earthed, in compliance
with regulations on electrical safety. Always ensure that the
earthing is efficient. If you have any doubts, contact a quali-
fied technician to check the system. The manufacturer de-
clines all liability for damage resulting from a system which
has not been earthed.

Before plugging the appliance into the mains, check that the

specifications indicated on the date plate (on the appliance
and/or packaging) correspond with those of the electrical
and gas systems in your home.

Check that the electrical capacity of the system and sockets

will support the maximum power of the appliance, as indi-
cated on the data plate. If you have any doubts, contact a
qualified technician.

10 An omnipolar switch with a contact opening of at least 3 mm

or more is required for installation.

11 If the socket and appliance plug are not compatible, have the

socket replaced with a suitable model by a qualified techni-
cian, who should also check that the cross-section of the
socket cable is sufficient for the power absorbed by the ap-
pliance. The use of adaptors, multiple sockets and/or exten-
sions, is not recommended. If their use cannot be avoided,
remember to use only single or multiple adapters and exten-
sions which comply with current safety regulations. In these
cases, never exceed the maximum current capacity indi-
cated on the individual adaptor or extension and the maxi-
mum power indicated on the multiple adapter.

12 Do not leave the appliance plugged in if it is not in use. Switch

off the main switch and gas supply when you are not using
the appliance.

13 The openings and slots used for ventilation and heat disper-

sion must never be covered.

14 The user must not replace the supply cable of this appliance.

Always contact an after-sales service centre which has been
authorised by the manufacturer if the cable has been dam-
aged or needs replacement.

15 This appliance must be used for the purpose for which it was

expressly designed. Any other use (e.g. heating rooms) is
considered to be improper and consequently dangerous. The
manufacturer declines all liability for damage resulting from
improper and irresponsible use.

16 A number of fundamental rules must be followed when us-

ing electrical appliances. The following are of particular im-
portance:

Do not touch the appliance when your hands or feet are
wet

Do not use the appliance barefooted.

Do not use extensions, but if they are necessary, caution
must be exercised.

Never pull the power supply cable or the appliance to
unplug the appliance plug from the mains.

Never leave the appliance exposed to atmospheric agents
(rain, sun etc.).

Do not allow children or persons who are not familiar with
the appliance to use it, without supervision.

17 Always unplug the appliance from the mains or switch off the

main switch before cleaning or carrying out maintenance.

18 In the case of problems and/or faulty operation, switch off the

appliance, close the gas cock and do not tamper with the
appliance. For repairs, contact only authorised after-sales
service centres and request the use of original spare parts
only. Failure to comply with the above may compromise the
safety of the appliance.

19 If you are no longer using an appliance of this type, remem-

ber to make it unserviceable by unplugging the appliance
from the mains and cutting the supply cable. Also make all
potentially dangerous parts of the appliance safe, above all
for children who could play with the appliance.

20 To avoid accidental spillage do not use cookware with un-

even or deformed bottoms on the burners. Turn the handles
of pots and pans inwards to avoid knocking them over acci-
dentally.

21 Some parts of the appliance remain heated for a long time

after use. Make sure not to touch them.

22 Never use flammable liquids such as alcohol or gasoline,

etc. near the appliance when it is in use.

23 When using small electric appliances near the hob, keep the

supply cord away from the hot parts.

24 Make sure the knobs are in the “•”/”o” position when the ap-

pliance is not in use.

25 Remember to keep children away from the appliance

when you use the grill or oven, since these parts be-
come very hot.

26 Gas appliances require regular air exchange to ensure

trouble-free performance. When installing the cooker,
follow the instructions provided in the paragraph on
“Positioning” the appliance.

27 Some of the models have a glass hob cover. This could crack

if overheated so make sure all the burners or electric hot
plates are off before closing it.

To maintain the EFFICIENCY and SAFETY of this appliance, we recommend:

call only the Service Centers authorized by the manufacturer

always use original Spare Parts

1
2
3
4
5
6
7
8
9
10
11
12
13
14
15
16
17
18
19
20
21
22
23
24
25
26
27
28
29
30
31
32
33
34
35
36
37
38
39
40
Оглавление инструкции
  • Страница 1 из 41
    Cucina Installazione e uso Cooker Installation and use Êóõoííaÿ ïëèòà Óñòàíîâêà è ïîëüçîâàíèå K6G52S/R
  • Страница 2 из 41
    Cucina con forno multifunzione 5 programmi Istruzioni per l'installazione e l'uso 3 Cooker with electric multifunction oven 5 programms Instructions for installation and use 14 Ïëèòà ñ ìíîãîôóíêöèîíàëüíîé äóõîâêîé Èíñòðóêöèè ïî óñòàíîâêå è èñïîëüçîâàíèþ 26
  • Страница 3 из 41
    Avvertenze Per garantire l’efficienza e la sicurezza di questo elettrodomestico: • rivolgetevi esclusivamente a centri di assistenza tecnica autorizzati • richiedete sempre l’utilizzo di parti di ricambio originali 1 Questo apparecchio è stato concepito per un uso di tipo non professionale
  • Страница 4 из 41
    Istruzioni per l’installazione Le istruzioni che seguono sono rivolte all’installatore qualificato affinchè compia le operazioni di installazione regolazione e manutenzione tecnica nel modo più corretto e secondo le norme in vigore. Importante: qualsiasi intervento di regolazione, manutenzione etc.
  • Страница 5 из 41
    c) Allorchè la cucina venga installata sotto un pensile, quest’ultimo dovrà mantenere una distanza minima dal piano di 700 mm (millimetri). I mobili adiacenti alla cappa dovranno mantenere una distanza minima dal piano di 420 mm. come da Fig. C e D. 420 mm. Min. min. 650 mm. with hood min. 700 mm.
  • Страница 6 из 41
    • verificare poi che ruotando rapidamente il rubinetto dalla posizione di massimo a quella di minimo, non si abbiano spegnimenti del bruciatore. d) Regolazione aria primaria dei bruciatori del piano: I bruciatori non necessitano di alcuna regolazione dell’aria primaria. Attenzione Al termine
  • Страница 7 из 41
    Caratteristiche tecniche Tensioni e frequenza di alimentazione: vedi targhetta caratteristiche Dimensioni utili del forno: larghezza cm. 43.5 profondità cm. 40 Bruciatori: adattabili a tutti i tipi di gas indicati nella terghetta caratteristiche altezza cm. 32 Volume utile del forno: litri 56
  • Страница 8 из 41
    Istruzioni per l’uso La selezione delle varie funzioni presenti nella cucina avviene agendo sui dispositivi ed organi di comando posti sul cruscotto della stessa. Attenzione: Utilizzare il primo ripiano dal basso, posizionandoci la leccarda in dotazione per raccogliere sughi e/ o grassi, solamente
  • Страница 9 из 41
    Forno Ventilato Posizione manopola termostato “M”: Tra 60°C e Max. Si attivano gli elementi riscaldanti ed entra in funzione la ventola. Poichè il calore è costante ed uniforme in tutto il forno, l’aria cuoce e rosola il cibo in modo uniforme in tutti i punti. Potete cuocere contemporaneamente
  • Страница 10 из 41
    Al fine di ottenere il massimo rendimento è utile ricordare quanto segue: • utilizzare recipienti adeguati a ciascun bruciatore (vedere tabella) alfine di evitare che le fiamme fuoriescano dal fondo dei recipienti. • utilizzare solamente recipienti a fondo piatto. • al momento dell’ebollizione
  • Страница 11 из 41
    Cottura della pizza Per una buona cottura della pizza utilizzate la funzione “ventilato”: • Preriscaldare il forno per almeno 10 minuti • Utilizzare una teglia in alluminio leggero appoggiandola sulla griglia in dotazione. Utilizzando la leccarda si allungano i tempi di cottura e difficilmente si
  • Страница 12 из 41
    Consigli pratici per la cottura Posizione manopola selezione Cibo da cucinare Peso Posizione di (Kg) cottura ripiani dal basso Tempo di preriscaldamento (minuti) Posizione manopola termostato Tempo di cottura (minuti) Scongelamento Tutti i cibi surgelati Statico Anatra Arrosto di vitello o manzo
  • Страница 13 из 41
    Manutenzione ordinaria e pulizia della cucina Prima di ogni operazione disinserire elettricamente la cucina. Per una lunga durata della cucina è indispensabile eseguire frequentemente una accurata pulizia generale, tenendo presente che: · per la pulizia non utilizzare apparecchi a vapore • le parti
  • Страница 14 из 41
    Important To maintain the EFFICIENCY and SAFETY of this appliance, we recommend: • call only the Service Centers authorized by the manufacturer • always use original Spare Parts 1 This appliance is intended for nonprofessional use within the home. 2 These instructions are only for those countries
  • Страница 15 из 41
    Installation The following instructions should be read by a qualified technician to ensure that the appliance is installed, regulated and technically serviced correctly in compliance with current regulations. Important: Disconnect the appliance from the electrical supply before performing any
  • Страница 16 из 41
    attachment. Only use pipes and gaskets complying with current standards. The full length of the pipe must not exceed 2000 mm. Once the connection has been made, ensure that the flexible metal pipe does not touch any moving parts and is not crushed. C and D. 900 mm. 420 mm. 420 mm. Min. Min. Min.
  • Страница 17 из 41
    c) Minimum regulation of the hob burners: • Turn the tap to minimum; • Remove the knob and adjust the regulation screw, which is positioned in or next to the tap pin, until the flame is small but steady. NB.: In the case of liquid gas, the regulation screw must be screwed in all the way. • Check
  • Страница 18 из 41
    Technical Specifications Voltage and Frequency of Power Supply: See data plate. Inner Dimensions of the Oven: Width: 43.5 cm Depth: 40 cm Height: 32 cm Burners: Adaptable for use with all the types of gas indicated on the data plate. Inner Volume of the Oven: 56 Liters Inner Dimensions of the Food
  • Страница 19 из 41
    How To Use Your Appliance The various features of cooker are controlled through the knobs and buttons located on the control panel. panel with the symbol on the timer knob. The Oven Control Knobs This multi-function oven combines the advantages of traditional convection ovens with those of the more
  • Страница 20 из 41
    Fan Assisted Grill Position of thermostat knob “M”: between 60°C and 200°C. The top central heating element and the fan come on. This combination of features increases the effectiveness of the unidirectional thermal radiation of the heating elements through forced circulation of the air throughout
  • Страница 21 из 41
    Practical Advice on Using the Burners In order to obtain the best performance, keep in mind the following: • Use the appropriate cookware for each burner (see table) so that the flames do not extend beyond the bottom of the cookware. • Only flat bottom cookware should be used. • At the boiling
  • Страница 22 из 41
    Practical Cooking Advice When using this mode, place the grid on the 2nd or 3rd oven rack from the bottom (see cooking table) then, to prevent fat and grease from dripping onto the bottom of the oven and thus smoke from forming, place a drippingpan on the 1st rack from the bottom. Important: always
  • Страница 23 из 41
    Cooking Fish and Meat When cooking white meat, fowl and fish, use temperature settings from 180 °C to 200 °C. For red meat that should be well done on the outside while tender and juicy in the inside, it is a good idea to start with a high temperature setting (200°C-220°C) for a short time, then
  • Страница 24 из 41
    Practical Cooking Advice Selector knob Food to be cooked setting Weight (in kg) Cooking rack position from bottom Preheating time (minutes) Thermostat knob setting Cooking time (minutes) 1 1 1 1 3 3 3 3 3 15 15 15 15 15 200 200 200 180 180 65-75 70-75 70-80 15-20 30-35 Defrosting All frozen food
  • Страница 25 из 41
    Routine Maintenance and Cleaning Before each operation, disconnect the cooker from the electrical supply. To ensure that the appliance lasts a long time, it must be thoroughly cleaned frequently, keeping in mind that: · Do not use steam equipment to clean the appliance. • The enamelled parts and
  • Страница 26 из 41
    Ïðåäóïðåæäåíèÿ Äëÿ îáåñïå÷åíèÿ ýôôåêòèâíîé è áåçîïàñíîé ýêñïëóàòàöèè äàííîãî áûòîâîãî ýëåêòðîïðèáîðà: · îáðàùàéòåñü òîëüêî â óïîëíîìî÷åííûå öåíòðû òåõíè÷åñêîãî îáñëóæèâàíèÿ · âñåãäå òðåáóéòå óñòàíîâêó îðèãèíàëüíûõ çàïàñíûõ ÷àñòåé 1 2 3 4 5 6 7 8 9 10 11 12 13 14 Ïîëüçîâàòåëü íå äîëæåí
  • Страница 27 из 41
    Istruzioni per l’installazione êóõîííîé òåõíèêè ìîæåò ïîòðåáîâàòü äîïîëíèòåëüíîé âåíòèëÿöèè, íàïðèìåð, îòêðûòîå îêíî èëè áîëåå ýôôåêòèâíóþ âåíòèëÿöèþ çà ñ÷åò ïîâûøåíèÿ ìîùíîñòè ìåõàíè÷åñêîé âûòÿæêè, åñëè îíà èìååòñÿ. d) Ñæèæåííûé ãàç ïðîïàí-áóòàí òÿæåëåå âîçäóõà è ñëåäîâàòåëüíî çàñòàèâàåòñÿ âíèçó.
  • Страница 28 из 41
    8 ìì – äëÿ ñæèæåííîãî ãàçà; 13 ìì – äëÿ ìåòàíà.  ÷àñòíîñòè ïðè ïîäñîåäèíåíèè òàêèõ ãèáêèõ øëàíãîâ íåîáõîäèìî ñ îáëþäàòü ñëåäóþùèå ìåðû ïðåäîñòîðîæíîñòè: · Øëàíã íèãäå íå äîëæåí êàñàòüñÿ äåòàëåé, ðàáî÷àÿ òåìïåðàòóðà êîòîðûõ ïðåâûøàåò 50°C; · Äëèíà øëàíãà íå äîëæíà ïðåâûøàòü 1500 ìì; · Øëàíã íå
  • Страница 29 из 41
    Ñåòü ýëåêòðîïèòàíèÿ äîëæíà áûòü îñíàùåíà íàäåæíûì çàçåìëåíèåì ñîãëàñíî íîðìàòèâàì è óêàçàíèÿì çàêîíîäàòåëüñòâà; · Ýëåêòðè÷åñêàÿ ðîçåòêà èëè ìíîãîïîëþñíûé âûêëþ÷àòåëü äîëæíû áûòü ëåãêîäîñòóïíû áåç íåîáõîäèìîñòè ñúåìà âàðî÷íîé ïàíåëè êóõîííîé ïëèòû. ÏÐÈÌÅ×ÀÍÈÅ: íå èñïîëüçóéòå óäëèíèòåëè, ïåðåõîäíèêè
  • Страница 30 из 41
    Õàðàêòåðèñòèêè ãàçîâûõ ãîðåëîê è ôîðñóíîê Òàáëèöà 1 Ãîðåëêè Ñæèæåííûé ãàç Äèàìåòð (mm) Ìîùíîñòü Âò kW (p.c.i.*) Íîìè- Óìåíüíàëüí. øåííàÿ Îòâåð- æèêëåð ñòèå 1/100 1/100 Ìåòàí ïîòîê* ë/÷ æèêëåð ïîòîê* æèêëåð ïîòîê* 1/100 ë/÷ 1/100 ë/÷ (mm) (mm) *** ** (mm) (mm) Áûñòðàÿ (Áîëüøàÿ) (R) 100 3,00 0,7 41
  • Страница 31 из 41
    Òåõíè÷åñêèå õàðàêòåðèñòèêè Ðàáî÷èå ãàáàðèòíûå ðàçìåðû äóõîâîãî øêàôà: Íàïðÿæåíèå è ÷àñòîòà ýëåêòðîïèòàíèÿ: øèðèíà ñì. 43,5 ãëóáèíà ñì. 40 ñì. òàáëè÷êó ñ òåõíè÷åñêèìè õàðàêòåðèñòèêàìè Ãîðåëêè: âûñîòà ñì. 32 íàñòðàèâàþòñÿ íà âñå òèïû ãàçà, óêàçàííûå íà ïàñïîðòíîé òàáëè÷êå èçäåëèÿ Ðàáî÷àÿ ¸ìêîñòü
  • Страница 32 из 41
    Ðóêîâîäñòâî ïî ýêñïëóàòàöèè ôóíêöèé íèêîãäà íå èñïîëüçóéòå ñàìûé íèæíèé óðîâåíü è íèêîãäà íå ïîìåùàéòå íèêàêèõ ïðåäìåòîâ íà äíî äóõîâîãî øêàôà â ïðîöåññå ïðèãîòîâëåíèÿ, òàê êàê ýòî ìîæåò ïîâðåäèòü åãî ýìàëèðîâàííîå ïîêðûòèå. Âñåãäà ñòàâüòå Âàøó ïîñóäó äëÿ ïðèãîòîâëåíèÿ áëþä (æàðîâíè, àëþìèíèåâûå
  • Страница 33 из 41
    òåëÿ÷üèõ è ãîâÿæüèõ áèôøòåêñîâ, àíòðåêîòîâ, âûðåçêè, ãàìáóðãåðîâ è ò.ä. Ãîòîâèòü ñ ïîëóîòêðûòîé äâåðöåé äóõîâêè çà èñêëþ÷åíèåì ïðèãîòîâëåíèÿ íà âåðòåëå.  ïàðàãðàôå «Ïðàêòè÷åñêèå ñîâåòû ïî ïðèãîòîâëåíèþ» ïðèâîäÿòñÿ íåêîòîðûå ïðèìåðû èñïîëüçîâàíèÿ ãðèëÿ. òîëüêî îäèí óðîâåíü, òàê êàê ïðè
  • Страница 34 из 41
    óñòàíîâèâ íàïðîòèâ ôèêñèðîâàííîé îòìåòêè íà ïåðåäíåé ïàíåëè öèôðó, ñîîòâåòñòâóþùóþ íóæíîìó âðåìåíè. Ïî èñòå÷åíèè çàäàííîãî âðåìåíè ïîìèìî çâîíêà ïðîèçîéäåò àâòîìàòè÷åñêîå âûêëþ÷åíèå äóõîâêè. Âíèìàíèå: äëÿ èñïîëüçîâàíèÿ äóõîâîãî øêàôà â ðó÷íîì ðåæèìå, ò.å. èñêëþ÷èâ óñòðîéñòâî ïðîãðàììèðîâàíèÿ
  • Страница 35 из 41
    Ïðè èñïîëüçîâàíèè ýòîé ôóíêöèè ðåêîìåíäóåòñÿ óñòàíîâèòü ðóêîÿòêó òåðìîñòàòà íà 200°C, òàê êàê ýòà îïòèìàëüíàÿ òåìïåðàò óðà, îáåñïå÷èâàþùàÿ íàèáîëüøóþ îòäà÷ó íà îñíîâå èíôðàêðàñíîãî èçëó÷åíèÿ. Ýòî, îäíàêî, íå èñêëþ÷àåò âîçìîæíîñòü èñïîëüçîâàíèÿ áîëåå íèçêèõ òåìïåðàòóð, óñòàíàâëèâàÿ ðóêîÿòêó
  • Страница 36 из 41
    Ïîëîæåíèå ðóêîÿòêè ðåãóëÿöèè Ïðèãîòàâëèâàåìûé ïðîäóêò Ðàçìîðàæèâàíèå Âñå ìîðîæåííûå ïðîäóêòû Ñòàòè÷åñêîå Óòêà Æàðêîå èç òåëÿòèíû èëè ãîâÿäèíû Æàðêîå èç ñâèíèíû Ïå÷åíüå (ïåñî÷íîå) Ïåñî÷íûé òîðò Âåíòèëèðîâàííîå Ïèööà (íà 2-õ óðîâíÿõ) Ëàçàíüÿ Áàðàíèíà óðèöà ñ êàðòîøêîé Ñêóìáðèÿ åêñ Ýêëåðû (íà 2-õ
  • Страница 37 из 41
    Ðåãóëÿðíîå òåõíè÷åñêîå îáñëóæèâàíèå è ÷èñòêà êóõîííîé ïëèòû Ïåðåä íà÷àëîì êàêîé-ëèáî îïåðàöèè îòñîåäèíèòå êó õîííóþ ïëèò ó îò ñåòè ýëåêòðîïèòàíèÿ. Äëÿ äëèòåëüíîãî ñðîêà ñëóæáû êóõîííîé ïëèòû âàæíî ðåãóëÿðíî ïðîèçâîäèòü åå òùàòåëüíóþ îáùóþ ÷èñòêó, ó÷èòûâàÿ ñëåäóþùåå: · íå èñïîëüçéòå ïàðîâûå àãðåãàòû
  • Страница 38 из 41
    38
  • Страница 39 из 41
    39
  • Страница 40 из 41
    Merloni Elettrodomestici 05/04 - 195042283.00 Viale Aristide Merloni 47 60044 Fabriano Italy Tel +39 0732 6611 Fax +39 0732 662501 www.merloni.com
  • Страница 41 из 41