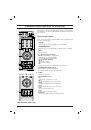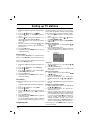
Setting the clock
1. Press
the
MENU
button and then
D
D
/
E
E
but-
ton to select the Time menu.
2. Press
the
G
G
button to select
Clock
.
3. Press
the
G
G
button and then
D
D
/
E
E
button to
adjust the hour.
4. Press
the
G
G
button and then
D
D
/
E
E
button to
adjust the minute.
5. Press the
OK
button.
6. Repeatedly press the
MENU
button to return to
normal TV viewing.
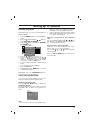
Setting the On/Off timer
By using this function, the set automatically
switches on or off at a preset time. You must set
the time correctly before using the on/off time
function.
1. Press the
MENU
button and then
D
D
/
E
E
but-
ton to select the Time menu.
2. Press the
G
G
button and then
D
D
/
E
E
button to
select
Off time
/
On time
.
3. Press the
G
G
button and then
D
D
/
E
E
button to
adjust the hour.
4. Press the
G
G
button and then
D
D
/
E
E
button to
adjust the minute.
5.
Only
On time
function
; Press the
G
G
button
and then
D
D
/
E
E
button to adjust programme
number and volume level.
6.
Press the
OK
.
7. Repeatedly press the
MENU
button to return to
normal TV viewing.
Note :
a.
On time
works only in standby mode.
b. To view the remaining on/off time, select the
Time menu.
c.
When you switch the main power off, the
Clock
is reset .
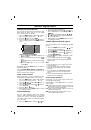
Auto sleep
If you select
On
on the
Auto sleep
pull-down
menu, the set will automatically switch itself to
standby mode approximately ten minutes after a
TV station stops broadcasting.
1. Press
the
MENU
button and then
D
D
/
E
E
but-
ton to select the Time menu.
2. Press the
G
G
button and then
D
D
/
E
E
button to
select
Auto sleep
.
3.
Press the
G
G
button and then
D
D
/
E
E
button to
select
On
or
Off
on the
Auto sleep
pull-down
menu.
4.
Press the
OK
or
F
F
button.
5. Repeatedly press the
MENU
button to return to
normal TV viewing.
Stereo/Dual reception
When a programme is selected, the sound infor-
mation for the station appears after the pro-
gramme number and station name disappear.
Mono sound selection
In stereo reception if the stereo signal is weak,
you can switch to mono by pressing the
I/II/
*
but-
ton twice. In mono reception the depth of sound is
improved. To switch back to stereo, press the
I/II/
*
button twice again.
Language selection for dual language broad-
cast
If a programme is received in two languages (dual
language), you can switch to
DUAL I
,
DUAL II
or
DUAL I+II
by pressing the
I/II/
*
button repeated-
ly.
DUAL I
sends the primary broadcast language to
the loudspeakers.
DUAL II
sends the secondary broadcast lan-
guage to the loudspeakers.
DUAL I+II
sends a separate language to each
loudspeaker.
NICAM reception (option)
If your set is equipped with the receiver for
NICAM reception, the high quality NICAM (Near
Instantaneous Companding Audio Multiplex) digi-
tal sound can be received.
Sound output can be selected according to the
type of received broadcast by pressing the
I/II/
*
button repeatedly.
1. When NICAM mono is received, you can
select
NICAM MONO
or FM MONO.
2. When NICAM stereo is received, you can
select
NICAM STEREO
or FM MONO. If the
stereo signal is weak, switch to FM mono.
3. When NICAM dual is received, you can select
NICAM DUAL I
,
NICAM DUAL II
or
NICAM DUAL I+II
or
MONO
. When FM
mono is selected the display
MONO
appears
on the screen.
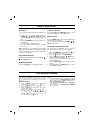
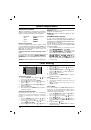
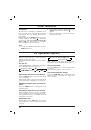
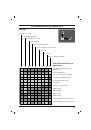
Sound adjustment
14
Broadcast
Mono
Stereo
Dual
On Screen Display
MONO
STEREO
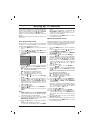
DUAL I
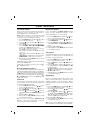
Time Setting
Clock
{
Off
o
time
{
On
o
time
{
Auto
o
sleep
{
-
i
-
o
:
o
-
i
-
Clock
{
()
O
}{
O
OK
O
MENU
Time