Other functions
TV and AV modes
Inputs can be set for TV or AV mode. AV mode is
used when a video cassette recorder (VCR), or
other equipment is connected to the set.
Note :
When a VCR is connected via the aerial
socket the set is used in TV mode. See the
‘Connection of external equipment’ section.
1. Press
the
MENU
button and then
D
D
/
E
E
button
to select the Special menu.
2.
Press the
G
G
button and then
D
D
/
E
E
button to
select
Input
.
3.
Press the
G
G
button and then
D
D
/
E
E
button to
select
TV
,
AV1
,
AV2
,
AV3
,
COMPONENT
(option) on the
Input
pull-down menu.
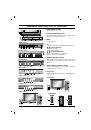
AV1 : VCR connected to the Euro scart sock-
et or
AV IN 1
sockets on the set
AV2 : VCR connected to the
AV IN 2
sockets
on the set.
AV3 : VCR connected to the
AV IN3
sockets
of the set
COMPONENT : DVD Player connected to the
COMPONENT
sockets on the set (option)
4. Repeatedly press the
MENU
button to return
to normal TV viewing.
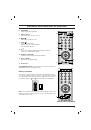
Alternatively you can select the TV or AV mode by
pressing the
TV/AV
button.
In AV mode, to return to TV mode, press the
D
D
/
E
E
or NUMBER buttons.
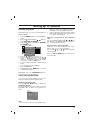
Auto AV switching (option)
If your VCR outputs switching voltage when it is
switched to playback with the VCR connected to the
Euro scart socket. The set is automatically switched
to
AV1
mode when an AV signal is input. But if you
want to keep on watching TV mode, press the
D
D
/
E
E
or NUMBER buttons. Press the
TV/AV
button to
return to AV modes.
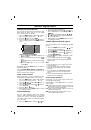
Child lock
The TV can be set so that the remote control hand-
set is needed to control it. This feature can be used
to prevent unauthorized viewing.
1. Press
the
MENU
button and then
D
D
/
E
E
button
to select the Special menu.
2.
Press the
G
G
button and then
D
D
/
E
E
button to
select
Child lock
.
3.
Press the
G
G
button and then
D
D
/
E
E
button to
select
On
or
Off
on the
Child lock
pull-down
menu.
4. Press the
OK
or
F
F
button.
5. Repeatedly press the
MENU
button to return
to normal TV viewing.
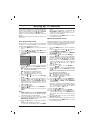
With the lock on, the display
Child lock
on
appears on the screen if any button on the front
panel is pressed while viewing the TV.
Blue back (option)
If you select
On
on the
Blue back
pull-down
menu, the blue background appears on the
screen when there is no or poor signal.
1. Press
the
MENU
button and then
D
D
/
E
E
but-
ton to select the Special menu.
2. Press the
G
G
button and then
D
D
/
E
E
button to
select
Blue back
.
3. Press the
G
G
button and then
D
D
/
E
E
button to
select
On
or
Off
on the
Blue back
pull-down
menu.
4.
Press the
OK
or
F
F
button.
5. Repeatedly press the
MENU
button to return
to normal TV viewing.
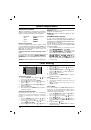
Tilt (option)
The TV picture may tilt to the left or right if the TV
set moves to another position. This function can
be used to compensate the tilt.
1. Press
the
MENU
button and then
D
D
/
E
E
but-
ton to select the Special menu.
2. Press the
G
G
button and then
D
D
/
E
E
button to
select
Tilt
.
3. Press the
G
G
button and then
F
F
/
G
G
button of
the panel control to adjust the tilt on the
Tilt
pull-down menu.
On some models,
adjust the tilt by using the
F
F
/
G
G
button of the remote control handset.
4.
Press the
OK
button.
5. Repeatedly press the
MENU
button to return
to normal TV viewing.
Degaussing
Due to the super large Tube in the set. The colour
purity of the picture may be affected by other
magnetic influences such as speakers. Stripes
may appear on the screen or there may be colour
patches.
1. Press
the
MENU
button and then
D
D
/
E
E
but-
ton to select the Special menu.
2. Press the
G
G
button and then
D
D
/
E
E
button to
select
Degauss
.
3. Press the
G
G
button and then
D
D
/
E
E
button to
select
On
on the
Degauss
pull-down menu.
After the degauss function works,
On
mode
switches to
Off
mode automatically.
4.
Press the
OK
or
F
F
button.
5. Repeatedly press the
MENU
button to return
to normal TV viewing.
Note :
If you cannot adjust the screen condition
by degaussing, try it again after about 4 minutes.
15