Connect ID 40-55
- 10 -
Quick guide
english
continued on the next page
ט
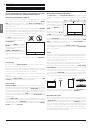
General information on the operation
Structure of the Menu screen
Basically, the structure of the different menu screens is similar, regard-
less of whether it is e.g. a wizard, rendering media content or a setup
menu. The structure is explained by means of three different screens.
The functions of these menu screens are explained more detailed in
the respective chapters.
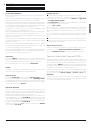
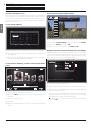
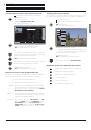
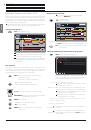
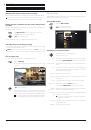
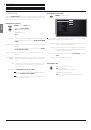
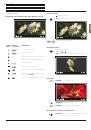
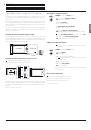
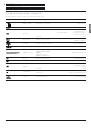
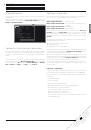
Screen structure: Wizard
(A) Title bar with name of the wizard and the current operating step.
(B) Selected items, whose number can be different according to the
operating step.
(C) Bottom line showing the available operating controls. If required,
instructions and information are inserted.
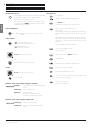
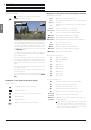
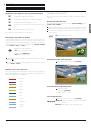
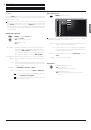
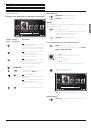
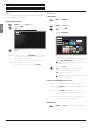
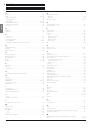
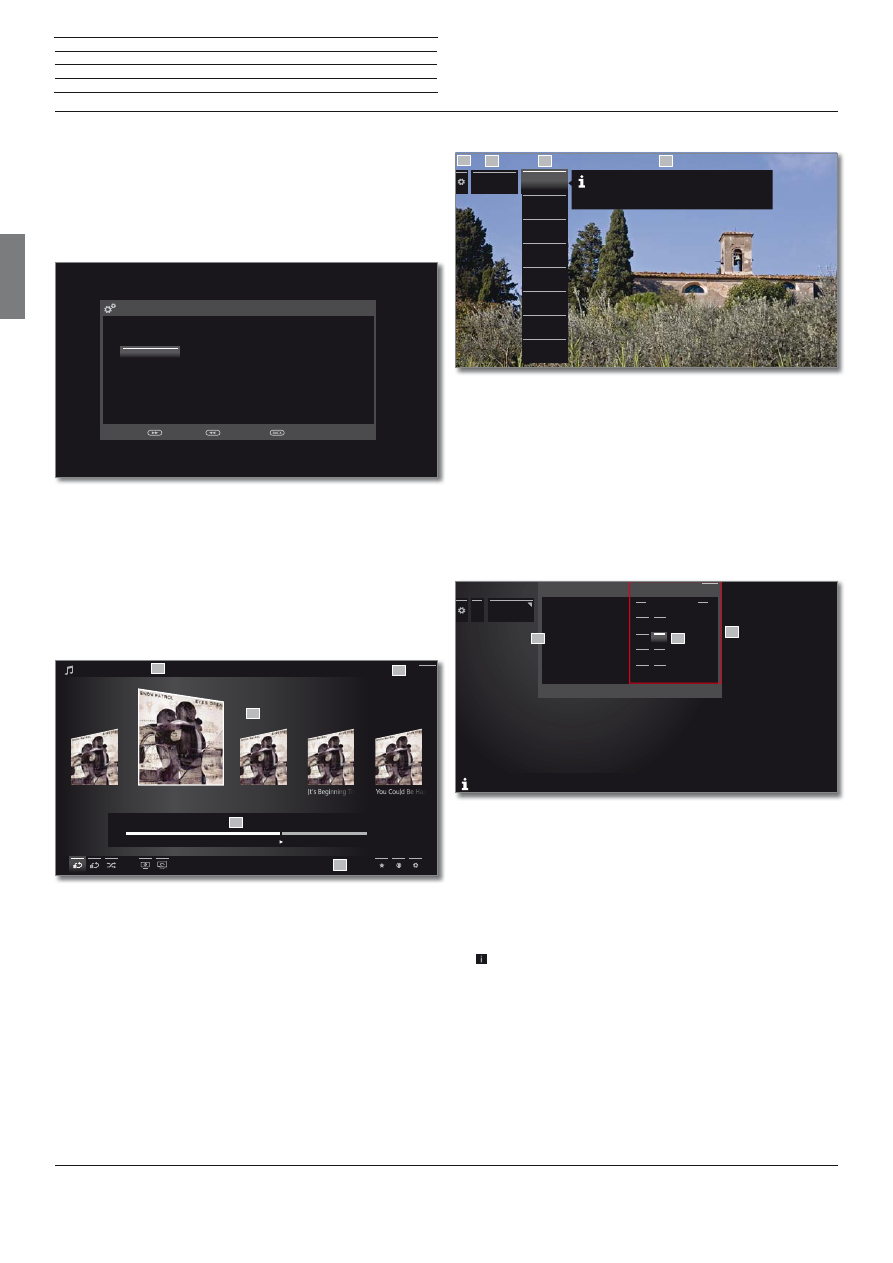
Screen structure: Rendering of media content (example: Audio
player)
(A) Title bar with selected album / subdirectory.
(B) Menu item
Back
to exit the menu or to go back to the previous
menu item.
(C) Selection of album or title
(D) Time bar
(E) Bottom line with the different symbols for controlling the playback
function.
Deutsch
(de)
Ελληνικά
(el) Svenska
(sv)
Č
eština
(cs)
English
(en)
Polski
(pl) Dansk
(da)
Français
(fr) Magyar
(hu)
Português
(pt)
Italiano
(it) Suomi
(fi)
Русский
(ru)
Español
(es) Slovenš
č
ina
(sl) Norsk
(no)
Nederlands
(nl) Sloven
č
ina
(sk) Türkçe
(tr)
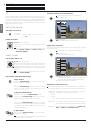
INITIAL INSTALLATION - Menu language
Proceed with
Back with
Cancel with
Which menu language do you want to use for operation?
Chasing Cars
Shut Your Eyes
Hands Open
Snow Patrol / Eyes Open
00:00
02:56
04:27
A
C
B
D
E
Back
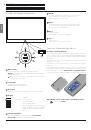
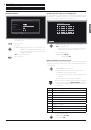
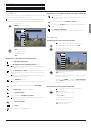
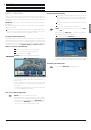
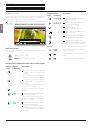
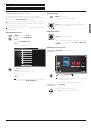
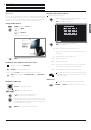
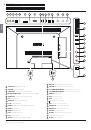
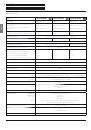
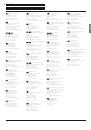
Screen structure: Setup (example: picture)
(A) Selected function in the Home overview (here: system settings)
(B) Home Menu
System settings
, with selected menu item
Picture
.
(C) Menu items
Picture
focusing on
3D
(D) Help text for the selected menu item
Picture > 3D
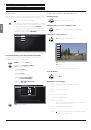
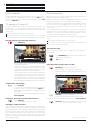
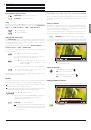
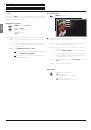
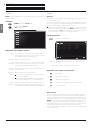
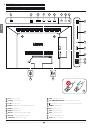
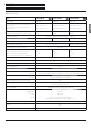
Navigation: Selection of elements (example: On-screen displays)
Highlighting and thus selecting the symbols/elements or menu items
on the screen can be effected by the arrow keys on the remote control.
So you can see all the time where you are. As soon as there is a bar
above a symbol or text, this is a selected element.
(A) Selectable elements / menu items.
(B) The text in the line where the marker is currently located is white.
(C) Move the selection marking by means of the arrow keys
to the menu item to be set.
In most cases, the marked menu item will be automatically
adopted. The font colour of the previously active item will change
to grey, that of the newly selected item to white.
In a few menus, to confirm a selected menu item is required by
pressing
OK
.
A
C
B
D
Picture
3D
Picture ad-
justment
Contrast
Brightness
Colour inten-
sity
Image+
Active
Picture for-
mat
more ...
If your desired display format has not been automatically
selected then you can choose it in the 3D settings menu. You
may display the 3D image in 2D or vice versa.
...
...
On-screen
displays
Display time
Volume display
Automatic info
Permanent clock display
Automatic HDMI hint
On-screen displays
< 7s >
yes no
off on
off on
yes no
< 7s
>
yes
no
on
off
on
yes
no
With this you activate/deactivate the info text overlay for the menu item just selected.
Back
A
B
C