-
29
-
(4)
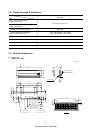
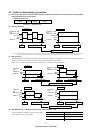
Installation of indoor unit
(a)
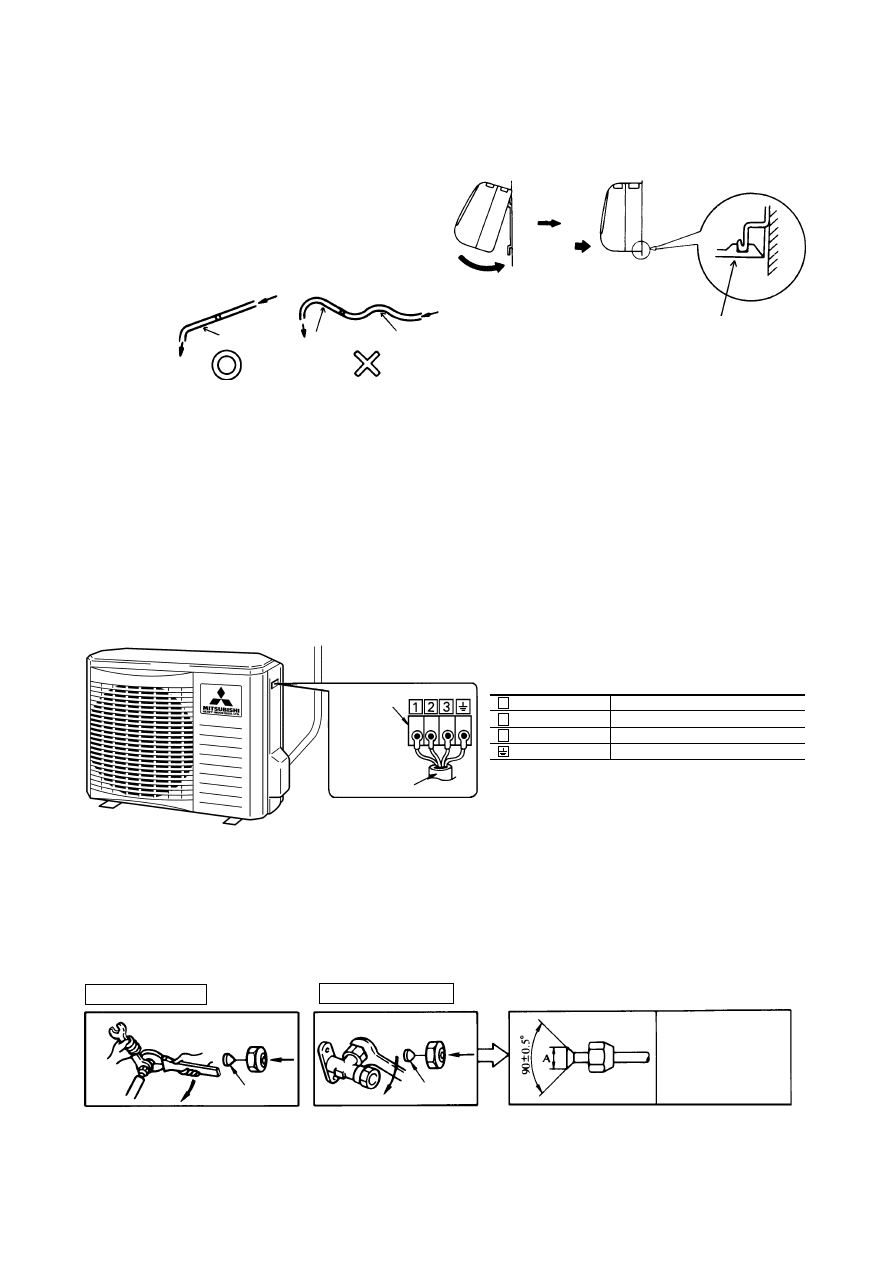
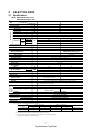
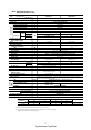
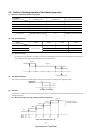
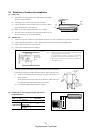
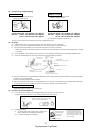
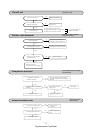
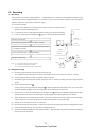
Install the indoor unit on the mounting plate.
Hook the upper part of the indoor unit on the stoppers disposed at the upper part of the mounting plate and lightly push the
lower part of the indoor unit so that the unit is fixed in position.
¡
When removing the indoor unit
1) Disconnect the lid at right and left.
2) Pull down the stoppers (right and left) pro-
vided at the bottom of the indoor unit base.
(See the detail view shown at right.)
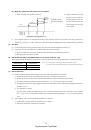
(b)
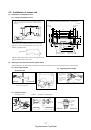
Be sure not to leave any trap on the drain pipe.
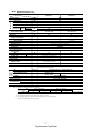
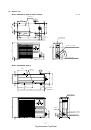
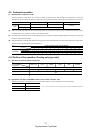
5.3 Installation of outdoor unit
(1)
Installation of outdoor unit
(a)
Make sure that sufficient space for installation and service is secured.
(b)
Fix the leg sections of the unit on a firm base which will not play.
Attach cushion pads, etc. between the unit and the mounting fixtures not to transmit vibration to the building.
(c)
Attach a drain elbow, etc. under the drain port of the bottom plate to guide drain water.
(Drain elbow should not be used where days when temperature drops below 0
°
C continue for several days. Draining may be
disturbed by frozen water.)
(d)
When installing the unit at a higher place or where it could be toppled with strong winds, secure the unit firmly with foundation
bolts, wire, etc.
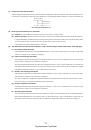
(2)
Connection of indoor and outdoor connecting wiring
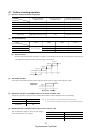
(a)
Connect the wiring according to the number of the indoor terminal block. (Mis-wiring may cause the burning damage, and
make sure to connect correctly.)
Notes (1) To prevent the mis-operation by noise, when the connecting wire too long for indoor and outdoor. Please hide the fixed wire in the pipe or use vinyl tape to set.
Do not put wire into the unit.
(2) Please let the anchorized personal to decide by indoor wiring code whether connect the leakage breaker or not.
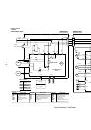
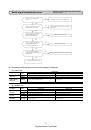
Indoor unit base bottom stopper
(2 places at right, left)
Light push
Mounting
plate
Wall
Declining slope
Inverted slope
Trap
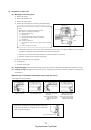
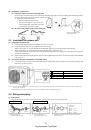
Terminal block
Interconneting
wire
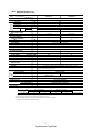
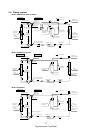
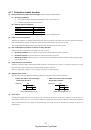
5.4 Refrigerant piping
(1)
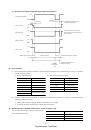
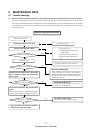
Preparation
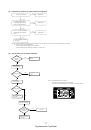
Keep the openings of the pipes covered with tapes etc. to prevent dust, sand, etc. from entering them.
Indoor unit side
Outdoor unit side
¡
Remove the flared nuts.
(on both liquid and gas sides)
¡
Remove the flared nuts.
(on both liquid and gas sides)
¡
Install the removed flared nuts to the pipes to be connected,
then flare the pipes.
Dimension A
Liquid side
(
φ
6.35):
9.1 dia
Gas side
(
φ
9.52):
13.2 dia
(
φ
12.7):
16.6 dia
Press
Remove
Remove
(Do not
turn)
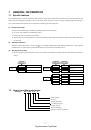
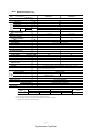
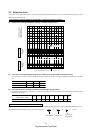
1 Brown
For power supply, indoor outdoor
2 Blue
Connecting wiring
3 Black
Indoor/outdoor signal wire (Low voltage)
Yellow/Green
Earth wiring terminal
Опубликовано TopClimat


Инструкции и руководства похожие на Mitsubishi Heavy Industries SRK/SRC 28HD-S/28HD-S