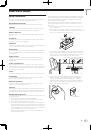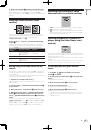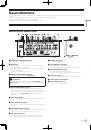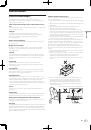
Pour lancer la lecture en utilisant le
crossfader
1 Réglez [THRU, , ] (le sélecteur de courbe du
crossfader)
j
sur [ ] ou [ ].
2 Appuyez sur la touche [CH-1] ou [CH-2]
i
dans la
section Lancement par le fader.
Activez le lancement par le fader.
3 Bougez le crossfader
f
.
Amenez le crossfader à l’extrémité opposée du canal pour lequel vous
voulez utiliser le lancement par le fader.
4 Spécifiez le repère sur le lecteur DJ
Le lecteur DJ se met en pause au point de repère.
5 Bougez le crossfader
f
.
La lecture démarre sur le lecteur DJ.
!
Si vous ramenez le crossfader à la position originale, le lecteur
revient instantanément au point de repère déjà spécifié et interrompt
la lecture (repère arrière).
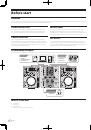
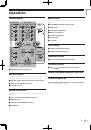
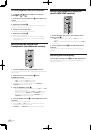
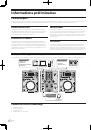
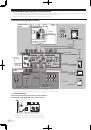
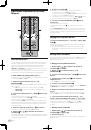
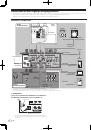
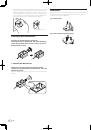
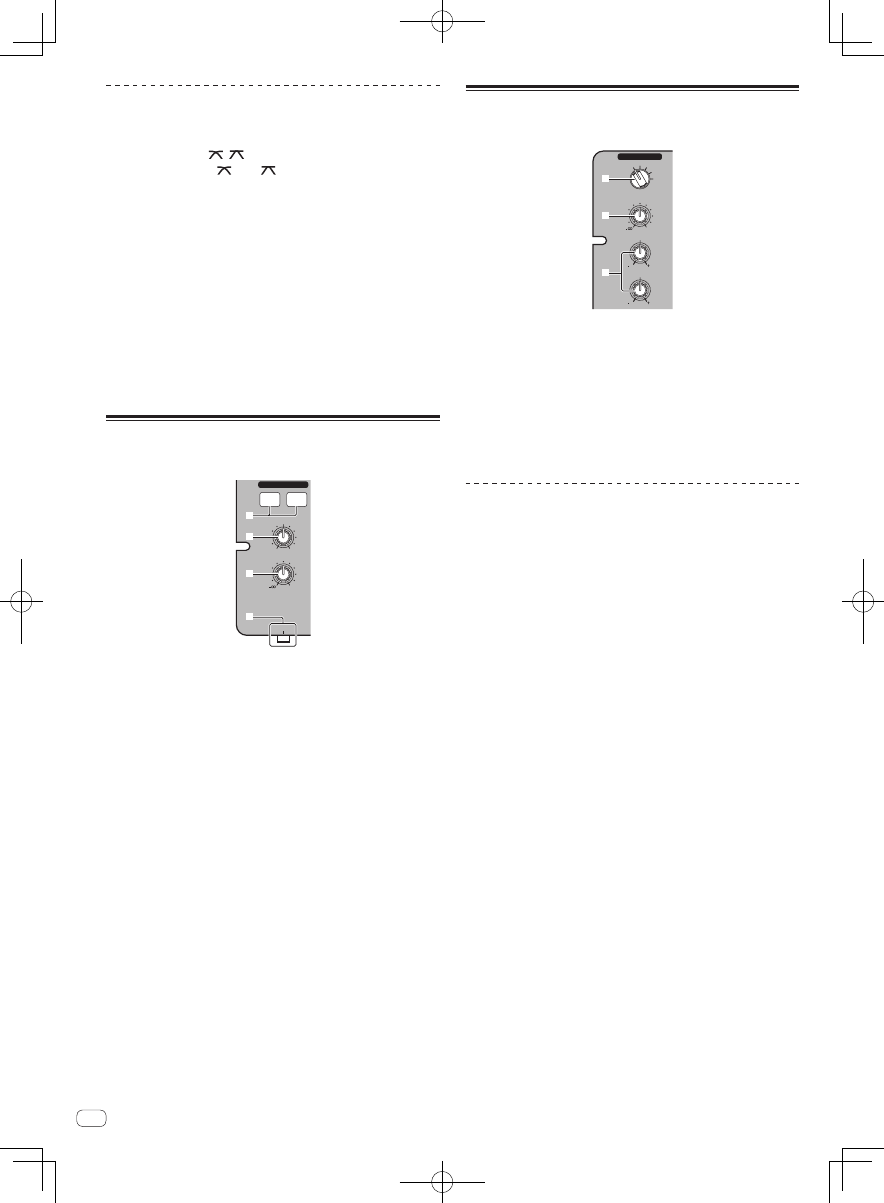
Contrôle du son par le casque
d’écoute (Section Casque d’écoute)
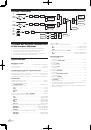
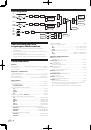
0
LEVEL
MASTER
CUE
MIXING
HEADPHONES
CH-1
CH-2
PHONES
6
7
5
8
1 Raccordez le casque à la prise [PHONES].
Pour les instructions sur le raccordement, reportez-vous à la page 6,
Raccordement des prises d’entrée/sortie
.
2 Appuyez sur la touche [CH-1] ou [CH-2]
5
dans la
section Casque d’écoute.
Sélectionnez le canal que vous voulez contrôler.
—
[
CH-1
] : Le son de [
CH-1
] est contrôlé.
—
[
CH-2
] : Le son de [
CH-2
] est contrôlé.
!
Cette opération n’est pas nécessaire pour contrôler le son de
[
MASTER 1
] ou [
MASTER 2
] (canal de référence).
3 Tournez la commande [MIXING]
6
.
—
Rotation dans le sens antihoraire : Le volume de [
CH-1
] et [
CH-2
]
devient plus fort.
—
Position centrale : Le son de [
CH-1
] et [
CH-2
] est au même
niveau sonore que le son provenant de [
MASTER 1
] et [
MASTER
2
].
—
Rotation horaire : Le volume de [
MASTER 1
] et [
MASTER 2
]
devient plus fort.
4 Tournez la commande [LEVEL]
7
dans la section
Casque d’écoute dans le sens horaire.
Le son est restitué par le casque d’écoute.
!
Le contrôle s’annule par une nouvelle pression sur la touche [
CH-1
]
ou [
CH-2
] dans la section Casque d’écoute.
!
Le contrôle de [
MASTER 1
] et [
MASTER 2
] ne peut pas être annulé.
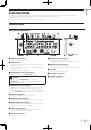
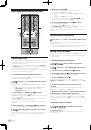
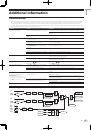
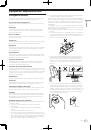
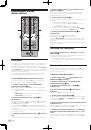
Utilisation d’un microphone ou d’un
dispositif externe (Section MIC/AUX)
0
LEVEL
12
12
HI
12
12
LOW
MIC/AUX
MIC OFF AUX 1
AUX 2
AUX 3
2
3
4
1 Réglez le sélecteur d’entrée [MIC, OFF, AUX 1, AUX 2,
AUX 3]
2
.
—
[
MIC
] : Le microphone raccordé à la prise [
MIC
] est sélectionné.
—
[
AUX
1–3] : Sélectionne le dispositif externe raccordé aux prises
[
AUX
1–3].
2 Tournez la commande [LEVEL]
3
dans la section MIC/
AUX dans le sens horaire.
Le son du microphone ou du dispositif externe est fourni par les
enceintes.
Réglage de la qualité du son
Tournez la commande [HI] ou [LOW]
4
dans la section
MIC/AUX.
Reportez-vous à la page 14,
Spécifications
pour la plage de réglage du
son de chaque commande.
12
Fr