7
En
English
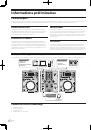
About the AC adapter
Safety instructions
To ensure your personal safety and to maximize the full operating poten-
tial of your unit, read and follow these safety instructions.
Read & Retain Instructions
Read all operating and user information provided with this product.
Cleaning
Use a damp cloth to clean the exterior housing. Avoid using any fluids
including liquid, aerosol or alcohol-based cleaning products.
Water or Moisture
Avoid operating or locating this product near water or other sources of
fluid.
Accessories
Do not place this product on an unstable cart, stand, or table. The prod-
uct may fall and be seriously damaged.
Ventilation
Do not block or cover this product in use. This unit should not be placed
in a built-in installation unless properly ventilated.
Environment
Avoid placing this product in a location with exposure to large quantities
of dust, high temperatures, high humidity, or subject to excessive vibra-
tions or shocks.
Power Sources
Operate this product only from the recommended power sources. If
you are unsure of the power source, consult an authorized Pioneer
representative.
Power-Cord Protection
When unplugging the unit, pull on the plug – not on the cord. Do not
handle the cord or plug with wet hands; doing so could cause an electric
short or shock. Do not allow anything to pinch or rest on the power cord
and do not place in a walkway.
Power
Turn OFF the system before installing this or any other hardware device.
Overloading
Avoid connecting too many devices to a single wall socket or power
source as this can cause fires or short circuits.
Object & Liquid Entry
Never push inappropriate objects in to the device. Avoid spilling any
liquids in to or on the outside of the drive.
Servicing
Opening or removing the cover exposes you to possible electrical shock
or other danger. Contact a Pioneer authorized service representative for
repairing this product (refer to the enclosed Service & Support Card).
Damage Requiring Service
Unplug the unit and refer servicing to qualified service personnel in the
following situations:
!
When the power cord, plug, or chassis is damaged.
!
If liquid has been spilled, or objects have fallen into the product.
!
If the product has been exposed to rain or water.
!
If the product does not operate normally when the operating instruc-
tions are followed. Adjust only those controls that are covered by the
operating instructions. Improper adjustment of other controls may
result in damage and can require extensive work by a qualified tech-
nician to restore the unit to its normal operation.
!
When the product exhibits a distinct change in performance – this
indicates a need for service.
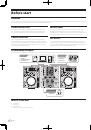
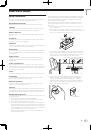
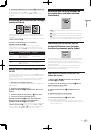
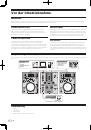
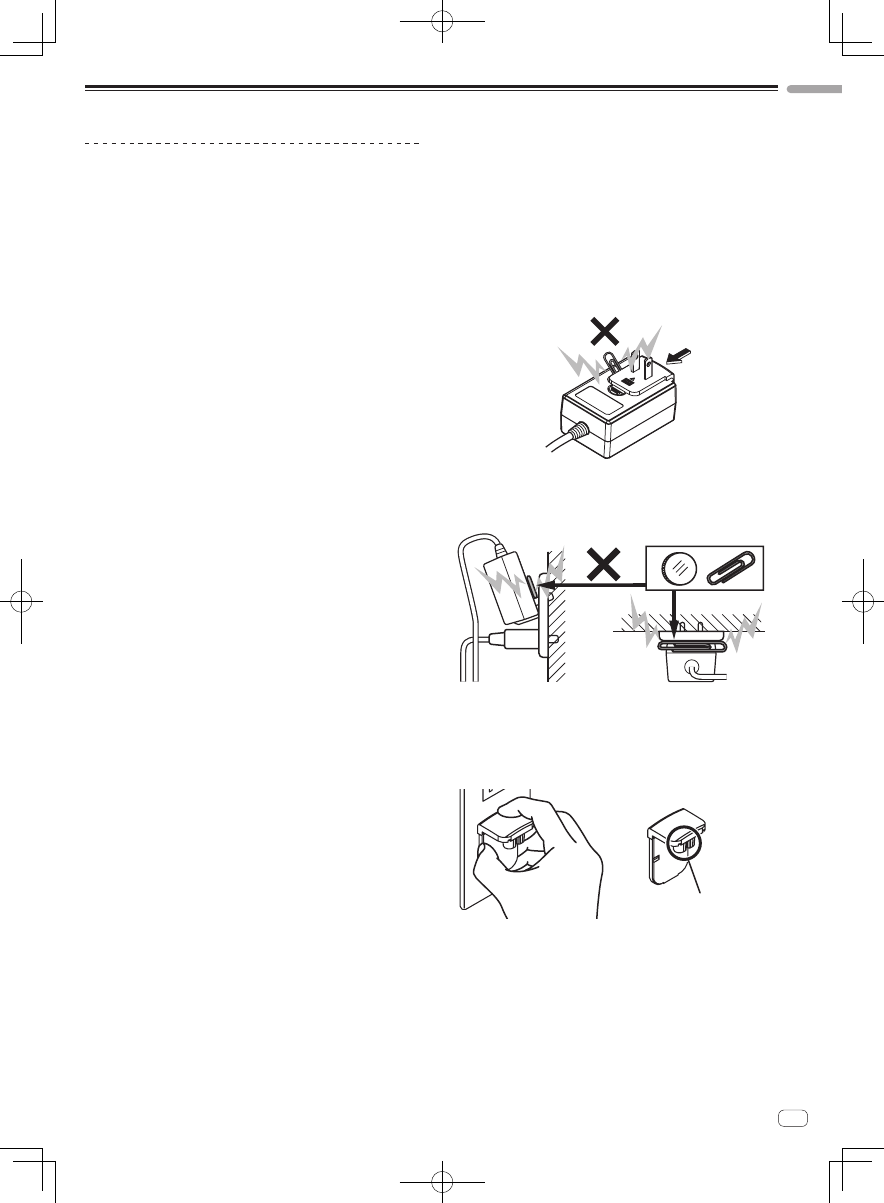
Check that there are no irregularities with the AC adapter or power plug,
then insert the power plug into the specified position of the AC adapter
using the specified procedure until a click is heard. For details, see
Mounting the power plug
on page 8.
If there are irregularities with the AC adapter or power plug, ask your
nearest Pioneer authorized service center or your dealer to carry out
repair work.
!
Do not place the AC adapter cord around your neck. Doing so could
result in suffocation.
!
Do not use this unit with a coin, paper clip or other metal object
stuck between the AC adapter and power plug. Doing so could cause
a short circuit, leading to fire or electric shock.
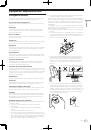
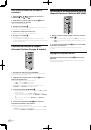
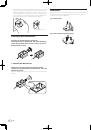
!
When mounting the AC adapter on a wall outlet, make sure there is
no space between the AC adapter and the wall outlet. Faulty contact
or a coin, paper clip or other metal object getting stuck in the space
could cause a short circuit, leading to fire or electric shock.
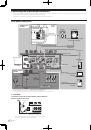
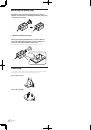
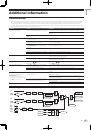
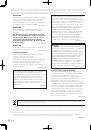
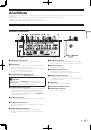
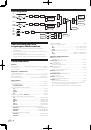
Coin, paper clip or other metal object
Top
Side
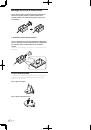
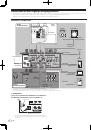
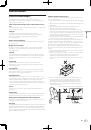
!
The power plug could come detached from the AC adapter and
remain in the power outlet if someone trips on the AC adapter’s
power cord or if something hits the AC adapter. If this happens,
remove the power plug remaining in the outlet with dry hands, hold-
ing it as shown on the diagram below and without touching metal
parts. Do not use any tools to remove it.
Do not touch.