28
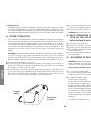
c) Fixed antenna:
- A fixed antenna should be installed in a clear a space as possible. If it is fixed
to a mast, it will perhaps be necessary to stay it, according to the laws in force
(you should seek professional advice). All PRESIDENT antennas and accessories
are designed to give maximum efficiency to each CB radio within the range.
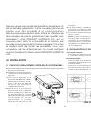
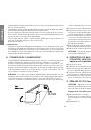
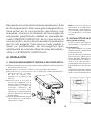
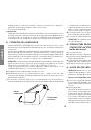
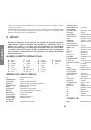
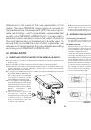
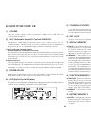
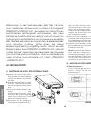
3) POWER CONNECTION:
Your PRESIDENT HARRISON ASC is protected against an inversion of polarities.
However, before switching it on, you are advised to check all the connections.
Your equipment must be supplied with a continued current of 12 volts (
A
).
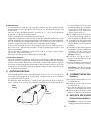
Today, most cars and lorries are negative earth. You can check this by making
sure that the negative terminal of the battery is connected either to the
engine block or to the chassis. If this is not the case, you should consult your
dealer.
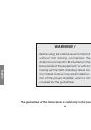
WARNING:
Lorries generally have two batteries and an electrical installation
of 24 volts, in which case it will be necessary to insert a 24/12 volt converter
(type CV 24/12 PRESIDENT) into the electrical circuit. The following connection
steps should be carried out with the power cable disconnected from the set.
a)
Check that the battery is of 12 volts.
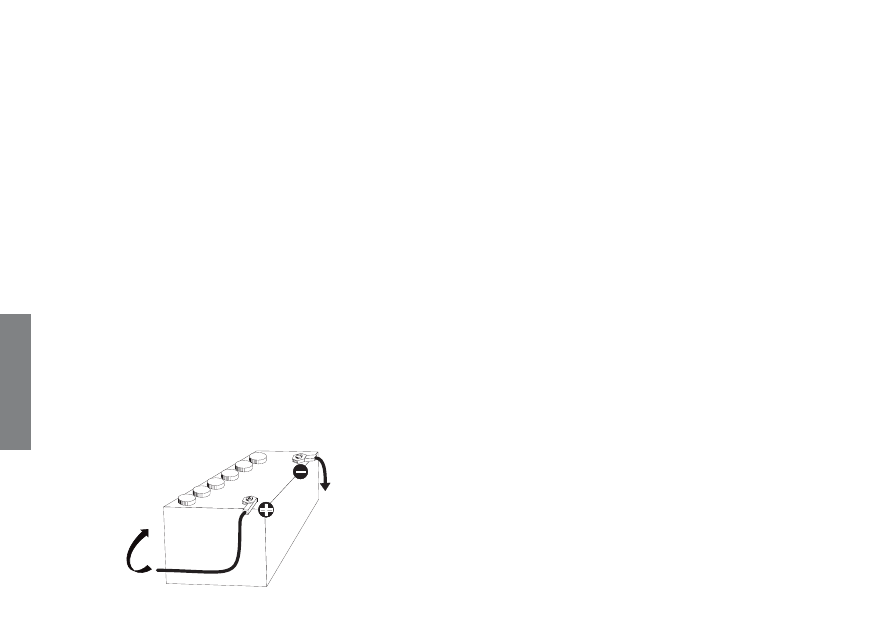
b)
Locate the positive and negative terminals of the battery (
+
is red and
-
is
black). Should it be necessary to lengthen the power cable, you should use
the same or a superior type of cable.
c)
It is necessary to connect your CB to a permanent (
+
) and (
-
). We advise you
to connect the power cable directly to the battery (as the connection of the
CB cable to the wiring of the car-radio or other parts of the electrical circuit
may, in somecases, increase the likelihood of interference).
d)
Connect the red wire (
+
) to the positive terminal of the battery and the black
(
-
) wire to the negative terminal of the battery.
e)
Connect the power cable to your CB radio.
WARNING:
Never replace the original fuse (5A) by one of a different value.
4) BASIC OPERATIONS TO BE CARRIED OUT BEFORE USING
YOUR SET FOR THE FIRST TIME (without transmitting and
without using the «push-to-talk» switch on the microphone):
a)
Connect the microphone
b)
Check the antenna connections
c)
Turn the set on by turning the knob VOLUME clockwise.
d
) Turn the SQUELCH knob to minimum (anti-clockwise). Adjust the volume to a
comfortable level.
e)
Go to Channel 20 using either the «CH
▲
» «CH
▼
» key on the microphone or
the rotary knob.
5) ADJUSTMENT OF SWR (Standing wave ratio):
WARNING:
This must be carried out when you use your CB radio for the first time
(and whenever you re-position your antenna). The adjustment must be
carried out in an obstacle-free area.
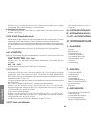
* Using an external SWR meter (e.g. SWR 1 or SWR 2):
a)
To connect the SWR meter :
- Connect the SWR meter between the CB radio and the antenna as close as
possible to the CB (use a maximum of 40 cm cable, type CA 2C).
b)
To adjust the SWR meter:
- Set the CB to channel 20.
- Put the switch on the SWR meter to position CAL ou FWD.
- Press the «push-to-talk» switch on the microphone.
- Bring the index needle to
▼
by using the calibration key.
- Change the switch to position SWR (reading of the SWR level). The reading on
the V.U. meter should be as near as possible to 1. If this is not the case, re-adjust
your antenna to obtain a reading as close as possible to 1. (An SWR reading
between 1 and 1.8 is acceptable).
- It will be necessary to re-calibrate the SWR meter after each adjustment of the
antenna.
Your CB is now ready for use.
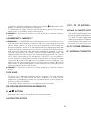
Zum
chassis
Connected
to chassis
Zum
starter
Towards
starter
English