C:\#WORK\@DPF\DPF-A72N\Writer-OP\06_FinalDelivery\GB\4155760111\4155760111DPF-A.E.D.72NCEK\050C03.fm
Master:
Right
DPF-A72N/E72N/D72N 4-155-760-
11
(1)
33
GB
Adv
anc
ed
op
erati
o
n
s
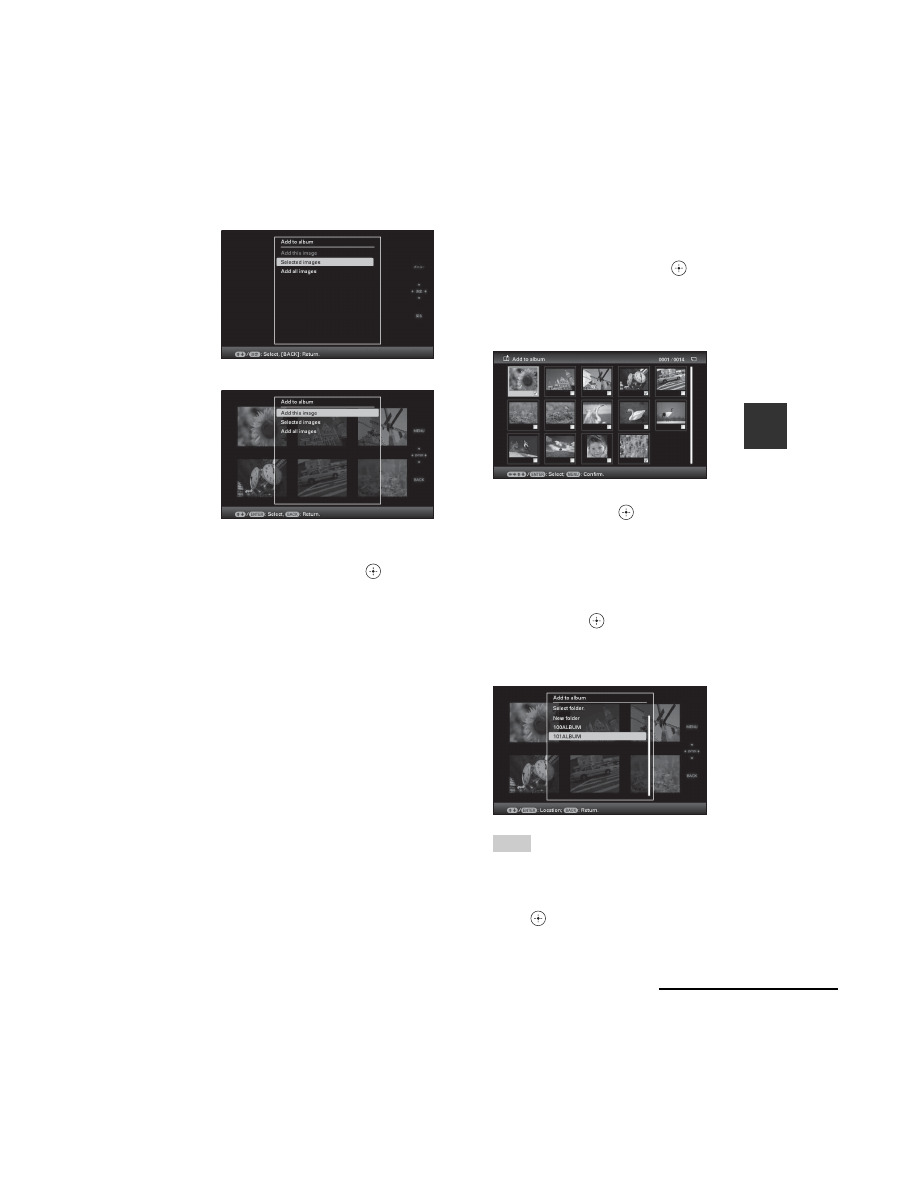
Slideshow display
Index image display
2
Press
v
/
V
to select [Add this image],
[Selected images] or [Add all
images] and then press
.
If you select [Add this image], the image
currently displayed is added to the album.
Go to step 4. (This item cannot be selected
on the slideshow display.)
If you select [Selected images], you can
select the image you want to add from the
image list. Go to step 3.
If you select [Add all images], the image
list is displayed. A check mark is attached
to the check box of all the images. Go to
step 4.
3
Specify the image to add from the
image list.
About image searching in the
image list (DPF-D72N only)
During a search: Displays all the images
applicable to the criteria used for the
search.
Other than during a search: Displays all
images in the device displayed on the
screen.
Refer to “Searching for an image
(Filtering) (DPF-D72N only)” (page 39).
1
Press
B
/
b
/
v
/
V
to select the image to
add to the album and then press
. A
check mark will be attached to the
check box of each selected image.
Repeat this operation to add multiple
images at the same time.
To cancel the selection, select images to
cancel and then press
to delete the
check mark in the check box.
2
Press MENU.
The confirmation screen used for
selecting a folder is displayed.
4
Press
v
/
V
to select the folder you
want and press
.
The confirmation screen used to decide
whether to add an image or not to the
internal memory is displayed.
Tip
A new folder is created automatically when you
select [New folder].
5
Press
v
/
V
to select [Yes] and then
press .
The image is saved in the specified folder
in internal memory.
Continued


