13
Advanced Functions
3. Pay attention to the power supply of the device when
you are using a mobile hard disk or a digital camera.
If the power supply is not sufficient or not stable, you
may encounter problems during operating or can not
operate at all. In this case, please restart the device,
or unplug the device and plug it again, and ensure that
its power supply is normal.
4. The system supports standard USB1.1 and USB2.0
devices, such as standard U-disks, MP3 players,
mobile hard disks, etc..
5. For obtaining better audio and video quality, suggests
to use the external device which accords with USB2.0
standard.
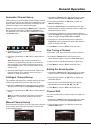
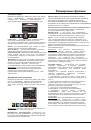
6. Connecting two USB hard disk devices
-The parameters of
file, such as the pixel of picture, code rate of audio and
video file, sampling rate of audio file, exceed the limit
of the system;
simultaneously
can cause to slow the speed of reading or other
problems, suggests to connect two U disk or one USB
hard disk and one U-disk simultaneously.
7. When playing the video with high compression ratio,
these phenomenons, such as picture standstill and
menu long time response, are normal.
8. For some USB device with power supply, such as large
size hard disk, MP4, etc., Suggests using it with power
to avoid electric power shortage.
Attention and Frequently Asked Questions
:
Attention:
This system supports the following file formats:
Picture format:
Video format:
, etc..
Audio format:
1. Some non-standard mobile storage device maybe
cannot be recognized. Please change to use the
standard device.
2.
JPEG
、
BMP
、
PNG
H.264
、
RM/RMVB
、
XVID
、
MPEG4
、
MPEG2
、
MPEG1
MP3
、
WMA
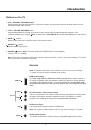
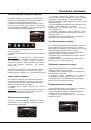
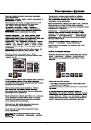
3. Press the up, down, left or right direction button to
select your desired music file and press
OK
to play it.
4. When playing music, press the
Menu
button to
display the play console. For the play console, press
the left or right direction button to select an icon, then
press the
OK
button to confirm.
The play console includes:
5. Select the
Stop
icon in play console, and press
OK
or
press
Exit
to return.
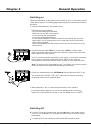
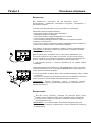
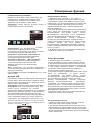
Auto Play
1. Select the
Auto Play
item and press right direction or
OK
button to enter the USB device.
2. Press the left or right direction button to select the USB
disk symbol and press the
OK
button to auto play.
Note:
This function is only available when the pictures
and music are synchronously located in the USB root
catalog.
3. Press
Exit
to return the USB root catalog
.
Play/Pause, Backward,
Forward, Prev, Next, Stop, Repeat Mode, Mute,
Playlist, Info and Goto Time.
Note:
For coding files, there are many kinds non-
standard coding method, so this system
can not be
guaranteed to support the file formats using any coding
method.
Frequently Asked Questions:
1. Under the following conditions, this system cannot
decode the file and the file cannot be play normally:
-The parameters of file, such as the pixel of picture,
code rate of audio and video file, sampling rate of
audio file, exceed the limit of the system;
-The format of file is not matched or the file is harmed.
Note:
The code rate this system supports does not
exceed 20Mbps.
2. Hot plug: Do not disconnection when the system is
reading or transmitting data, avoid damaging the
system or the device.
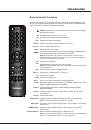
For the Natural Light function, you can also press the
button to turn on or off ,and press the
DEMO
button
to demonstrate:
Turns on or off the natural light function:
1. Press the
button to switch between
Natural Light
ON
and
Natural Light OFF
.
2. Press
Menu
or
Exit
to close the menu.
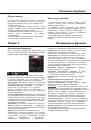
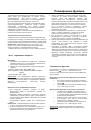
Demonstrate the natural light function:
1. Press the
DEMO
button to display the menu including
E Care
(Eyes Care)
,
E Saving (Energy Saving)
and
E Picture (Enhance Picture)
icons.
2. Press the left or right direction button to select an icon
and press the up direction or
OK
button to display the
corresponding menu.
3. Press
Menu
or
DEMO
to return or
Exit
to close the menu.
Special Functions
Note:
You are recommended to demonstrate the natural
light function in full screen mode.