www.timberk.com • Electric air conditioner
www.timberk.com • Electric air conditioner
14
15
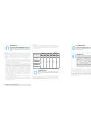
NOTE:
1.In the low temperature heating mode, the fan speed
was default to Auto and nonajusatable.
2.In the low temperature heating mode, «TURBO» and
«QUIET» can’t be set. If enter the low temperature
heating mode,the turbo and quiet function that started
before will be canceled. As well as when exit the low
temperature heating mode, it will not resume.
3.When exit from the low temperature heating mode,
the speed and temperature will turn into the original
condition before it started.
4.You can set up other function.
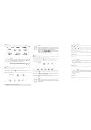
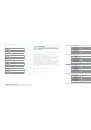
8. MAINTENANCE
• Before cleaning unplug the conditioner.
• Cleaning of the indoor unit and remote control board:
• Indoor unit and remote control board should be cleaned with a dry soft cloth.
• If the indoor unit is too unclean, moisten the cloth with cold water.
• It is prohibited to clean the remote control board with moist cloth.
• In order to avoid the damage of paint or details of the conditioner, do not
clean it with brushes and do not leave them on the surface of indoor unit.
• In order to avoid the damage of surface or deformation of the conditioner
details, do not clean it with petrol, solvents, cleaning powders or other
chemically active substances.
• Before a sustained interruption in the conditioner work:
• Turn the conditioner on for several hours in the FAN mode. It will allow you to
dry its inner cavities
• Unplug the conditioner. Remove the batteries from the remote control board.
• Checks before starting:
• Make sure that an air filter is installed.
• Make sure that air inlet and outlet grilles of the outdoor unit are not blocked
by foreign objects.
• Cleaning of air filter
• Air filter cleans the air entering the conditioner from dust and foreign
particles. If the filter is contaminated, the conditioner capacity decreases
sharply.
• If the conditioner is operated permanently, the filter should be cleaned once
per two weeks.
• If the conditioner is installed in a room with dusty atmosphere, then the air
filter should be cleaned more often.
• To remove the filter, open the indoor unit panel.
• Remove air filters. Clean the filter with a vacuum cleaner or rinse it in clean
water. If the filter is contaminated heavily, clean it with a soft brush and wash in
diluted washing solution, then dry it in a cool place.
• While cleaning the filter with the vacuum cleaner, hold it with contaminated
surface up. While washing the filter in water, hold it with contaminated surface
down.
• Do not dry the filter in the sun or near a fire.
• Set the air filter to initial position and close the panel.
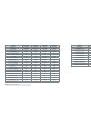
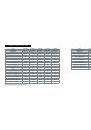
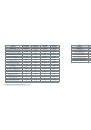
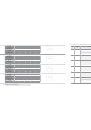
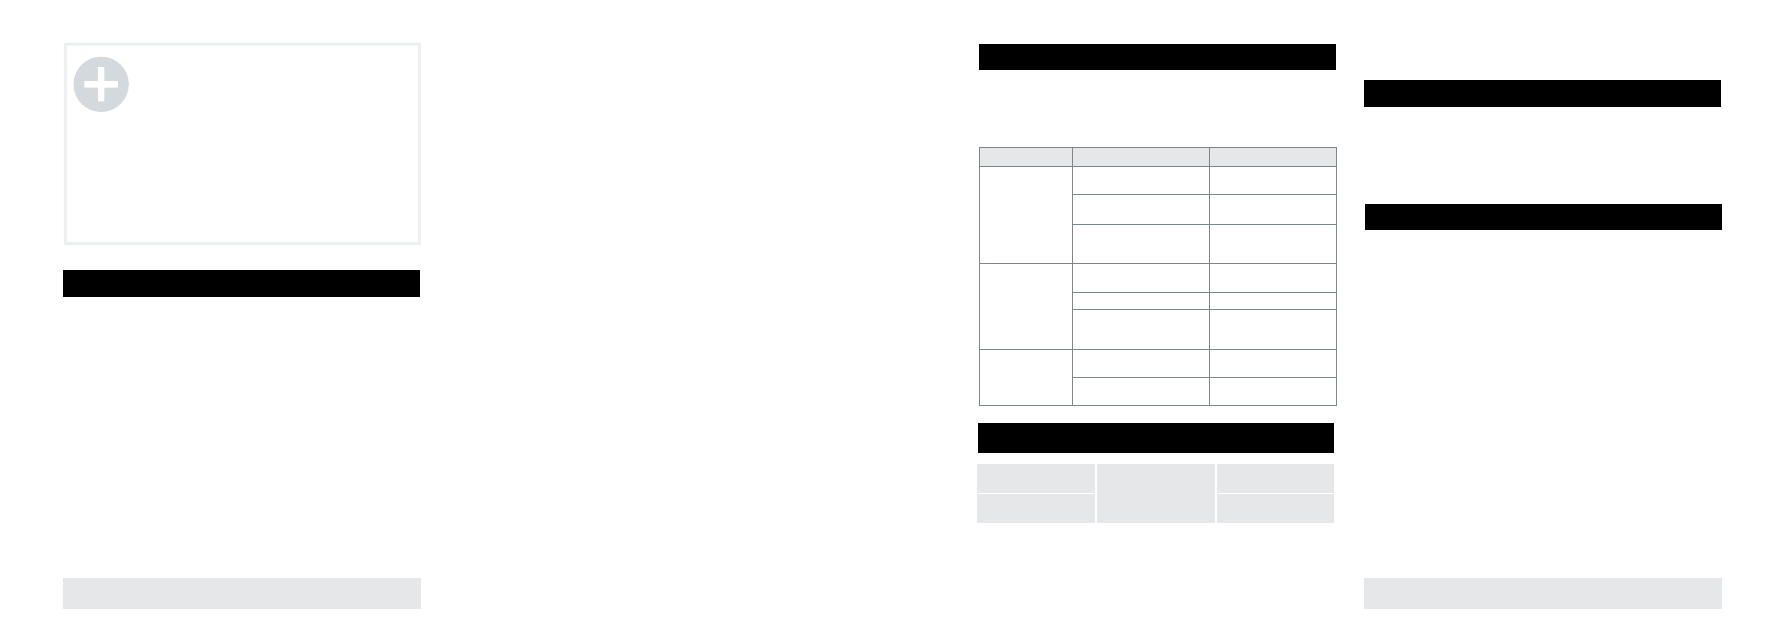
9. TROUBLESHOOTING
11.SERVICE LIFE
In case of emergency, please, use the troubleshooting methods shown in
tables. If it is impossible to solve problems with these methods, apply to
the service center.
Failures and their possible reasons:
12. UTILIZATION RULES
10. TRANSPORTATIOM AND STORAGE
We are exploring new technologies and we constantly improving the quality
of our products. That’s why specifications, design and accessories are
subject to change without any specific notice.
Service life of the appliance is 10 years provided that the respective
installation and operation rules are observed.
Date of the conditioner manufacture is shown in a serial number of the
device. For more details, please, ask a shop assistant.
* This product must have storage in dry, well-ventilated space of warehouse
at the temperature not lower than -30°C.
Temperature
requirements*
Humidity
requirements*
Transportation and
storage
From -30° to +50°
From 15% to 85%
(without a condensate)
Upon expiration of the service life, the appliance should be utilized in
accordance with norms, regulations and procedures effective in the place
of utilization.
Failure
Possible reason
Actions
The conditioner does
not work
Interruptions in power supply
Wait for restoration of power
supply
Batteries in the remote control
board are low
Replace the batteries
Time of tuming on is set by
the timer
Wait till the conditooner turns
on by the timer or cancel the
timer setting
Insufficient cooling or
heating capacity
The set air temperature is too
high or too low
Set the air temperature
correctly
The air filter is clogged with dust
Clean the air filter
Foreign objects block the air intel
and retum air grillages of the
outdoor unit
Remove foreign objects
The conditioner works,
but does not cool or
heat the room
A three-minute delay of
compressor tuming on
Wait a little
The air temperature is set
incorrectly
Set the temperature correctly