www.timberk.com • Electric air conditioner
www.timberk.com • Electric air conditioner
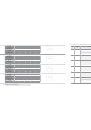
10
11
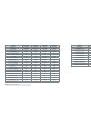
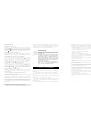
Fig. 5
Fig. 7
Fig. 6
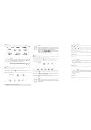
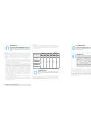
FAN button
Pressing this button can set fan speed circularly as: auto (AUTO), fan1( ),
fan2 ( ), fan3 ( ), fan4( ), fan5 ( ), infinite fan.
button
Press this button the up&down swing function can be started and canceled.
The remote controller defaults to static swing condition.
Press «MODE» button and « » button at the same time when remote
controller OFF to switch between simple swing and static swing.
In static swing condition, pressing button, the swing angle of up & down
louver changes as below:
button
Rotate button blinds left / right in this series do not used «Health» button
-to activate the mode in this series do not used
Press «MODE» button and «
» button at the same time at remote
controller OFF to switch between simple swing and static swing.
In static swing condition, pressing button, the swing angle of left & right
louver changes as below:
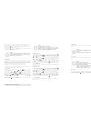
When selecting « » with remote controller, it’s auto swing. Vertical louver
of air conditioner will swing up&down automatically at the maximum angle.
When selecting «
» position swing. Vertical louver
of air conditioner will stop at that position as shown by the icon to swing.
When selecting « », it’s the circulating swing. Vertical louver of air conditioner
will swing circularly according to the angle as shown by the icon.
NOTE:
In AUTO speed, air conditioner will select proper fan
speed automatically according to ambient temperature.
Fan speed under dry mode is fan1.
After entering the infinite fan speed mode, users can
adjust the fan speed according to the button « » or « ».
NOTE:
When selecting « » with remote controller, it’s auto
swing. Horizontal louver of air conditioner will swing
up&down automatically at the maximum angle.
When selecting «
» with remote controller
swing. Horizontal louver of air conditioner will stop at that
position as shown by the icon to swing.
NOTE:
There is no this function for the units. If press this
button, the main unit will sound, but it also runs under
original status.
« » and « » button
Press « » or « » button once to increase or decrease 1
0
C of set
temperature.
Holding « » or « » button, set temperature on remote controller will
change quickly. On reseasing button after setting is finished, temperature
indicator on indoor unit will change accordingly. (Temperature can’t be
adjusted under auto mode)
When setting TIMER ON, TIMER OFF or CLOCK, press «+» or «-» button to
adjust time (Refer to CLOCK, TIMER ON, TIMER OFF buttons).
TURBO button
Press this button to turn on or turn off the TURBO function in cool heat
fan mode.
HEALTH button
Press this button to turn on or turn off the health function.
SLEEP button
Press this button to turn on or turn off the SLEEP function under cool heat
dry mode.
I FEEL button
Press this button to start I FEEL function and « » will be displayed on
the remote controller. After this function is set, the remote controller will
send the detected ambient temperature to the indoor unit and the unit
will automatically adjust the indoor temperature according to the detected
temperature. Press this button again to close I FEEL function and « »
will disappear.
TEMP button
By pressing this button, you can see indoor set temperature, indoor
ambient temperature or outdoor ambient temperature on indoor unit’s
display. The setting on remote controller is selected circularly as below:
NOTE:
Press «QUIET» or «FAN» button the unit will quit this
function.
This function is no use in auto mode or dry mode.
NOTE:
If there is no this function for units, If press this button,
the main unit will sound, but it also runs under original
status.
NOTE:
This function is off as defaulted after power on.
It will be cleared after changing mode.
It is no use under «FAN» mode and «AUTO» mode.
NOTE:
Please put the removte controller near and confirm the
unit can receive the remote code when this function is
set. Do not put the remote controller near the object of
high temperature or low temperature in order to avoid
detecting inaccurate ambient temperature.
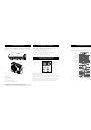
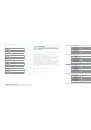
Fig. 8
No display
No display
No display