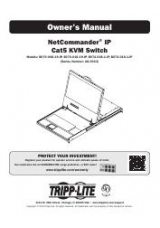
Инструкция для TRIPP LITE B072-008-1-IP, B070-016-19-IP, B072-016-1-IP, B070-008-19-IP

(скачивание инструкции бесплатно)
Формат файла: PDF
Доступность: Бесплатно как и все руководства на сайте. Без регистрации и SMS.
Дополнительно: Чтение инструкции онлайн
background image

1

Owner’s Manual

NetCommander

®

 IP  

Cat5 KVM Switch

Models: B070-008-19-IP, B070-016-19-IP, B072-008-1-IP, B072-016-1-IP 

(Series Number: AG-00C3)

1111 W. 35th Street, Chicago, IL 60609 USA • www.tripplite.com/support

Copyright © 2014 Tripp Lite. All rights reserved. All trademarks are the property of their respective owners.

PROTECT YOUR INVESTMENT!

Register your product for quicker service and ultimate peace of mind. 

You could also win an ISOBAR6ULTRA surge protector—a $50 value!

www.tripplite.com/warranty

1
2
3
4
5
6
7
8
9
10
11
12
13
14
15
16
17
18
19
20
21
22
23
24
25
26
27
28
29
30
31
32
33
34
35
36
37
38
39
40
41
42
43
44
45
46
47
48
49
50
51
52
53
54
55
56
57
58
Оглавление инструкции
  • Страница 1 из 59
    Owner’s Manual NetCommander® IP Cat5 KVM Switch Models: B070-008-19-IP, B070-016-19-IP, B072-008-1-IP, B072-016-1-IP (Series Number: AG-00C3) PROTECT YOUR INVESTMENT! Register your product for quicker service and ultimate peace of mind. You could also win an ISOBAR6ULTRA surge protector—a $50
  • Страница 2 из 59
    Table of Contents Legal Notice . . . . . . . . . . . . . . . . . . . . . . . . . . . 3 3. Conducting a Remote Session . . . . . . . . . . . 36 3.1 Starting a Remote Session . . . . . . . . . . . . . . . . . . . . 36 1. Product Overview . . . . . . . . . . . . . . . . . . . . . 3 3.2 Remote Session
  • Страница 3 из 59
    Legal Notice This manual and the software described in it are furnished under license, and may be used or copied only in accordance with the terms of such license. The content of this manual is provided for informational use only, and is subject to change without notice. It should not in and of
  • Страница 4 из 59
    1. Product Overview 1.2 Terminology The following table describes terms used in this guide. Term Definition Target Server The computer/server that is connected directly to the KVM, and which is accessed via the local console or by a Client Computer running a remote session. Client Computer A
  • Страница 5 из 59
    1. Product Overview • If an extension cord is used with this device, make sure that the total ampere rating of all products used on the cord does not exceed the extension cord ampere rating. Make sure that the total of all products plugged into the wall outlet does not exceed 15 amperes. • To help
  • Страница 6 из 59
    1. Product Overview 1.7 The NetCommander IP Unit Console KVM Switch Front View 6 1 2 3 4 6 5 7 1 Upper Handle – Pull to slide the console out; push to slide the console in. 2 19” LCD Screen – After sliding the console out, flip up the cover to access the LCD screen, keyboard and touchpad. 3 LCD
  • Страница 7 из 59
    1. Product Overview Console KVM Switch Rear View 4 6 RESET 3 1 2 5 1 Power Outlet – The power cord included with the console connects to the unit here. 2 Reset Button – Pressing this button for 10 seconds restores the system to its factory default settings. 3 Serial Ports 1 and 2 – The KVM features
  • Страница 8 из 59
    1. Product Overview Rackmount KVM Switch Rear View The NetCommander IP back panel is illustrated in the figure below. Note: The figure below shows the back panel for a B072-016-1-IP, but the back panel will be functionally the same for all models, with the only difference being the number of server
  • Страница 9 из 59
    1. Product Overview 1.9 Connecting the System The figure below illustrates the NetCommander IP system overview. Note: The figure below shows a B072-016-1-IP. The only difference in set up between models is the number of ports, and the lack of an external console on the B070-Series console KVMs. 1.
  • Страница 10 из 59
    1. Product Overview in the following sections. To set the IPv4 address via the local console OSD: 1. From the local console, press the left [Shift] key twice to open the OSD. 2. Press the [F2] key to open the Settings menu. 3. In the Settings menu, press the [Tab] key until the DHCP field is
  • Страница 11 из 59
    1. Product Overview 3. Upon installing the certificate or accepting the unrecognized certificate for the current session, the initial web page appears, and the Java application is launched. Before the installation completes, a security warning may appear stating that the connection to this website
  • Страница 12 из 59
    1. Product Overview 7. There are two LAN sections in the Device tab, one for IPv4 and one for IPv6. For IPv4, you have the options of automatically assigning an address via DHCP server (default) and manually assigning an address. For IPv6, you have the options of automatically assigning an address
  • Страница 13 из 59
    2. Web Configuration Interface The NetCommander IP can be accessed in two ways: locally via the local console OSD, or remotely via the Web Configuration Interface. This section of the manual details the Web Configuration Interface, which can be used to access the computer/servers and other devices
  • Страница 14 из 59
    2. Web Configuration Interface 5. Enter in your username and password, and press Enter. If this is the first time you are accessing the KVM, enter in the default username (admin) and password (access). The My Targets page of the Web Configuration Interface opens, showing the state of your unit, and
  • Страница 15 из 59
    2. Web Configuration Interface 2.3 My Targets Section The My Targets section of the Web Configuration Interface is the first page that is displayed upon logging into the KVM remotely. This section is where users remotely access the connected computers/servers and serial devices. When accessing the
  • Страница 16 из 59
    2. Web Configuration Interface The following table describes the columns found in the My Targets section Data Pane. Server Name The Server Name column displays all of the Target Servers and Serial devices that are accessible to the logged in account. The Server Name for each port can be changed in
  • Страница 17 из 59
    2. Web Configuration Interface Clicking on the Factory Restore icon will restore the KVM’s default settings, resetting all information that had been changed. The affected settings include network information, servers, switches, users, and passwords. You will be given the option of preserving the
  • Страница 18 из 59
    2. Web Configuration Interface In addition to the KVM firmware, you can upgrade the SIU firmware to take advantage of new features. 1. Download the firmware upgrade file from www.tripplite.com/support. 2. Save the firmware upgrade file on the Client Computer. 3. Login to the Web Configuration
  • Страница 19 из 59
    2. Web Configuration Interface 2.4.2 Backup/Restore Using the Backup/Restore function in the Configuration sections toolbar, you can back up all configuration data and restore it at a later date. To back up data: 1. In the toolbar, click on icon. The Backup/Restore Data page appears. 2. In the
  • Страница 20 из 59
    2. Web Configuration Interface To restore data: 1. In the toolbar, click on icon. The Backup/Restore Data page appears. 2. Click the Browse button next to the Restore data from file field, and then navigate to and select the KVM backup. 3. Click the Restore button to restore the KVM configuration.
  • Страница 21 из 59
    2. Web Configuration Interface 6. When the SSL certificate has been installed, a prompt appears to let you know the installation was successful, and that the KVM will be rebooted. Click the OK button to exit the Web Configuration Interface and reboot the KVM. 2.4.4 Device The Device tab in the
  • Страница 22 из 59
    2. Web Configuration Interface • Obtain DNS Server Address Automatically – When the DHCP mode checkbox is checked, this checkbox is also checked. When the Stateless or Static mode checkboxes are checked, this checkbox is deactivated, and you must manually enter a DNS Server address. • DNS Server –
  • Страница 23 из 59
    2. Web Configuration Interface To add an account: 1. Click on the Users tab in the Configuration section. The Users page opens and displays a list of existing accounts. 2. Click the Add button. The Add User page appears. 3. Type in a User Name and Password. The password must be at least six
  • Страница 24 из 59
    2. Web Configuration Interface To delete a User: 1. In the Users page, select an account from the list and click the Delete button. The Delete Selected User(s) confirmation page appears. Note: You cannot delete an Administrator who is logged onto the system. 2. Click Yes to delete the selected
  • Страница 25 из 59
    2. Web Configuration Interface 2.4.7 User Targets By default, administrators are allowed access to all servers. However, you must define the access rights of each user account to the following: • Target Access – To initiate a remote session for the corresponding port. • Virtual media access – To
  • Страница 26 из 59
    2. Web Configuration Interface 3. In PDU Name, type an appropriate name for the PDU you are adding. 4. The Type drop-down menu provides a list of PDUs that are supported by the NetCommander IP. Select your PDU from this list. Based on your selection, the number of PDU outlets is displayed in the
  • Страница 27 из 59
    2. Web Configuration Interface 2.4.9 Power Outlets Once a PDU is added to the KVM via the Power Devices section, you need to assign a NetCommander IP Target Server port to one of the ports on a PDU to be able to Power Cycle it, or turn its power Off/On. For Target Servers with dual power supplies,
  • Страница 28 из 59
    2. Web Configuration Interface 2.4.10 Serial Ports The Serial Ports page is where you configure the settings of the serial device(s) that you have connected to the KVM. (See the Serial Pinout section in this manual for the pinout information.) To configure the serial port settings: 1. From the
  • Страница 29 из 59
    2. Web Configuration Interface 2. In the Account Blocking section: • In the Block after field, enter in the number of unsuccessful login attempts that will be allowed in a given time period. This time period is set in the attempts within (hr:min) field. Enter into this field the time in hours and
  • Страница 30 из 59
    2. Web Configuration Interface 2.4.12 Authentication The Authentication page allows you to set up remote authentication via RADIUS and/or LDAP/S server. From the Configuration section, select the Authentication tab to open this page. Enable Authentication Methods – The section at the top of the
  • Страница 31 из 59
    2. Web Configuration Interface • To add an LDAP/S server to the list, click on the Add button to bring up the Add LDAP Server screen. • Enter the IPv4, IPv6, or Host address for your LDAP/S server in the corresponding field. • Select the Port number that is used by the server. The default port
  • Страница 32 из 59
    2. Web Configuration Interface • Search Base – The Search Base field should be populated with the location in the Active Directory in which the search is taking place. • Search Password – The Search Password field should be populated with the password for the user account that is being used to
  • Страница 33 из 59
    2. Web Configuration Interface Access Rights Permission String – In order for access rights to be assigned in User or Group authentication mode, a permission string must be entered into the directory attribute that is assigned to each User or Group. The name of this attribute must be entered into
  • Страница 34 из 59
    2. Web Configuration Interface • Enter and re-enter a shared secret according to the one specified in the RADIUS server. • Click the OK button to add the server to the list. • Servers can be edited or deleted by highlighting them in the list and clicking on Edit or Delete. They can be re-ordered
  • Страница 35 из 59
    2. Web Configuration Interface 2. In the New Password field, type in a new password, according to the Password Policy set in the Security page of the Configuration section (see the Security section in this manual for details). 3. In the Confirm Password, retype the new password. 4. Click . The new
  • Страница 36 из 59
    3. Conducting a Remote Session A remote session allows accounts IP access to computer/servers and serial devices connected to the KVM. In a remote session, accounts can access computers/servers, power cycle or turn power to a Target Server Off/On, virtually mount an .iso file, and configure the
  • Страница 37 из 59
    3. Conducting a Remote Session 3.2 Remote Session Toolbar The NetCommander IP provides a toolbar that allows a remote session to be manipulated. The features on the toolbar allow you to toggle between accessible ports, adjust the video settings of the remote session, align the local and remote
  • Страница 38 из 59
    3. Conducting a Remote Session • Unmount ISO – The Unmount ISO feature disconnects an ISO virtual media file that has already been mounted. To unmount an ISO file: 1. Click on the action. icon in the remote session toolbar, and choose the Unmount ISO option. A prompt appears asking you to confirm
  • Страница 39 из 59
    3. Conducting a Remote Session 4. In the Exclusivity section, check the Exclusive Session checkbox to prevent other accounts from accessing the Target Server port at the same time. By default, this checkbox is unchecked, and a remote session is initiated in Share Mode, which allows up to 5 accounts
  • Страница 40 из 59
    3. Conducting a Remote Session To manually adjust the video settings: 1. Click on the icon in the remote session toolbar, and choose the Advanced option. The Advanced window appears. 2. In the Brightness & Contrast section of the Advanced screen, use the corresponding scales to adjust the
  • Страница 41 из 59
    3. Conducting a Remote Session 3.2.5 Keys – Clicking on the Keys icon will display a list of predefined key sequences (e.g. Ctrl + Alt + Delete) that can be performed on the Target Server. By default, performing these key sequences on the Client Computer’s keyboard sends the command to the Client
  • Страница 42 из 59
    3. Conducting a Remote Session To record a keyboard sequence: 1. Open the Special Key Manager window and click the Record New Custom Key button. The Record New Custom Key macro screen appears. 2. In the Label field, type a name for the new key sequence. 3. Click the Start Recording button. 4. On
  • Страница 43 из 59
    3. Conducting a Remote Session 3.2.6 Mouse – Clicking on the Mouse icon allows you to select the Mouse Settings mode being used, as well as to manually adjust settings related to mouse synchronization. The following section describes the settings found via the Mouse icon and how to use them, as
  • Страница 44 из 59
    3. Conducting a Remote Session To configure settings in Relative Mouse Position, OS-Specific mode: 1. Click on the icon in the remote session toolbar, and choose the Mouse Settings option. The Mouse Settings window appears. 2. Check the Relative Mouse Position, OS-Specific checkbox. Additional
  • Страница 45 из 59
    3. Conducting a Remote Session To align the mouse pointers: Note: The Align function is only available in the Mouse drop-down menu when the Mouse Settings mode is set to Relative Mouse Position. When logging into the KVM or accessing a new port, the local and remote mouse pointers may not be
  • Страница 46 из 59
    3. Conducting a Remote Session 3.2.7 Server/Serial – Clicking on the Server/Serial icon displays a drop-down list of ports that are accessible to the currently logged-in account. Simply select a port to access it. 3.2.8 Full Screen – Clicking on the Full Screen icon (or pressing [Alt] + [Enter])
  • Страница 47 из 59
    4. Local Console This chapter explains how to operate the NetCommander IP via the local console. The local console allows you to access connected computer/servers, configure the KVM’s network settings, and to configure some more basic settings specific to local access. To display the OSD: 1. From
  • Страница 48 из 59
    4. Local Console 4.3 Power Management As with the Web Configuration Interface, you are able to perform power management functions via the local console. The power management functions available to you are described below. Note: In order to perform power management actions on a port, it must be
  • Страница 49 из 59
    4. Local Console To set the IPv4 address via the local console OSD: 1. From the local console, press the left [Shift] key twice to open the OSD. 2. Press the [F2] key to open the Settings menu. 3. In the Settings menu, press the [Tab] key until the DHCP field is highlighted. Press the [Spacebar]
  • Страница 50 из 59
    4. Local Console Changing the Hotkey: By default, the hotkey combination used to open the OSD is [Shift] + [Shift]. You can change this hotkey in the F2 – SETTING menu to use any of the following. Note: The left [Shift] hotkey must be used; the right [Shift] key will not work. If you set the hotkey
  • Страница 51 из 59
    5. Serial Port Pinout Note: When connecting a Cisco device, use Cisco rolled cable. Serial Port 1: Serial Port 2: Pin 1: RTS Pin 1: RTS Pin 2: DTR Pin 2: DTR Pin 3: TX Pin 3: TX Pin 4: GND Pin 4: GND Pin 5: GND Pin 5: GND Pin 6: RX Pin 6: RX Pin 7: DSR (pins 7 and pin 2 are shorted inside the unit)
  • Страница 52 из 59
    6. Security Certificate Installation 3. Click on the Certificate error message to display the Certificate Invalid prompt. 4. Click on the View certificates option at the bottom of the prompt to redirect to the Certificate screen. 52
  • Страница 53 из 59
    6. Security Certificate Installation 5. Click on the Install Certificate button to bring up the Certificate Import Wizard, then click the Next button. 6. Select the option to Place all certificates in the following store, then click the Browse button. Highlight the Trusted Root Certification
  • Страница 54 из 59
    6. Security Certificate Installation Java Security The following steps apply to Internet Explorer 9 and Java version 1.7.0_45, but may also be used with other Web browsers and Java versions. Note: You may need to run Internet Explorer as an Administrator to install the security certificate. 1. Open
  • Страница 55 из 59
    6. Security Certificate Installation 3. In the Details tab page, click on the Copy to File button. The Certificate Export Wizard appears. 4. Click Next, accepting the default values until you get to the File to Export page. 5. Click the Browse button to navigate the location you want to save the
  • Страница 56 из 59
    6. Security Certificate Installation 6. Click the Next button, followed by the Finish button on the next page to complete export of the KVM certificate. 7. Navigate to your computer’s Control Panel window and open the Java Control Panel. 8. Click on the Security tab, then click the Manage
  • Страница 57 из 59
    7. Technical Specifications Specification Description Operating systems Target Server – Windows and Linux Client computer – Windows with Internet Explorer, Firefox, or Chrome browsers. Linux with Firefox or Chrome browsers. Max Resolution 1920 x 1080 (Local console monitor on B070- Series supports
  • Страница 58 из 59
    8. Video Resolution and Refresh Rates Hz 56 60 x 640x480 65 66 70 72 x x x x 75 x x 76 x x x 1024x768 x 85 86 x x 720x400 800x600 73 x x x x x x x x x 1152x864 x 1152x900 1280x720 x 1280x768 x 1280x960 x 1280x1024 x 1600x1200 x 1920x1080 x 1920x1200 x x x x x x x x Note: The local console monitor
  • Страница 59 из 59