Инструкция для Defort DPC-2220

(скачивание инструкции бесплатно)
Формат файла: PDF
Доступность: Бесплатно как и все руководства на сайте. Без регистрации и SMS.
Дополнительно: Чтение инструкции онлайн
background image

17

GB

Basic safety rules

Look around you:
•  To ensure that people, animals or other things can-

not affect your control of the machine.

•  To make sure that none of the above might come 

within reach of your saw or be injured by falling 
trees.

CAUTION! Follow the instructions above, but 
do not use a chain saw in a situation where you 
cannot call for help in case of an accident.

Do not use the machine in bad weather, such as dense 
fog, heavy rain, strong wind, intense cold, etc. 

Working

in bad weather is tiring and often brings added risks, 
such as icy ground, unpredictable felling direction, etc.
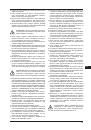
3 Take great care when removing small branches and 
avoid cutting bushes (i.e. cutting many small branches 
at the same time). Small branches can be grabbed by 
the chain and thrown back at you, causing serious in-
jury.
4 Take great care when cutting a tree that is in ten-
sion. A tree that is in tension may spring back to its 
normal position before or after being cut. If you posi-
tion yourself incorrectly or make the cut in the wrong 
place the tree may hit you or the machine and cause 
you to lose control. Both situations can cause serious 
personal injury.
5 Before moving your chain saw switch off the engine 
and lock the chain using the chain brake. Carry the 
chain saw with the bar and chain pointing backwards. 
Fit a guard to the bar before transporting the chain saw 
or carrying it for any distance.
6 When you put the chain saw on the ground, lock the 
saw chain using the chain brake and ensure you have 
a constant view of the machine. Switch the engine off 
before leaving your chain saw for any length of time.

WARNING! Sometimes chips get stuck in the 
clutch cover causing the chain to jam. Always 
stop the engine before cleaning.

GENERAL RULES

1 If you understand what kickback is and how it hap-
pens then you can reduce or eliminate the element of 
surprise. By being prepared you reduce the risk.
Kickback is usually quite mild, but it can sometimes be 
very sudden and violent.
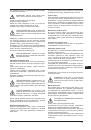
2 Always hold the chain saw 

fi

 rmly with your right hand 

on the rear handle and your left hand on the front han-
dle. Wrap your 

fi

 ngers and thumbs around the handles. 

You should use this grip whether you are right-handed 
or left-handed. This grip minimises the effect of kick-
back and lets you keep the chain saw under control. Do 
not let go of the handles!
3 Most kickback accidents happen during limbing. 
Make sure you are standing 

fi

 rmly and that there is 

nothing in the way that might make you trip or lose your 
balance.

Warm engine

Use the same procedure as for starting a cold engine 
but without setting the choke control in the choke posi-
tion. Set the throttle to the start position by pulling out 
the blue choke control to the choke position and then 
pushing it in again.

WARNING! Long term inhalation of the en-
gine’s exhaust fumes, chain oil mist and dust 
from sawdust can represent a health risk.

•  Never start a chain saw unless the bar, chain and 

all covers are 

fi

 tted correctly. See instructions under 

the heading Assembly. Without a bar and chain at-
tached to the chain saw the clutch can come loose 
and cause serious injury.

•  The chain brake should be activated when starting. 

See instructions under the heading Start and stop. 
Do not drop start. This method is very dangerous 
because you may lose control of the saw.

•  Never start the machine indoors. Exhaust fumes can 

be dangerous if inhaled.

•  Observe your surroundings and make sure that 

there is no risk of people or animals coming into 
contact with the cutting equipment.

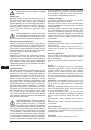
•  Always hold the saw with both hands. The right hand 

should be on the rear handle, and the left hand on 
the front handle. All people, whether right or left 
handed, should use this grip. Use a 

fi

 rm grip with 

thumbs and 

fi

 ngers encircling the chain saw han-

dles.

Stopping

Stop the engine by pressing down the stop button.

WORKING TECHNIQUES

BEFORE USE:

1  Check that the chain brake works correctly and is 

not damaged.

2  Check that the rear right hand guard is not dam-

aged.

3  Check that the throttle lockout works correctly and 

is not damaged.

4  Check that the stop switch works correctly and is 

not damaged.

5  Check that all handles are free from oil.
6  Check that the anti vibration system works and is 

not damaged.

7  Check that the muf

fl

 er is securely attached and not 

damaged.

8  Check that all parts of the chain saw are tightened 

correctly and that they are not damaged or miss-
ing. 

9  Check that the chain catcher is in place and not 

damaged.

10  Check the chain tension.

1
2
3
4
5
6
7
8
9
10
11
12
13
14
15
16
17
18
19
20
21
22
23
24
25
26
27
28
29
30
31
32
33
34
35
36
37
38
39
40
41
42
43
44
Оглавление инструкции
  • Страница 1 из 45
    DPC-2220 98291902 Bedienungsanleitung..........................4 User’s Manual ..................................12 Mode d’emploi ..................................20 Инструкция по эксплуатации .........28
  • Страница 2 из 45
     8 TUSPLF  NJO  DN  -  -  NN  QDT  LH
  • Страница 3 из 45
    Starting 1 2 3 FULL 4 6 5 OFF Stopping
  • Страница 4 из 45
    DE DE Benzin Kettensäge MASSNAHMEN VOR DER BENUTZUNG EINER NEUEN MOTORSÄGE DIE BEDIENUNGSANLEITUNG AUFMERKSAM DURCHLESEN. WARNUNG! Unter keinen Umständen darf die ursprüngliche Konstruktion des Gerätes ohne Genehmigung des Herstellers geändert werden. Es ist immer Originalzubehör zu verwenden.
  • Страница 5 из 45
    verursacht mehr Vibrationen als das Sägen in weichem Holz (meist Nadelbäume). Durch das Sägen mit einer falschen, ungeschärften oder falsch geschärften Schneidausrüstung werden die Vibrationen erhöht. WARNUNG! Personen mit Blutkreislaufstörungen, die zu oft Vibrationen ausgesetzt werden, laufen
  • Страница 6 из 45
    DE geschärft sein. Wir empfehlen, den Tiefenbegrenzerabstand nach jeder dritten Sägekettenschärfung zu justieren. ACHTUNG! Diese Empfehlung setzt voraus, dass die Länge der Schneidezähne nicht unnormal verkürzt worden ist. • Zur Justierung des Tiefenbegrenzerabstands sind eine Flachfeile und eine
  • Страница 7 из 45
    stets Handschuhe tragen, um Verletzungen vorzubeugen. Kontrollieren, dass die Kettenbremse nicht in ausgelöster Position ist, indem der Handschutz der Kettenbremse gegen den vorderen Griff geführt wird. Die Schienenmuttern lösen und den Kupplungsdeckel (Kettenbremse) abnehmen. Den Transportschutz
  • Страница 8 из 45
    DE Den Tankdeckel nach dem Tanken wieder sorgfältig zudrehen. Das Gerät zum Starten immer von der Auftankstelle entfernen. Um den Tankdeckel herum abwischen. Kraftstoff- und Kettenöltank regelmäßig reinigen. Den Kraftstofffilter mindestens einmal pro Jahr auswechseln. Verunreinigungen im Tank
  • Страница 9 из 45
    Säge befinden sich vereinfachte, illustrierte Schritt-fürSchritt-Starthinweise. GRUNDLEGENDE SICHERHEITSVORSCHRIFTEN DE Startvorgang wie bei kaltem Motor, der Chokehebel wird jedoch nicht in Choke-Lage geführt. Den Gashebel in Startposition bringen, indem der blaue Hebel in Choke- Lage geführt und
  • Страница 10 из 45
    DE greifen. Durch diesen Griff kann man die Rückschlagkraft am besten verringern und gleichzeitig die Kontrolle über die Motorsäge behalten. Die Handgriffe nicht loslassen! 3 Die meisten Rückschlagunfälle ereignen sich beim Entasten. Der Anwender hat dafür zu sorgen, dass er fest und sicher steht
  • Страница 11 из 45
    Tagliche Wartungfalle 5-10 h) DE Wöchentliche Wartungfalle 10-25 h) Monatliche Wartungfalle 25-40 h) Das Gerät äußerlich reinigen. Die Startvorrichtung, ihr Startseil und die Rückzugfeder kontrollieren. Bremsband an der Kettenbremse auf Verschleiß kontrollieren. Austauschen, wenn weniger als 0,6 mm
  • Страница 12 из 45
    CHAIN BRAKE AND FRONT HAND GUARD GB Petrol chainsaw GENERAL SAFETY PRECAUTIONS Before using a new chain saw please read this manual carefully. WARNING! Under no circumstances may the design of the machine be modified without the permission of the manufacturer. Always use genuine accessories.
  • Страница 13 из 45
    WARNING! Overexposure to vibration can lead to circulatory damage or nerve damage in people who have impaired circulation. Contact your doctor if you experience symptoms of overexposure to vibration. Such symptoms include numbness, loss of feeling, tingling, pricking, pain, loss of strength,
  • Страница 14 из 45
    ADJUSTMENT OF DEPTH GAUGE SETTING GB • The cutting teeth should be newly sharpened before adjusting the depth gauge setting. We recommend that you adjust the depth gauge setting every third time you sharpen the cutting teeth. NOTE! This recommendation assumes that the length of the cutting teeth is
  • Страница 15 из 45
    ASSEMBLY FITTING THE BAR AND CHAIN WARNING! Switch off the engine before carrying out any checks or maintenance. The stop switch automatically returns to the start position. In order to prevent unintentional starting, the spark plug cap must be removed from the spark plug when assembling, checking
  • Страница 16 из 45
    GB Clean the area around the fuel cap. Clean the fuel and chain oil tanks regularly. The fuel filter must be replaced at least once a year. Contamination in the tanks causes malfunction. Make sure the fuel is well mixed by shaking the container before refuelling. The capacities of the chain oil
  • Страница 17 из 45
    Warm engine Use the same procedure as for starting a cold engine but without setting the choke control in the choke position. Set the throttle to the start position by pulling out the blue choke control to the choke position and then pushing it in again. WARNING! Long term inhalation of the
  • Страница 18 из 45
    GB Lack of concentration can lead to kickback if the kickback zone of the bar accidentally touches a branch, nearby tree or some other object. Have control over the workpiece. If the pieces you intend to cut are small and light, they can jam in the saw chain and be thrown towards you. This is not
  • Страница 19 из 45
    Daily maintenance (Every 5-10 h) Weekly malntenance (Every 10-25 h) Monthly maintenance (Every 25-40 h) Clean the outside of the machine. Check the starter, the starter cord and the recoil spring. Check the brake band on the chain brake for wear. Replace when less than 0.6 mm (0,024 inch) remains
  • Страница 20 из 45
    FREIN DE CHAÎNE AVEC ARCEAU PROTECTEUR Tronçonneuse d'essence FR MESURES À PRENDRE AVANT DE METTRE EN USAGE UNE TRONÇONNEUSE NEUVE Lisez attentivement ce manuel d’utilisation. Une exposition prolongée au bruit risque de causer des lésions auditives permanentes. Toujours utiliser des protecteurs
  • Страница 21 из 45
    De tels symptômes peuvent être: engourdissement, perte de sensibilité, chatouillements, picotements, douleur, faiblesse musculaire, décoloration ou modification épidermique. Ces symptômes affectent généralement les doigts, les mains ou les poignets. Ces symptômes peuvent être accentués par le
  • Страница 22 из 45
    FR • La partie coupante de la chaîne consiste en un maillon coupant qui comporte une dent et un limiteur d’épaisseur de copeau. La distance verticale entre ces éléments détermine la profondeur de coupe. Quatre dimensions doivent être prises en compte lors de l’affûtage d’une dent. 1 Angle
  • Страница 23 из 45
    être remplacé en même temps que la chaîne. Contrôle de l’usure de l’équipement de coupe Vérifier quotidiennement l’état de la chaîne et s’assurer: • Que les rivets et les maillons ne comportent pas de fissures. • Que la chaîne n’est pas raide. • Que les rivets et les maillons ne sont pas
  • Страница 24 из 45
    HUILE POUR CHAÎNE FR • Il est recommandé d’utiliser une huile spéciale (huile pour chaîne) possédant de bonnes qualités d’adhérence pour la lubrification. • Ne jamais utiliser d’huile usagée. Ceci endommagerait la pompe à huile, le guide-chaîne et la chaîne. • Il est important d’utiliser une huile
  • Страница 25 из 45
    Démarrage Saisissez la poignée avant de la main gauche. Maintenez la tronçonneuse au sol en plaçant votre pied droit dans la poignée arrière. 3. Saisissez la poignée du lanceur de la main droite, tirez la corde du lanceur lentement jusqu’à sentir une résistance (les cliquets se mettent en prise).
  • Страница 26 из 45
    FR AVERTISSEMENT! Des copeaux se coincent parfois dans le carter de l'embrayage, ce qui bloque la chaîne. Arrêtez toujours le moteur avant le nettoyage. du nez se trouve en contact avec l’arbre, un rebond peut se produire. Le tronçonnage avec la partie inférieure de la chaîne, c’est à dire par
  • Страница 27 из 45
    Tagliche Wartungfalle 5-10 h) Wöchentliche Wartungfalle 10-25 h) Monatliche Wartungfalle 25-40 h) Das Gerät äußerlich reinigen. Die Startvorrichtung, ihr Startseil und die Rückzugfeder kontrollieren. Bremsband an der Kettenbremse auf Verschleiß kontrollieren. Austauschen, wenn weniger als 0,6 mm an
  • Страница 28 из 45
    Пила бензиновая КОМПЛЕКТАЦИЯ Пила бензиновая. Шина. Цепь пильная. Защитный кожух шины. Ёмкость с маслом для цепи Ключ универсальный. ТЕХНИЧЕСКИЕ ХАРАКТЕРИСТИКИ RU Рабочий объем двигателя, см 50,0 Скорость на холостом ходу, об/мин 8000 Тип двигателя 2-тактный Свеча зажигания Champion RCJ7Y Зазор
  • Страница 29 из 45
    ● Перед запуском оператор должен принять устойчивое положение. ● Пилу следует запускать только в предусмотренном инструкцией по обслуживанию порядке. Иной способ запуска недопустим. ● При запуске следует обеспечить пиле надежную опору и крепко ее удерживать. Как полотно цепи, так и сама цепь не
  • Страница 30 из 45
    ● Следует обращать особое внимание на ветви, находящиеся в состоянии натяжения. Свободно висящие ветви не следует перерезать снизу. ● Нельзя выполнять обрезание сучьев, стоя на стволе. Работу по пилению деревьев можно начинать, только убедившись, что: 1. в зоне валки (падения деревьев) нет
  • Страница 31 из 45
    ник провода высокого напряжения. Всегда надевайте защитные перчатки! Продолжая держать шину поднятой, затяните предохранительную гайку универсальным ключом. ВНИМАНИЕ! Цепную пилу можно запускать только после ее полной сборки. Тормоз цепи Пилы оснащены инерционным тормозом цепи. Тормоз цепи
  • Страница 32 из 45
    ИЗБЕГАЙТЕ КОНТАКТА МАСЛА С КОЖЕЙ И ГЛАЗАМИ Смазка цепи Во время работы в масляном баке должно быть достаточное количество масла, чтобы обеспечить хорошую смазку цепи. Одноразовое наполнение хватает примерно на полчаса непрерывной работы. Для обеспечения безотказной работы масляного насоса постоянно
  • Страница 33 из 45
    ВНИМАНИЕ! Оптимальная производительность достигается при правильно отрегулированном карбюраторе. Для регулировки карбюратора, которую во время гарантийного срока должен вьшолнять специалист, двигатель должен быть разогрет и воздушный фильтр должен быть чистым. Вставьте вкладку обратно в необходимой
  • Страница 34 из 45
    Сначала необходимо заточить самый короткий резец. Длина этого резца после заточки является шаблоном для всех остальных резцов пилы. Всегда ведите напильник горизонтально (под углом 90° к шине). Держатель напильника обеспечивает его правильное проведение. На нем обозначен правильный угол заточки 30°
  • Страница 35 из 45
    6. ПЕРЕЧЕНЬ РАБОТ ПО ПЕРИОДИЧЕСКОМУ ОБСЛУЖИВАНИЮ Чтобы обеспечить долговременное использование и предотвратить повреждения, следует регулярно выполнять описанные ниже операции по обслуживанию изделия. Если периодический ремонт не будет выполняться регулярно и согласно с инструк- циями, гарантия на
  • Страница 36 из 45
    НЕИСПРАВНОСТИ И ИХ УСТРАНЕНИЕ Неисправность Система Наблюдение Причина Цепь не передвигается Тормоз цепи Двигатель работает Включенный тормоз цепи Система зажигания Запальная искра Неисправность в системе топливозаправки, системе сжатия или механическая неисправность. Система зажигания Отсутствие
  • Страница 37 из 45
    37
  • Страница 38 из 45
    Exploded view DPC-2220 38
  • Страница 39 из 45
    Spare parts list DPC-2220 No. 18 64 71 127 130 132 133 134 135 136 146 155 182 183 Part Name Reel ignition Oil pump Cluth drum Crankshaft Bearing Piston Piston Pin O-ring Gasket Cylinder Carburator Gasket Starter Starter assy (pos. 2,3,4,5,6,7,8,9,10,11,12,13) Clutch (pos. 72,73,74,75) 39
  • Страница 40 из 45
    DE KONFORMITÄTSERKLÄRUNG Wir erklären in alleiniger Verantwortung, daß dieses Produkt mit den folgenden Normen oder normativen Dokumenten übereinstimmt: EN ISO 12100-1; EN ISO 12100-2:2003; EN ISO 11681-2:2006 gemäß den Bestimmungen der Richtlinien 2006/42/ЕG, 2006/95/ЕG, 2004/108/ЕGС.
  • Страница 41 из 45
  • Страница 42 из 45
  • Страница 43 из 45
  • Страница 44 из 45
  • Страница 45 из 45