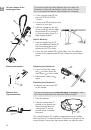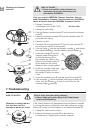
3. Assembly
1. Undo the knots in the cutting
filaments
1
.
2.
1
Fit the guard
2
vertically onto
the cutting head
3
and
2
turn 180° (bayonet fitting) until
the connection clicks into place.
When doing this the cutting
filaments must not get trapped.
1. Unscrew the orange screw
cover
4
anti-clockwise.
2. Remove grip holder
6
.
3. Fit the handle
5
.
The handle
with the start button
J
must be
on the right hand side in the
working position.
4. Fit the grip holder
6
onto the
handle.
5. Screw the orange screw
cover
4
clockwise securely
to fix the handle
5
.
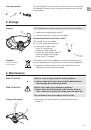
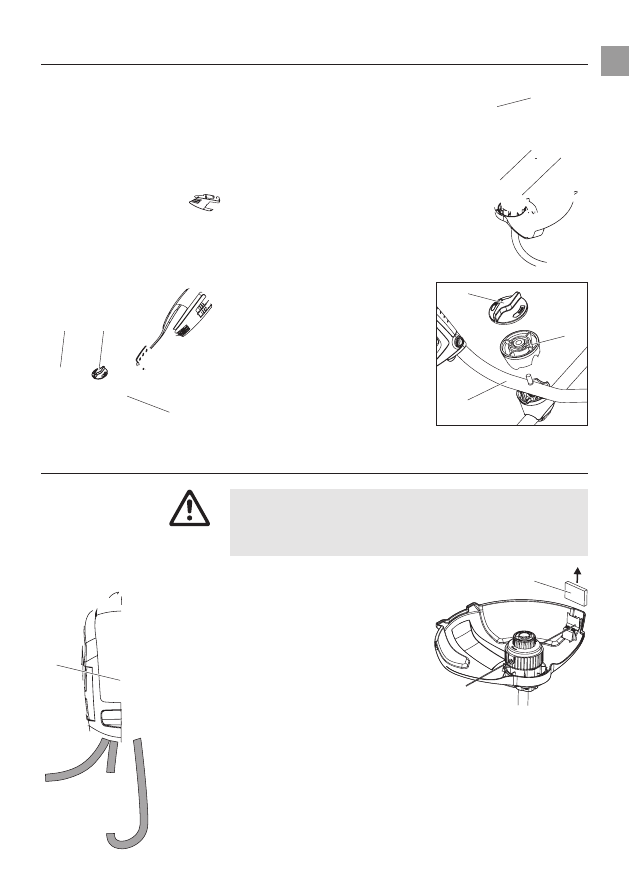
4. Operation
Risk of injury if the Turbotrimmer does not switch off when
you release the start button.
V
Never bypass the safety devices or switches (e.g. by
tying the safety lock to the handle).
1. Remove the orange blade
cover
8
.
2. Insert the extension cable
9
into the cable lock
0
on the
upper part of the trimmer
A
.
3. Plug the plug
B
of the trimmer
into the socket
C
of the extension
cable.
4. Plug the extension cable into
a 230 V mains power supply.
13
GB
Fitting the guard :
RISK OF INJURY !
Connecting the Turbotrimmer :
ProCut 1000
Fitting the handle :
2
3
1
4
6
5
8
4
J
5