GB 5
GB 4
BEFORE THE FIRST WASH CYCLE
To remove any residual water used in testing by the
manufacturer, we recommend that you carry out a
short wash cycle without laundry.
1. Open the tap.
2. Close the drum flaps.
3. Add a small amount of detergent (maximum
1/3 of the quantity the detergent manufacturer
recommends for lightly soiled laundry) to the main
wash chamber
of the detergent dispenser.
4. Close the lid.
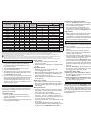
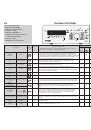
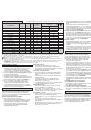
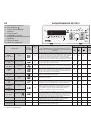
5. Select and start programme “Synthetics” at 60°C
(see separate the programme chart).
PREPARATION OF THE LAUNDRY
Sort the laundry
1. Sort the laundry according to…
• Type of fabric / care label symbol
Cottons, mixed fibres, easy care/synthetics, wool,
handwash items.
• Colour
Separate whites and coloureds. Wash new
coloured items separately.
• Size
Wash items of different sizes in the same load to
improve washing efficiency and distribution in the
drum.
• Fabric delicacy
Wash delicate articles separately: use a special
programme for Pure New Wool
, curtains and
other delicates. Always remove curtain glides or
wash curtains with the glides inside a cotton bag.
Use the special programme for handwash fabrics.
Wash stockings, belts and other small items or
articles with hooks (e.g. bras) in special cotton
bags for washing machines or in zipped pillow
cases.
2. Empty pockets
Coins, safety pins and similar items can damage
your laundry as well as the washing machine’s
drum and tub.
3. Fasteners
Close zips and fasten buttons or hooks; loose belts
or ribbons should be tied together.
Stain remwoval
• Blood, milk, egg and other organic substances are
generally removed by the enzyme phase of the
programme.
• To remove red wine, coffee, tea, grass and
fruitstains etc. add a stain remover to the main
wash chamber
of the detergent dispenser.
• Particularly stubborn stains should be treated
before the wash.
Dyeing and bleaching
• Only use dyes and bleaches that are suitable
forwashing machines.
• Follow the manufacturer’s instructions.
• Plastic and rubber parts of the machine may be
stained by dyes or bleaches.
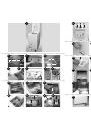
Loading the laundry
1. Open the machine lid by pulling it upwards.
2. Open the drum
-
by pushing the drum flap release (picture
10,11);
models as shown on picture
10 have a fixed drum
flap release which will not compress when pushed.
-
by holding the rear drum flap, sliding back the
slider into arrow direction and pushing the front
flap towards the inside of the drum until the closing
mechanism releases (picture
12).
3. Place the items of laundry into the drum one by
one. Do not exceed the maximum load of the
programmes indicated in the separate programme
chart.
-
Overloading the machine will result in
unsatisfactory washing results and creased
laundry.
-
Take care that the laundry does not overhang the
drum; if this is the case, push the laundry down
into the drum so that there is enough free space
to close the drum flaps properly.
-
Do not use the flaps to push the laundry into the
drum.
4. To close the drum, hold both flaps in the middle
again (picture
13), the rear flap over the front flap.
ATTENTION: make sure that the drum flaps are
properly locked - depending on the model:
-
all metal hooks must be properly hooked inside
the rear door flap - see picture
14.
-
all metal hooks must be properly hooked inside
the rear door flap, and the button must overlap
the edge of the rear door flap see picture
15.
-
the slider of the front flap must slightly overlap
the rear flap - see picture
16.
Check that no laundry gets stuck between the flaps,
or between flaps and drum.
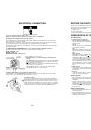
Do not use extension leads or multi sockets.
Electrical connections must be made in accordance with local regulations.
1) Warning - this washing machine must be earthed
This washing machine is normally supplied with a mains lead having a plug fitted in the factory which has
been checked for correct earth continuity.
If the fitted plug is not suitable for your socket outlet, or if the machine’s mains lead is not fitted with a plug,
you should fit a suitable new, good quality plug by following the instructions in (2) below.
Any unsuitable plug should be cut off and disposed of in order to avoid a possible shock hazard should it be
inserted into a socket.
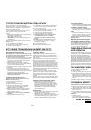
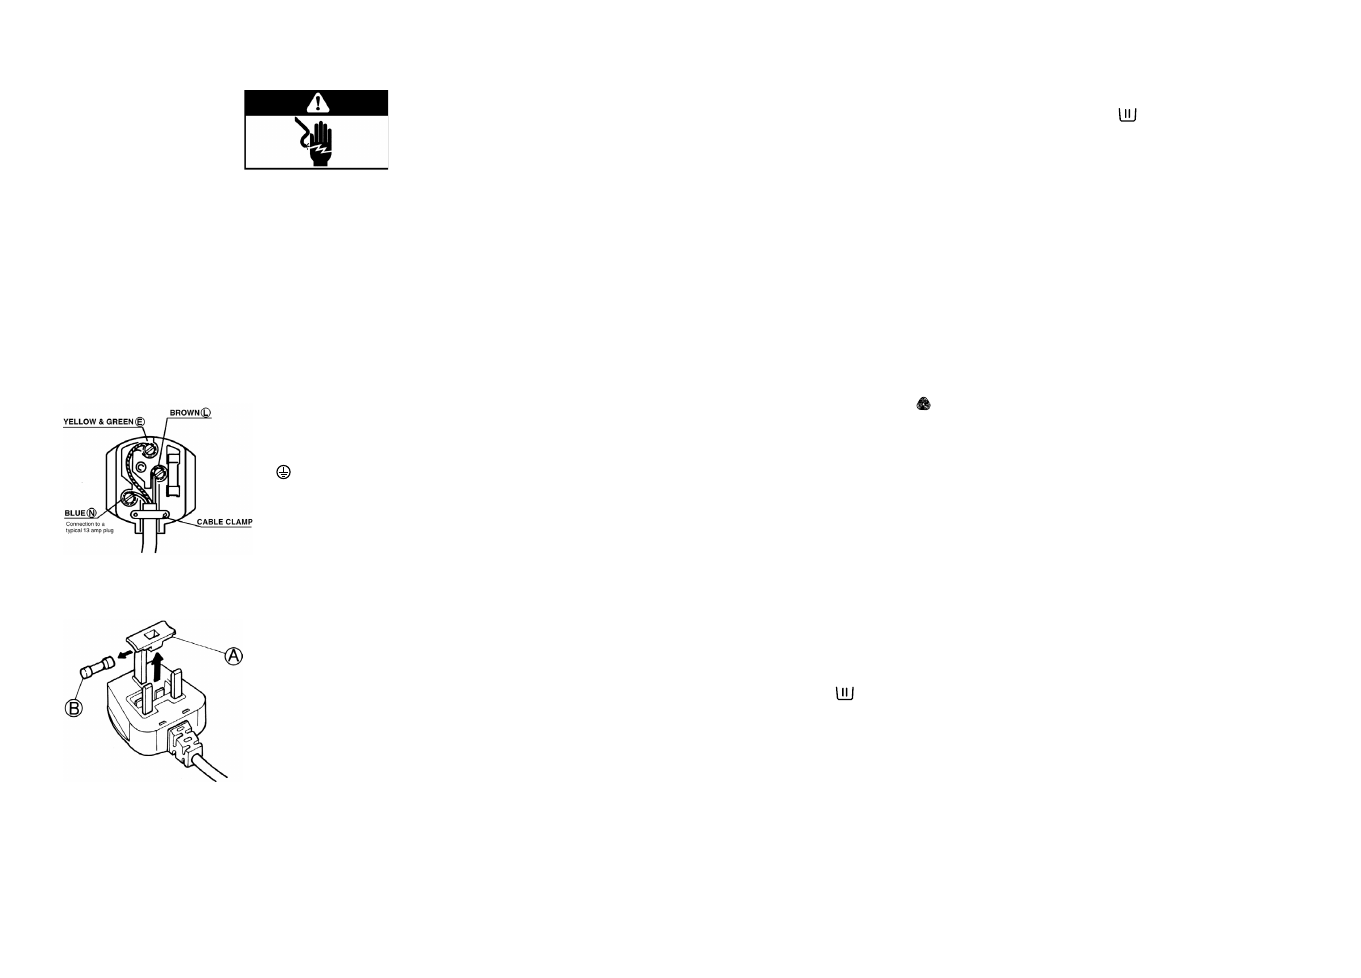
2) CONNECTION TO A REWIRABLE PLUG - to be carried out only by a qualified electrician
The wires in the mains lead are coloured in accordance with the following code:
BLUE - “NEUTRAL” (“N”)
BROWN - “LIVE” (“L”)
GREEN AND YELLOW - “EARTH” (“E”)
To fit a new plug, proceed as follows:
2.1)Polarized Plugs (e.g. 3 pin, 13 amp plug conforming to BS
1363A)
a. The GREEN AND YELLOW wire must be connected to the terminal
in the plug which is marked with the letter “E” or by the Earth symbol
or coloured green and yellow.
b. The BLUE wire must be connected to the terminal which is marked
with the letter “N” or coloured blue.
c. The BROWN wire must be connected to the terminal which is
marked with the letter “L” or coloured brown.
2.2) Non-polarized plugs (e.g. 2 pin with side earth contact)
The wire which is coloured GREEN AND YELLOW must be connected to the earth contact. The other two
wires should be connected to the two pins, irrespective of colour.
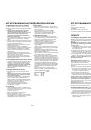
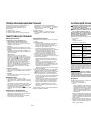
FUSE REPLACEMENT
If the mains lead of this washing machine is fitted with a BS 1363A 13
amp fused plug, replace the fuse only with an A.S.T.A. approved type con-
forming to BS 1362 and proceed as follows: Remove the fuse cover (A)
and the fuse (B). Fit the replacement 13 A fuse into the fuse cover. Refit
both into the plug. For all other types of plug, the supply socket should be
protected by a 16 A fuse or circuit breaker at the distribution board.
ELECTRICAL CONNECTION