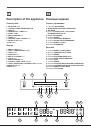
GB
11
allows the heat to penetrate right into the food. Always cook
in this mode with the oven door closed.
GRILL
mode
The top heating element and the rotisserie spit (where
present) are activated. The high and direct temperature
of the grill is recommended for food which requires a high
surface temperature. Always cook in this mode with the oven
door closed (see “Practical cooking advice”).
FAST COOKING
mode
Preheating is not necessary for this cooking mode. This
mode is particularly suitable for cooking pre-packed
food quickly (frozen or pre-cooked). The best results are
achieved using one cooking rack only.
PIZZA
mode
The top and circular heating elements switch on and the fan
begins to operate. This combination heats the oven rapidly.
If you use more than one rack at a time, switch the position
of the dishes halfway through the cooking process.
ECO
mode
The rear heating element and the fan are switched on,
thus guaranteeing the distribution of heat in a delicate and
uniform manner throughout the entire oven. This energy
saving mode is suitable for cooking small dishes, reheating
meat and finishing off cooking processes.
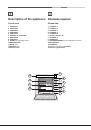
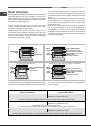
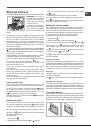
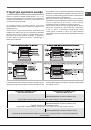
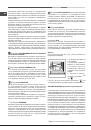
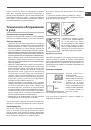
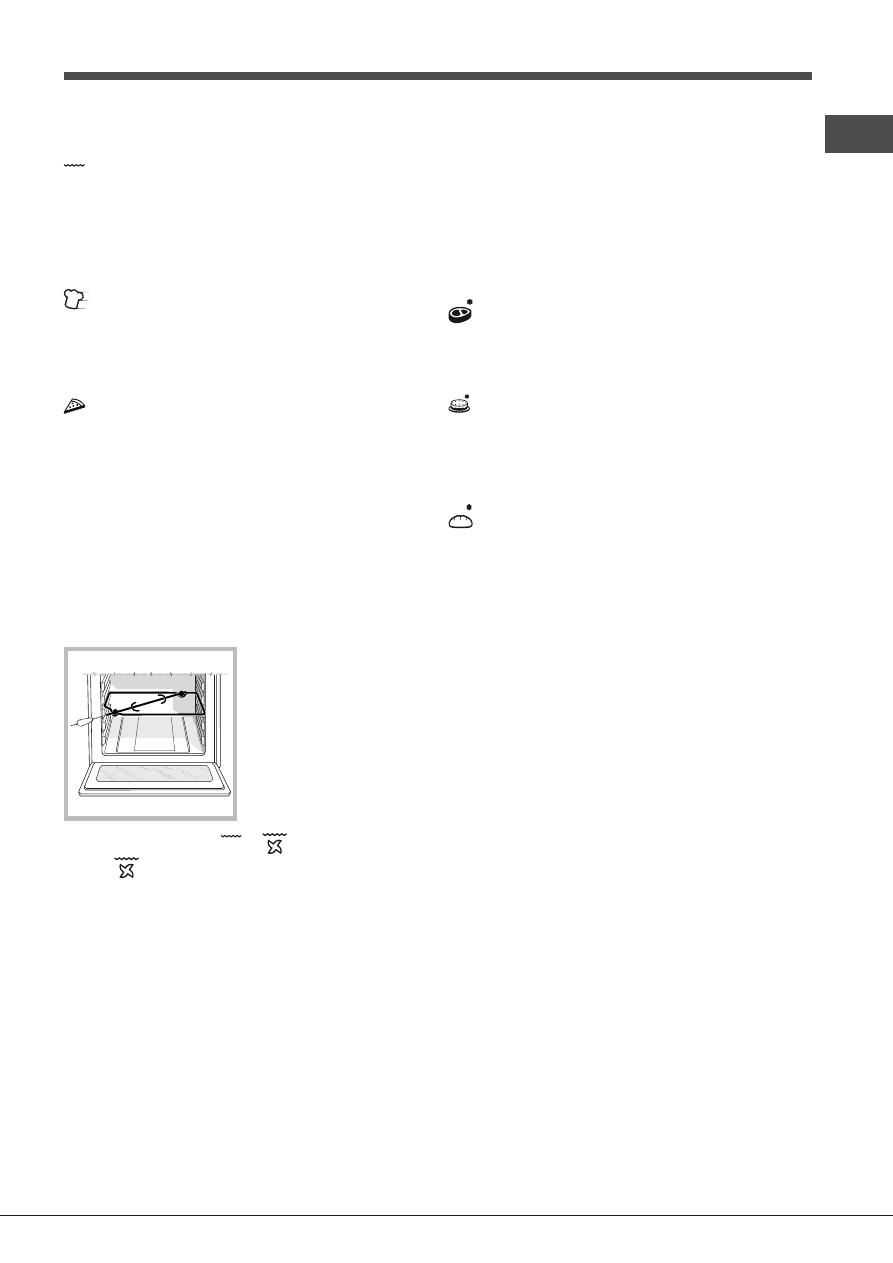
Rotisserie spit*
To operate the rotisserie
function (see diagram)
proceed as follows:
1. Place the dripping pan in
position 1.
2. Place the rotisserie
support in position 3 and
insert the spit in the hole
provided on the back panel
of the oven.
3. Start the rotisserie
function by selecting the
or
modes.
!
When
mode is on, the rotisserie will stop if the door
is opened.
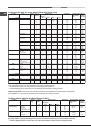
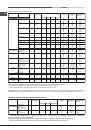
SUCCESS cooking modes
!
The
temperature
and
cooking duration
are
pre-
set values
, guaranteeing a perfect result every time -
automatically. These values cannot be adjusted and use
the
C.O.P.® (Programmed Optimal Cooking)
system. The
cooking cycle stops automatically and the oven indicates
when the dish is cooked. You may start cooking whether
the oven has been preheated or not. The cooking duration
can be customised according to personal tastes, modifying
it - before the start time - by ±5/20 minutes depending on
the selected programme. Once cooking has begun, it is still
possible to modify its duration. If the value is modified before
cooking begins, it is stored in the appliance memory and
suggested again when that cooking mode is next used. If
the temperature inside the oven is higher than the suggested
value for the selected mode, the text “Hot” appears on the
TEMPERATURE display and it will not be possible to begin
cooking; wait for the oven to cool.
!
When the cooking stage has been reached, the oven
buzzer sounds.
!
Do not open the oven door as this will disrupt the cooking
time and temperature.
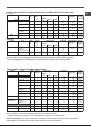
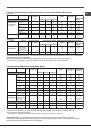
BEEF
mode
Use this function to cook beef and pork. Place the food
inside the oven while it is still cold. The dish may also be
placed in a preheated oven.
CAKES
mode
This function is ideal for cooking desserts which are made
using natural yeast, baking powder and desserts which
contain no yeast. Place the dish in the oven while it is still
cold. The dish may also be placed in a preheated oven.
BREAD
mode
Use this function to bake bread. To obtain the best results, we
recommend that you carefully observe the instructions below:
•
Follow the recipe.
•
Do not exceed the maximum weight of the dripping pan.
•
Remember to pour 100 g (1dl) of cold water into the
dripping pan, which should be placed in position 7.
•
The dough must be left to rise at room temperature for
1 – 1 ½ hours (depending on the room temperature) or
until the dough has doubled in size.
Recipe for BREAD:
1 dripping pan holding 1000 g max, lower level
2 dripping pans each holding 1000 g max, middle and
lower levels
Recipe for 1000 g of dough: 600 g flour, 360 g water, 11g
salt, 25 g fresh yeast (or 2 sachets of powder yeast)
Method:
•
Mix the flour and salt in a large bowl.
•
Dilute the yeast in lukewarm water (approximately 35
degrees).
•
Make a small well in the mound of flour.
•
Pour in the water and yeast mixture.
•
Knead the dough by stretching and folding it over itself
with the palm of your hand for 10 minutes until it has a
uniform consistency and is not too sticky.
•
Form the dough into a ball shape, place it in a large bowl
and cover it with transparent plastic wrap to prevent the
surface of the dough from drying out. Select the manual
LOW TEMPERATURE function on the oven and set the
temperature to 40°C. Place the bowl inside and leave
the dough to rise for approximately 1 hour (the dough
should double in volume).
•
Cut the dough into equal sized loaves.
•
Place them in the dripping pan, on a sheet of baking paper.
•
Dust the loaves with flour.
*
Only available in certain models.