9
GB
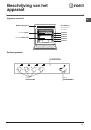
H
o
b
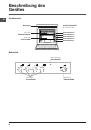
Ty
pe
o
f
ho
b
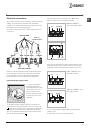
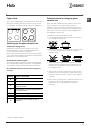
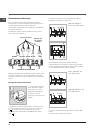
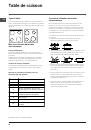
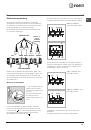
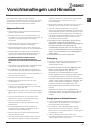
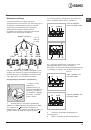
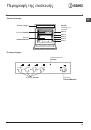
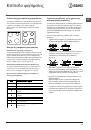
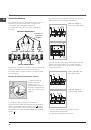
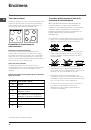
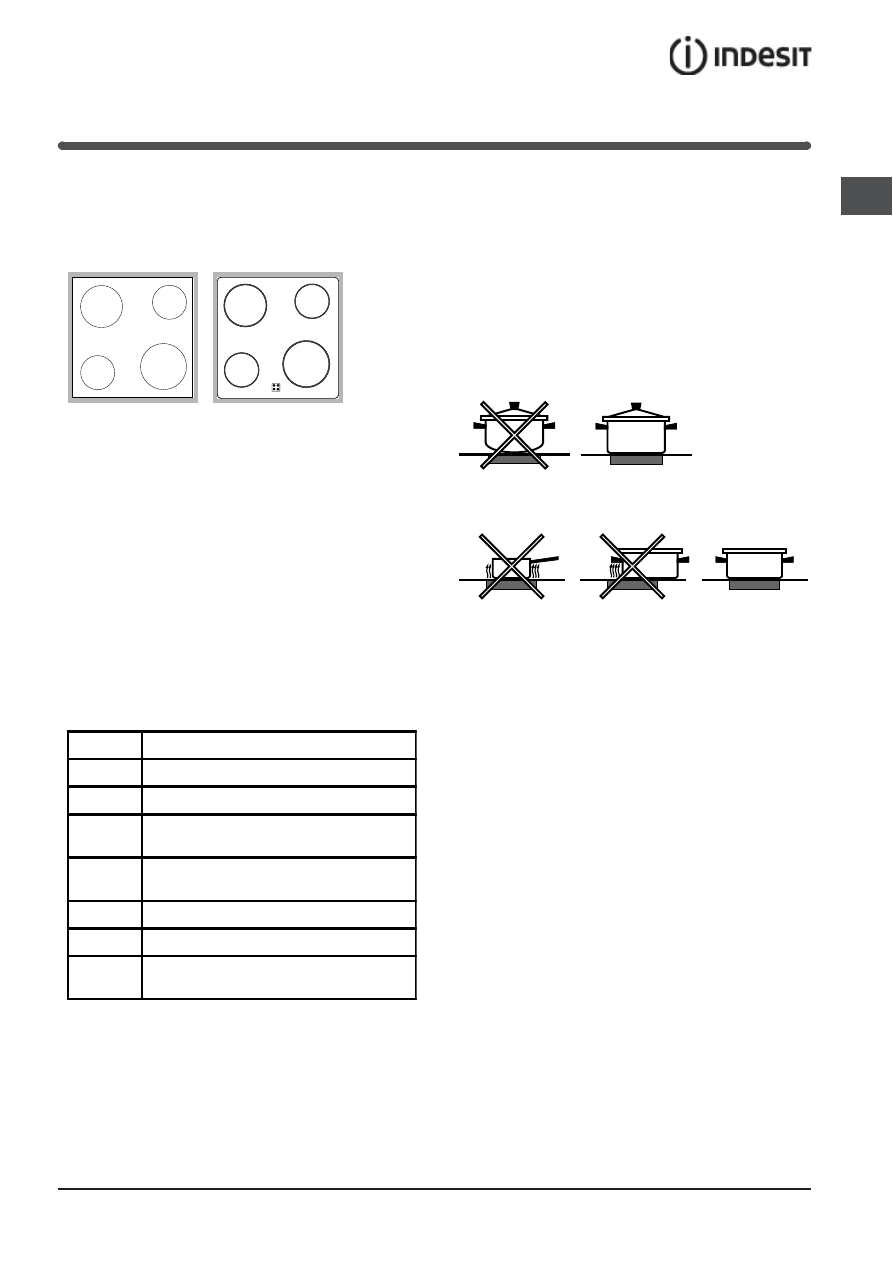
The
oven
is
combined
with
a
hob
that
can
be
made
up
of
two
types
of
heating
elements:
cast-iron
electric
plates
(
see
diagram
1
)
or
glass
ceramic
hobs
(
see
diagram
2
).
S
w
i
t
ch
in
g
o
n
t
h
e
g
l
ass
c
e
r
a
m
i
c h
o
b
T
r
a
d
i
t
i
o
na
l
c
oo
k
in
g z
o
nes
Traditional
cooking
zones
are
made
up
of
circular
heating
elements.
They
turn
red
approximately
ten
seconds
after
they
have
been
turned
on.
Each
cooking
zone
is
fitted
with
a
control
knob
allowing
you
to
select
from
6
different
temperature
settings
from
a
minimum
of
1
to
a
maximum
of
6.
R
esi
d
ual
heat
in
d
icato
r
lights
*
The indicator lights (C) indicate that the temperature of
the corresponding cooking zones have exceeded 60°C,
even after the heating element has been switched off.
R
ecommen
d
e
d
po
w
e
r
le
v
els
f
o
r
v
a
r
ious
t
y
pes
o
f
cooking
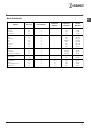
:
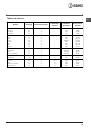
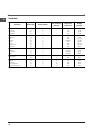
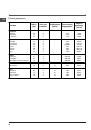
Setting
Normal or Fast Plate
0
Off
1
Cooking vegetables, fish
2
Cooking potatoes (using steam) soups,
chickpeas, beans.
3
Continuing the cooking of large quantities
of food, minestrone
4
For roasting (average)
5
For roasting (above average)
6
For browning and reaching a boil in a
short time.
Pr
a
c
t
i
c
a
l
a
d
v
i
c
e
o
n
u
sin
g
t
h
e
g
l
ass
c
e
r
a
m
i
c h
o
b
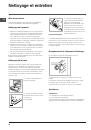
The
glue
that
is
applied
on
the
gaskets
leaves
some
traces
of
grease
on
the
glass.
Before
using
the
appliance,
we
recommend
you
eliminate
these
with
a
special
non-abrasive
cleaning
product.
During
the
first
few
hours
of
use
there
may
be
a
smell
of
rubber
which
will
disappear
very
quickly.
To
obtain
the
best
results
with
your
hob:
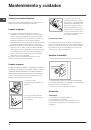
Use
flat-bottomed
pans
to
ensure
that
they
adhere
to
the
cooking
zone
perfectly.
Always
use
pans
with
a
diameter
that
is
large
enough
to
cover
the
hotplate
fully,
in
order
to
use
all
the
available
heat.
Make
sure
that
the
bottom
of
the
cookware
is
always
dry
and
clean
to
guarantee
correct
adherence
and
long
life,
not
only
for
the
cooking
zones
but
also
for
the
cookware
itself.
Avoid
using
the
same
cookware
that
is
used
on
gas
burners:
the
heat
concentration
on
gas
burners
may
deform
the
base
of
the
pan,
causing
it
not
to
adhere
correctly.
Never
leave
a
cooking
zone
on
without
cookware
on
it
because
as
it
heats
up
and
rapidly
reaches
the
maximum
level,
it
could
damage
the
heating
elements.
diagram
2
diagram
1
C
A
A
A
A
* Only on certain models