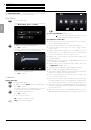
BluTechVision 3D
- 25 -
Instructions for Use
Deutsch
English
Français
Italiano
Español
Nederlands
Português
Magyar
Polski
Č
eština
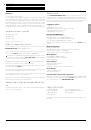
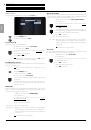
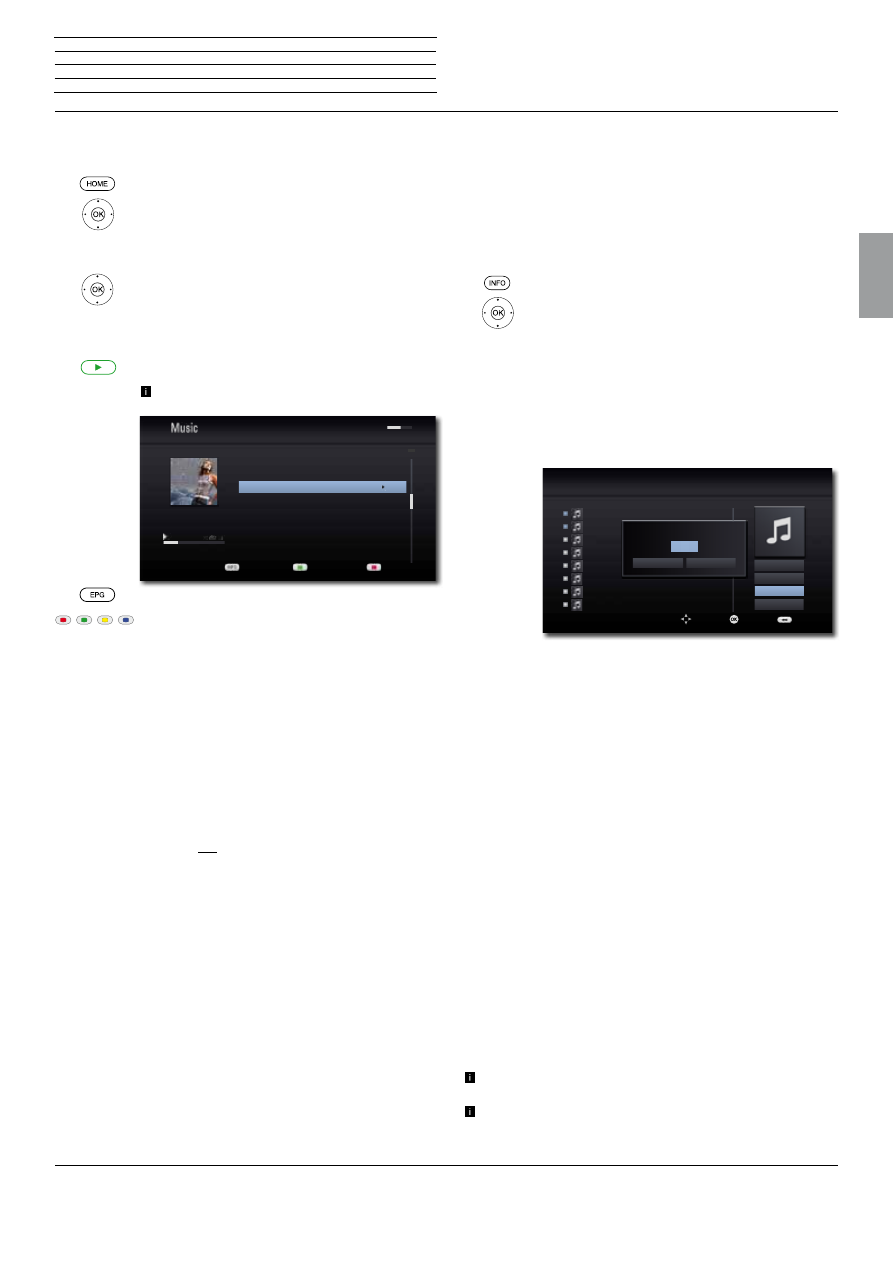
Music files
Playing music files
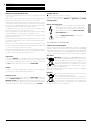
Call up the Main Menu.
3456
Select the
Music
option in the Main Menu.
Press
OK
to confirm.
If several media sources are available for the selected
operating mode, a selection menu will appear.
56
Select the desired medium.
Press
OK
to confirm.
3456
Select file or folder.
OK
Start play or change to folder.
Play
Start / Continue playback.
For controlling the playback of media files see the
chapter "Playback in general" (page 20).
Select the type of repeat.
Green button:
Screen On/Off
Red button
Change device.
Prerequisites for music files
•
Sampling frequency: 16- 48 kHz (MP3), 32 - 48 kHz (WMA).
•
Bit rates: MP3: 32 - 320 kbps, WMA: 32 - 192 kbps.
•
File extensions: “.mp3” / “.wma”.
•
CD/DVD/Blu-ray Disc™ format: ISO9660 / JOLIET / UDF (Bridge).
•
ID3 tags are not supported by WMA.
USB Mode
•
You can connect a USB storage medium directly to the USB socket.
•
The standard USB 1.1 and 2.0 is supported.
•
The USB device must not be disconnected during a data transfer.
•
The file systems FAT16, FAT32 and NTFS are supported.
•
The maximum number of files and folders is 2000. The search can
take longer than 1 minute.
•
Devices requiring an additional software installation for connection
to a computer are not supported.
•
USB connection options other than those indicated above are
not supported.
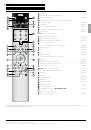
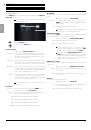
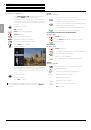
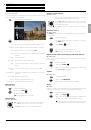
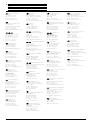
03 One more time
0:01:15
0:03:10
03:02
04:12
02:55
03:45
04:34
03:10
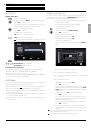
USB/MP3/Finja/....
2 Up to Heaven
3 One more time
1 Peace
4 Say it loud
5 Yes
7527 MB/7641 MB
1/5
Screen off /on
Device Change
Information
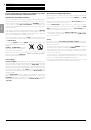
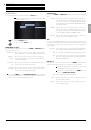
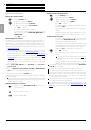
Importing Audio CDs
You can convert the titles (tracks) on your audio CDs to digital music
files and then access them easily with
BluTechVision
. The music files
are saved on a connected USB storage medium.
Connect a USB storage medium with enough free
memory space (page 8)
Insert the audio CD into the drive (page 19).
Start playing the disc (page 21).
Display Title Menu
.
34
Select the option
CD Recording
.
Press
OK
to confirm.
56
Select the desired track.
Mark the selected track with
OK
Mark any further tracks with
OK
4
Select the right menu.
56
If necessary, select the bit rate in the
Options
Menu.
Start Selected tracks are converted
Select All All tracks of the CD are selected
Option You can set the bit rate (and the sound quality along
with it)
Close Cancel procedure
3456
Select the option
Start
.
Press
OK
to confirm.
56
Select a potential destination folder on the USB
storage medium or create a new folder by using
New
Folder
. You can name the new folder using the keypad
that is shown.
4
Select the option
OK
in the right-hand menu.
Press
OK
to confirm.
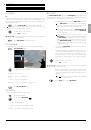
The conversion of the selected tracks now starts.
The process lasts several minutes. The progress is
displayed during this time.
A message is displayed after the process is completed.
Press
OK
to confirm.
The finished music files are located in a new folder on
the USB storage medium, which has the name of the
CD album.
Do not disconnect the USB storage medium from the device until
it is no longer being accessed.
The music titles must be at least 20 seconds long.
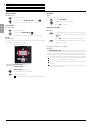
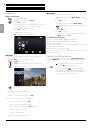
n
Control
Playback of media files
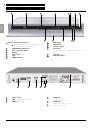
192kbps
2/10
1
2
3
4
5
6
7
8
1
2
3
4
5
6
7
8
OK
Title 2
Title 1
Title 3
Title 8
Title 4
Title 5
Title 6
Title 7
128kbps
320kbps
128kbps
CD Recording
2 Items
Encoding option
Cancel
OK
Start
Deselect All
Option
Close
Back
Select
Move