7
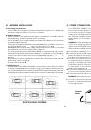
4) BASIC OPERATIONS TO BE CARRIED OUT BEFORE USING
YOUR SET FOR THE FIRST TIME (without trans-mitting and
without using the «push-to-talk» switch on the
microphone):
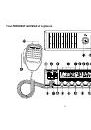
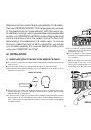
a)
Connect the microphone
b)
Check the antenna connections
c)
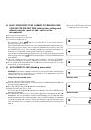
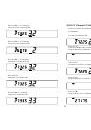
To turn the equipment on :
Press any key so that
flashes. You have about 10 seconds in which to
enter your access code.
Press «PROGRAM» key four times (access code pre-determined in the factory).
Each time you press a key, the counter in the display increases by one. Press
the «POWER» key once. Your CB radio will light up and automatically go to
Channel 19, in AM. (MIC GAIN and RF GAIN set to maximum).
If you make a mistake while entering your access code, press any key (several
times, if necessary) until
flashes and then press four times PROGRAM and
then POWER.
d)
Turn the squelch knob to minimum (anti-clockwise). Turn the «RF POWER»
switch to maximum (clockwise). Adjust the volume to a comfortable level.
e)
Go to Channel 20 using either the «CH
▲
» key on the microphone or on the
front panel, or the rotary knob.
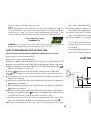
5) ADJUSTMENT OF SWR (Standing wave ratio):
WARNING
:
This must be carried out when you use your CB radio for the first time
(and whenever you re-position your antenna). The adjustment must be
carried out in an obstacle-free area.
* Using the integrated SWR meter:
For this, carry out the following steps :
a)
Press the «push-to-talk» switch on the microphone and keep it pressed down
throughout the adjustment.
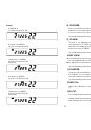
b)
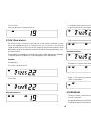
Press the «METER» key until
▲
appears in the display.
c)
Adjust the SWR/CAL key so that
the 7 rows (like a bar graph
▲
) appear in the display, with the RF/POWER knob
turned to maximum.
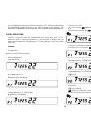
d)
Press again the «METER» key so that «SWR» appears in the display and the
▲
disappears. It is now possible to take the SWR reading. If in the display there
are less than three rows of the bar graph, then the SWR reading is acceptable
(1 being the ideal SWR value). If there are Minimum value more than three
rows, we advise you to re-adjust your antenna and re start the procedure from
step a).
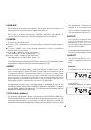
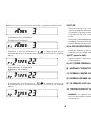
e)
Press the «METER» key, with the «push-to-talk» switch pressed down, so that the
equipment is in S/RF mode.
DISPLAY
Maximumvalue
Minimum value