3
2
2
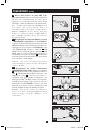
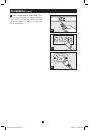
Attach the input plug of the PDU to a grounded
outlet. Insert the plug directly into a grounded outlet
that does not share a circuit with a heavy electrical load
(such as an air conditioner or refrigerator).
Note: Select models include an input plug adapter that
converts plug types for various applications. See below
for details.
2-1
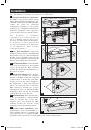
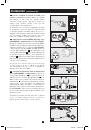
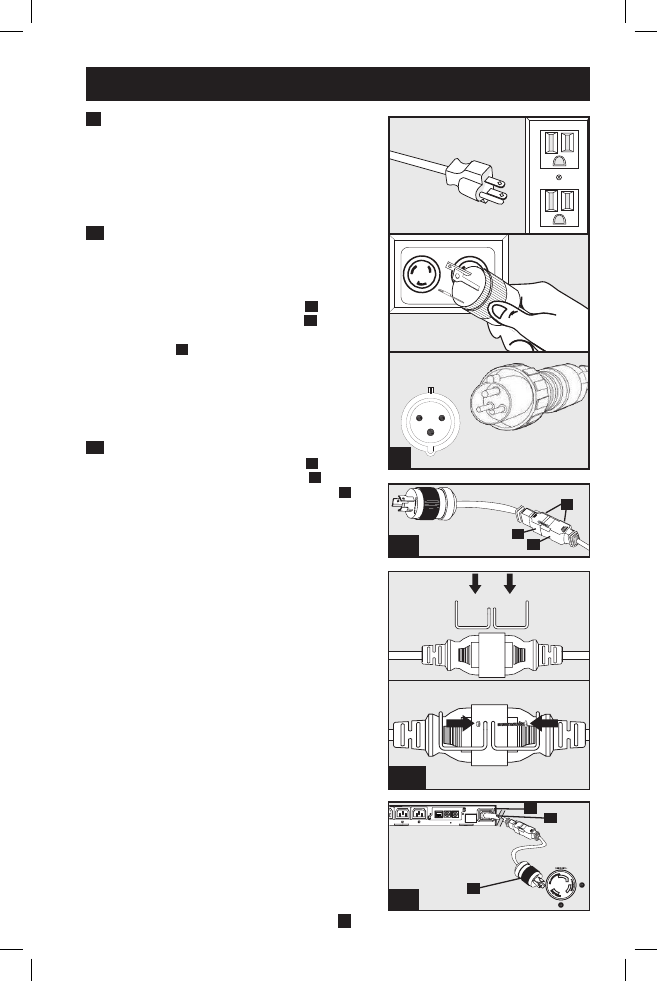
NEMA Adapter Connection (Optional -
PDUMH20HV Only): The PDUMH20HV includes a
plug adapter that adds a NEMA L6-20P plug to the
input power cord. Use this adapter only if you will be
connecting the PDUMH20HV to a NEMA L6-20R
outlet. Insert the IEC 60320 C19 connector
A
of the
adapter into the IEC 60320 C20 connector
B
of the
input power cord. Secure the connection with the
retention bracket
C
by using the included bolts to
fasten the two halves of the bracket around the
connection as shown.
Caution: To avoid the risk of electric shock, ensure that
the Neutral (L2) conductor has been identified before
connecting the PDU.
2-2
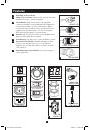
Input Power Cord Connection (PDUMH20HV
Only): Insert the IEC 60320 C19 connector
A
of the
input power cord into the IEC 60320 C20 inlet
B
of the
PDU. Connect the other end of the input power cord
C
to a compatible source of AC power, such as a UPS
system, PDU or utility outlet. The PDU should be
provided with over-current protection. PDUMH20HV
should be provided with a maximum 20A branch-rated
over-current protection device.
Note: The AC power source should not share a circuit
with a heavy electrical load (such as an air conditioner
or refrigerator).
Installation
(continued)
2-1
A
B
C
88
PDUMH20HV
2-2
A
B
C
2-1C
201103062 93-3059.indd 3
4/29/2011 2:33:41 PM