25
TES55. | 05/2013
en
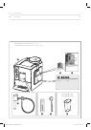
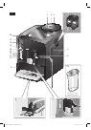
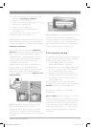
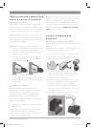
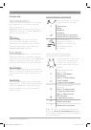
Overview
(see overview images
A, B, C, D and E at
the beginning of this instruction manual)
1 Bean container
2 Aroma cover
3 Selector for grind setting
4 Drawer
(ground coffee/cleaning tablet)
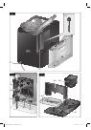
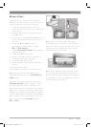
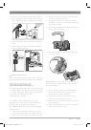
5 Brewing unit (Fig. E)
a) Brewing unit
b) Door
c) Storage compartment for quick
reference guide
d) Push button
e) Lock
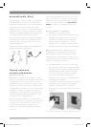
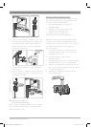
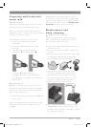
6 Milk frother (Fig. C) removable
a) Outlet
b) Rotary selector for warm milk/
milk froth
c) Milk tube
d) Upper part
e) Air nozzle
7 Coffee outlet, height-adjustable
8 Drip tray (Fig. D)
a) Drip tray panel
b) Coffee grounds container
c) Drip tray for coffee outlet
d) Grate for coffee outlet
9 Power on/off switch O / I
10 start button
11
d
button
12
h
/
g
button
13
e
off /
j
button
14 “Coffee strength” rotary knob
15 “Drink selection” rotary knob
16 Display
17 Removable water tank
18 Lid for water tank
19 Measuring spoon
(insertion aid for water filter)
20 Storage compartment for
measuring spoon
21 Power cable with storage compartment
ONLY TES556M1RU / TES559M1RU
22 Milk container
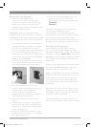
Never immerse the appliance or power cord
in water.
Do not reach into the grinding unit.
Use the appliance only in frost-free rooms.
¡
Risk of scalding!
The milk frother outlet (6a) gets very hot.
After use, allow to cool down first before
touching.
Use this appliance only after the milk frother
(6) has been fully assembled and installed.
¡
Risk of suffocation!
Do not allow children to play with packaging
material.
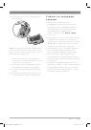
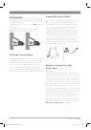
Included in delivery
(see overview image at the start of the
instructions)
1
Fully automatic espresso machine
2
Quick reference guide
3
Instruction manual
4
Milk frother
5
Water hardness testing strip
6
Measuring spoon
ONLY TES556M1RU / TES559M1RU
7
Milk container
TES556M1RU_559M1RU.indb 25
04.06.2013 14:30:28


Инструкции и руководства похожие на BOSCH TES 559M1 RU