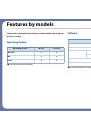
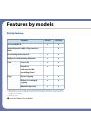
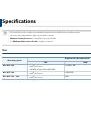
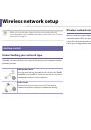
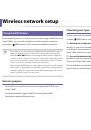
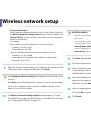
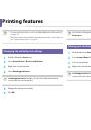
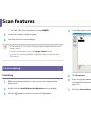
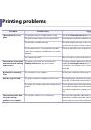
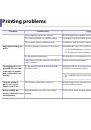
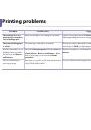
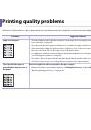
Wireless network setup
•
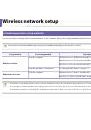
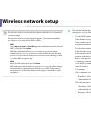
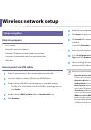
For the Static method
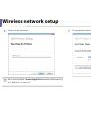
If the IP address assignment method is Static, check if Static is shown in
the
Wireless Network Setting Confirm
window. If it shows DHCP, click
Change TCP/IP
to enter the IP address and other network configuration
values for the machine.
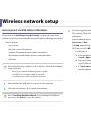
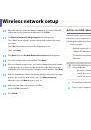
For example:
If the computer’s network information is as shown follows:
-
IP address: 169.254.133.42
-
Subnet Mask: 255.255.0.0
Then, the machine’s network information should be as below:
-
IP address: 169.254.133.
43
-
Subnet Mask: 255.255.0.0 (Use the computer’s subnet mask.)
-
Gateway: 169.254.133.
1
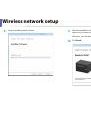
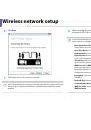
When the wireless network settings are completed, disconnect the USB
9
cable between the computer and machine. Click
Next
.
If the
Change PC Network Setting
window appears, follow the steps in the
window.
Click
Next
if you are finished with the computer’s wireless network settings.
If you set the computer’s wireless network on DHCP, it will take several
minutes to receive the IP address.
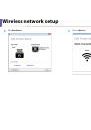
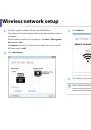
The
Wireless Network Setting Complete
window appears. To print
10
from a Wi-Fi Direct supported mobile device, set the Wi-Fi Direct Option
(see "Setting up Wi-Fi Direct" on page 131).
Wi-Fi Direct Option:
• Wi-Fi Direct option appears on the screen only if your printer supports
this feature.
• You can start to build Wi-Fi Direct by using
Dell Printer Manager (see
"Setting up Wi-Fi Direct" on page 131).
•
Network Name(SSID)
: The default Network Name is the model name
and the maximum length is 22 characters (not including "Direct-xx-").
•
Network Key
is the numeric string, and the size is 8 ~ 64 characters.
Click
Next
when the
Confirm Printer Connection
window appears.
11
Select the components to be installed. Click
Next
.
12
After selecting the components, you can also change the machine name,
13
set the machine to be shared on the network, set the machine as the
default machine, and change the port name of each machine. Click
Next
.
After the installation is finished, a window asking you to print a test page
14
appears. If you want to print a test page, click
Print a test page
.
Otherwise, just click
Next
and go to step 16.
If the test page prints out correctly, click
Yes
.
15
If not, click
No
to reprint it.
Click
Finish
.
16
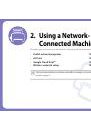
2. Using a Network-Connected Machine
126
 1
1
 2
2
 3
3
 4
4
 5
5
 6
6
 7
7
 8
8
 9
9
 10
10
 11
11
 12
12
 13
13
 14
14
 15
15
 16
16
 17
17
 18
18
 19
19
 20
20
 21
21
 22
22
 23
23
 24
24
 25
25
 26
26
 27
27
 28
28
 29
29
 30
30
 31
31
 32
32
 33
33
 34
34
 35
35
 36
36
 37
37
 38
38
 39
39
 40
40
 41
41
 42
42
 43
43
 44
44
 45
45
 46
46
 47
47
 48
48
 49
49
 50
50
 51
51
 52
52
 53
53
 54
54
 55
55
 56
56
 57
57
 58
58
 59
59
 60
60
 61
61
 62
62
 63
63
 64
64
 65
65
 66
66
 67
67
 68
68
 69
69
 70
70
 71
71
 72
72
 73
73
 74
74
 75
75
 76
76
 77
77
 78
78
 79
79
 80
80
 81
81
 82
82
 83
83
 84
84
 85
85
 86
86
 87
87
 88
88
 89
89
 90
90
 91
91
 92
92
 93
93
 94
94
 95
95
 96
96
 97
97
 98
98
 99
99
 100
100
 101
101
 102
102
 103
103
 104
104
 105
105
 106
106
 107
107
 108
108
 109
109
 110
110
 111
111
 112
112
 113
113
 114
114
 115
115
 116
116
 117
117
 118
118
 119
119
 120
120
 121
121
 122
122
 123
123
 124
124
 125
125
 126
126
 127
127
 128
128
 129
129
 130
130
 131
131
 132
132
 133
133
 134
134
 135
135
 136
136
 137
137
 138
138
 139
139
 140
140
 141
141
 142
142
 143
143
 144
144
 145
145
 146
146
 147
147
 148
148
 149
149
 150
150
 151
151
 152
152
 153
153
 154
154
 155
155
 156
156
 157
157
 158
158
 159
159
 160
160
 161
161
 162
162
 163
163
 164
164
 165
165
 166
166
 167
167
 168
168
 169
169
 170
170
 171
171
 172
172
 173
173
 174
174
 175
175
 176
176
 177
177
 178
178
 179
179
 180
180
 181
181
 182
182
 183
183
 184
184
 185
185
 186
186
 187
187
 188
188
 189
189
 190
190
 191
191
 192
192
 193
193
 194
194
 195
195
 196
196
 197
197
 198
198
 199
199
 200
200
 201
201
 202
202
 203
203
 204
204
 205
205
 206
206
 207
207
Инструкции и руководства похожие на DELL B1163, B1163w