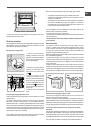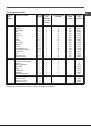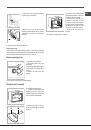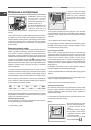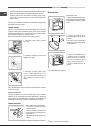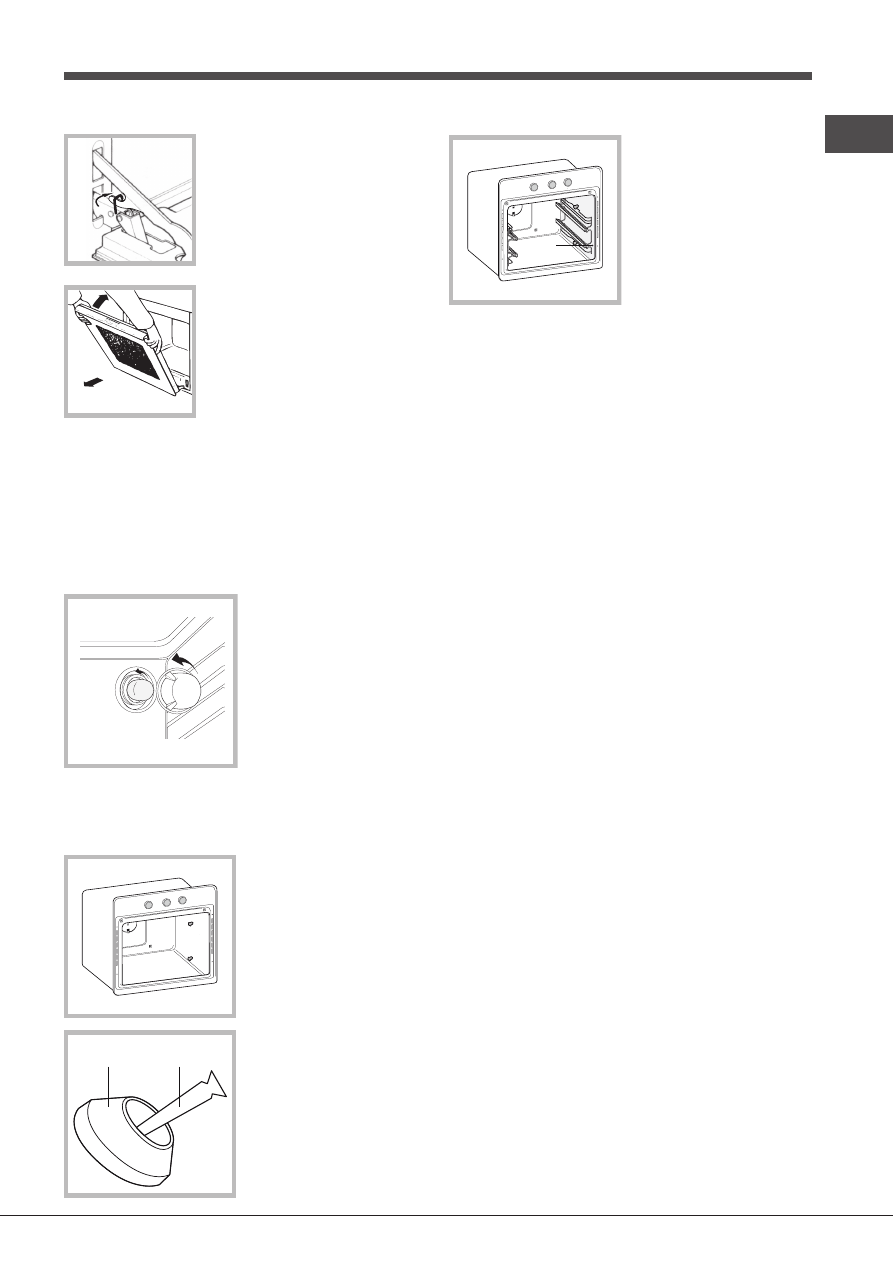
2. Lift up and turn the small levers located on
the two hinges (see diagram);
3. Grip the door on the two external sides
and close it approximately half way. Pull the
door towards you, lifting it out of its slot (see
diagram).
To replace the door, reverse this sequence.
Inspecting the seals
Check the door seals around the oven regularly. If the seals are damaged,
please contact your nearest Service Centre (see Assistance). We recommend
that the oven is not used until the seals have been replaced.
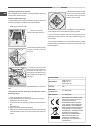
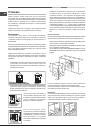
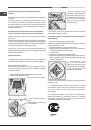
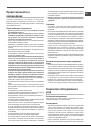
Replacing the light bulb
To replace the oven light bulb:
1. Remove the glass cover of the
lamp-holder.
2. Remove the light bulb and replace
it with a similar one: Wattage 25 W,
cap E 14.
3. Replace the glass cover (see
diagram).
!
Do not use the oven lamp as/for ambient lighting.
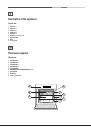
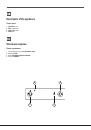
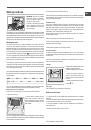
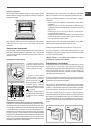
Sliding Rack Kit assembly
To assemble the sliding racks:
1. Loosen the two screws A (see
diagram). If the oven is fitted with
self-cleaning panels, these will have
to be temporarily disassembled.
2. Replace the screws A with the
screws and spacers (
B
+
C
) supplied
with the kit.
A
A
C
B
3.Tighten the new screws
B
and the
corresponding spacers
C
, fitting the
self-cleaning panels on again.
4. Secure the two joints
D
of the
guide rail in the holes provided
on the oven walls (see diagram).
The holes for the left guide rail are
situated at the top, while the holes
for the right one are at the bottom.
5. Finally, fit the guide rail on the
spacer
C
.
!
Do not place the sliding racks in position 5.
D
GB
13