Start-up and use
WARNING!
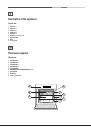
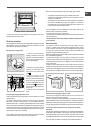
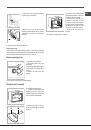
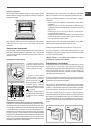
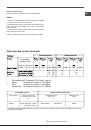
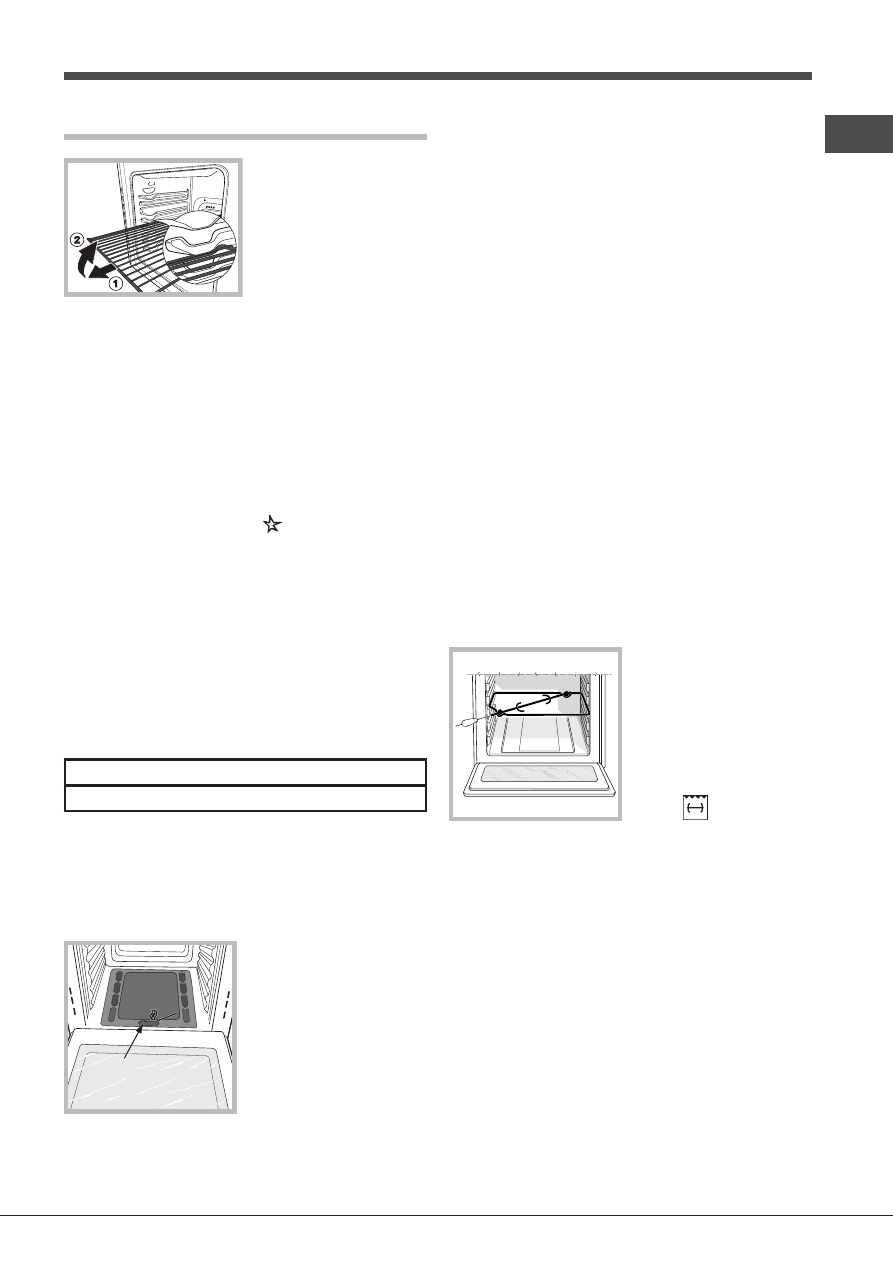
The oven is provided
with a stop system to extract the
racks and prevent them from
coming out of the oven (1).
As shown in the drawing, to extract
them completely, simply lift the
racks, holding them on the front
part, and pull (2).
!
The first time you use your appliance, heat the empty oven with its door closed
at its maximum temperature for at least half an hour. Ensure that the room is
well ventilated before switching the oven off and opening the oven door. The
appliance may emit a slightly unpleasant odour caused by protective substances
used during the manufacturing process burning away.
Starting the oven
This knob is used not only to select the different oven modes, but also to
choose the right cooking temperature for various foods from among the
temperatures shown on the knob itself (the range is from 140°C to 240°C
inclusive). The electronic ignition device of the oven is built into the control
knob. To light the oven burner, press the OVEN knob in as far as possible and
turn it anti-clockwise, setting it to position
(keeping the oven door shut).
The oven is equipped with a safety device. After lighting the burner allow the
gas to circulate until the safety thermocouple is heated by keeping the OVEN
knob pressed in for about 6 seconds.
!
The electronic ignition device of the oven burner must not be activated for
more than 15 seconds. If the burner fails to light after 15 seconds, stop pressing
the OVEN knob, open the oven door and wait for at least one minute before
you try to light the burner again.
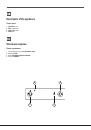
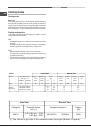
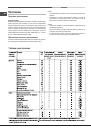
The cooking temperature is selected by matching the desired temperature with
the reference mark on the control panel; the complete range of temperatures
is shown below:
Min
•
150
•
180
•
220
•
Max
140 145
160
200
230 240
The oven will automatically reach the temperature set, and the thermostat,
which is controlled by the knob, will keep the temperature constant.
Switching the oven on manually
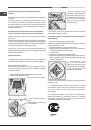
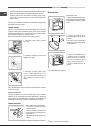
In the event of a power failure, the oven burner can be lit manually:
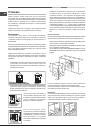
1. Open the oven door.
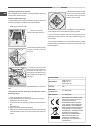
F
2. Hold a match or lighter near the
burner hole as shown in the figure,
press knob
F
(see figure) in fully and
turn it anticlockwise, setting it to the
Max position.
The oven is equipped with a safety device. After lighting the burner allow the
gas to circulate until the safety thermocouple is heated by keeping the OVEN
knob pressed in for about 6 seconds.
3. Once the burner is lit, shut the oven door.
!
If the burner flame is accidentally extinguished, turn the OVEN control knob
to the off position, open the oven door and wait for at least one minute before
trying to light the burner again.
The GRILL knob
Your oven is equipped with an electric grill. The extremely high and direct
temperature of the grill makes it possible to brown the surface of meats
and roasts while locking in the juices to keep them tender. The grill is also
highly recommended for dishes that require a high surface temperature:
beef steaks, veal, rib steak, fillets, hamburgers etc...
Some examples of how the grill may be used are included in the “Practical
Cooking Advice” section.
!
When using the grill, the oven door must be kept shut.
!
Never put objects directly on the bottom of the oven - this could result in
damage to the enamel coating.
!
Always place cookware on the rack(s) provided.
Cooling ventilation
In order to cool down the external temperature of the oven, some models
are fitted with a cooling fan that blows air out between the control panel and
the oven door.
!
Once the cooking has been completed, the cooling fan remains on until the
oven has cooled down sufficiently.
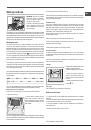
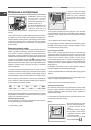
Turnspit*
To operate the rotisserie function (see
diagram) proceed as follows:
1. Place the dripping pan in position
1.
2. Place the rotisserie support in
position 3 and insert the spit in the
hole provided on the back panel of
the oven.
3. Start the rotisserie using the knob
to select
;
Oven light
This is switched on by pressing the LIGHT button.
How to use the timer
1. To set the buzzer, turn the TIMER knob clockwise almost one complete
revolution.
2. Turn the knob anticlockwise to set the desired time: align the minutes shown
on the knob with the indicator on the control panel.
3. The timer operates in minutes: when the selected time has elapsed, a
buzzer will sound.
!
The timer does not switch the oven on or off.
*
Only available in certain models.
GB
9