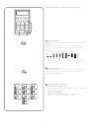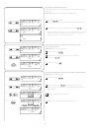
43
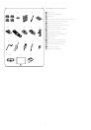
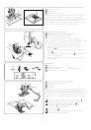
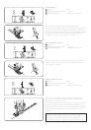
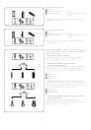
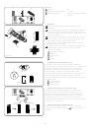
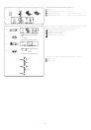
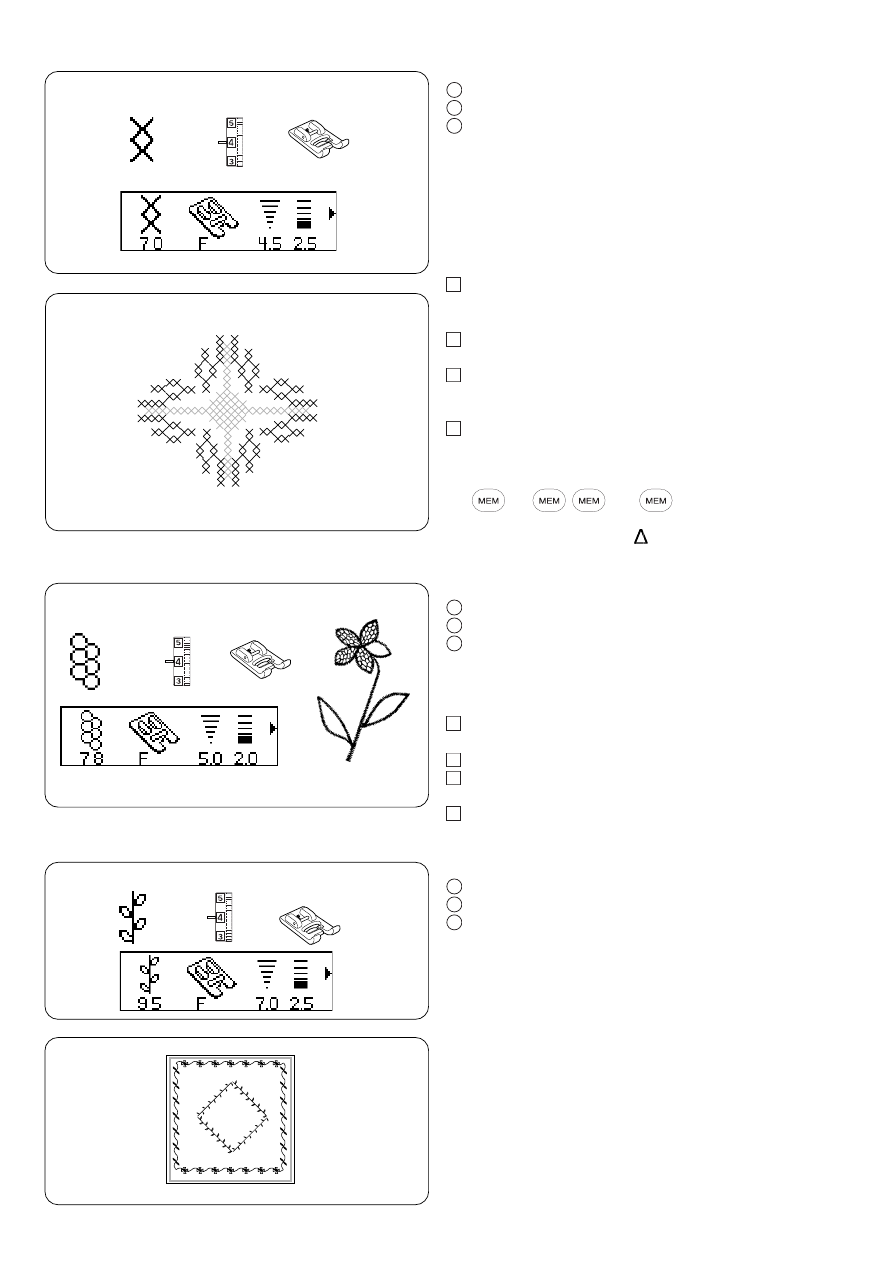
Cross Stitch
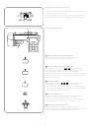
q Stitch Pattern:
70
w Thread tension dial:
3 to 6
e Presser foot:
Satin stitch foot: F
* Stitch patterns 61 to 63 can also be used.
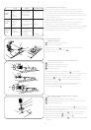
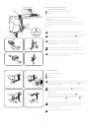
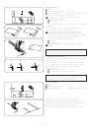
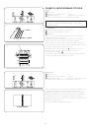
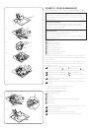
You can make beautiful designs with this embroidery stitch
pattern, in half the time it would take if embroidered by
hand. You can also combine cross stitches with the other
decorative patterns and letters or numbers for attractive
samplers and other sewing projects.
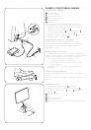
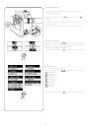
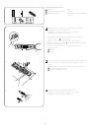
• To sew
z Choose a plain close weave fabric such as linen or wool
flannel for the background fabric. If you choose light
weight fabric, use a tear away backing for support.
x Adjust the stitch width and length as you desire to
match the pattern.
c Find the center of the design, or if the design is a
border, choose a starting point.
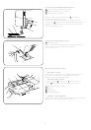
v Count the cross stitches from the center up and
program the number. Use auto-lock to begin and end.
For example: For 2 cross stitches, press
Press the clear button to reprogram.
Use the placement arrow “ ” on foot F to insure straight,
even rows.
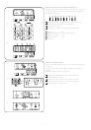
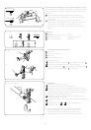
Sand Stitch
q Stitch Pattern:
78
w Thread tension dial:
1 to 4
e Presser foot:
Satin stitch foot: F
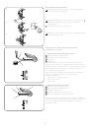
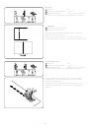
The sand stitch fills in outlined embroidery designs
• To sew
z Outline the pattern with satin stitch 4.
Set stitch length and width as you desire.
x Fill in the design with the sand stitch.
c Decrease the stitch width to fill in small spaces.
v Sew in rows, starting at the edge, until the pattern is
filled in.
70
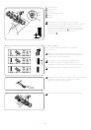
98
98
q
w
e
q
w
e
q
w
e
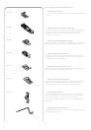
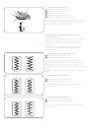
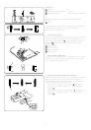
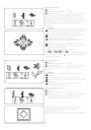
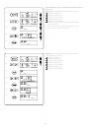
Decorative Stitch
q Stitch pattern:
95
w Thread tension dial:
3 to 6
e
Presser foot:
Satin stitch foot: F
* Stitch pattern 46 to 50, 52 to 60, 69, 71, 74 to 77, and
81 to 97 can also be used.
For the best sewing results, carefully align and guide the
fabric when you sew with decorative stitches.
Use a tear-way backing if necessary.
43
Cross Stitch
q Stitch Pattern:
70
w Thread tension dial:
3 to 6
e Presser foot:
Satin stitch foot: F
* Stitch patterns 61 to 63 can also be used.
You can make beautiful designs with this embroidery stitch
pattern, in half the time it would take if embroidered by
hand. You can also combine cross stitches with the other
decorative patterns and letters or numbers for attractive
samplers and other sewing projects.
• To sew
z Choose a plain close weave fabric such as linen or wool
flannel for the background fabric. If you choose light
weight fabric, use a tear away backing for support.
x Adjust the stitch width and length as you desire to
match the pattern.
c Find the center of the design, or if the design is a
border, choose a starting point.
v Count the cross stitches from the center up and
program the number. Use auto-lock to begin and end.
For example: For 2 cross stitches, press
Press the clear button to reprogram.
Use the placement arrow “ ” on foot F to insure straight,
even rows.
Sand Stitch
q Stitch Pattern:
78
w Thread tension dial:
1 to 4
e Presser foot:
Satin stitch foot: F
The sand stitch fills in outlined embroidery designs
• To sew
z Outline the pattern with satin stitch 4.
Set stitch length and width as you desire.
x Fill in the design with the sand stitch.
c Decrease the stitch width to fill in small spaces.
v Sew in rows, starting at the edge, until the pattern is
filled in.
70
98
98
q
w
e
q
w
e
q
w
e
Decorative Stitch
q Stitch pattern:
95
w Thread tension dial:
3 to 6
e
Presser foot:
Satin stitch foot: F
* Stitch pattern 46 to 50, 52 to 60, 69, 71, 74 to 77, and
81 to 97 can also be used.
For the best sewing results, carefully align and guide the
fabric when you sew with decorative stitches.
Use a tear-way backing if necessary.
43
Стежок крестом
Строчка:
70
Натяжение верхней нити:
от 3 до 6
Прижимная лапка:
лапка атласных стежков F
* Также можно работать с образцами от 61 до 63.
Можно создавать красивые проекты при помощи этого
вышивального стежка. Иногда кажется, что это ручная
вышивка. Можно также комбинировать стежок крестом с
другими декоративными строчками, буквами или
цифрами.
•
Как шить
Выберите простую ткань, например, лен или фланель в
качестве основы. Если у Вас легкая ткань, обязательно
используйте отрывной стабилизатор с изнанки.
Отрегулируйте по желанию ширину и длину стежка,
чтобы он подходил к Вашему проекту.
Найдите центр рисунка или, если рисунок
используется в качестве бордюра, найдите точку
начала.
Отсчитайте количество стежков крестом от центра до
верха и запрограммируйте число. В начале и конце
используйте автозакрепку.
Например, для 2 стежков крестом нажмите
98 70 98
Нажмите кнопку очистки для нового программирования.
Воспользуйтесь стрелкой « » на лапке F для создания
прямых, четких рядов.
Стежок «Соты»
Строчка:
78
Натяжение верхней нити:
от 1 до 4
Прижимная лапка:
лапка атласных стежков F
Стежок «Соты» застилает контурные вышивальные
рисунки.
•
Как шить
Создайте контур образца при помощи атласного
стежка 4.
Заполните рисунок при помощи этого стежка.
Уменьшайте ширину стежка при работе с маленькими
деталями.
Шейте рядами, начиная от края до тех пор, пока
не заполнится весь рисунок.
Декоративный стежок
Строчка:
95
Натяжение верхней нити:
от 3 до 6
Прижимная лапка:
лапка атласных стежков F
* Также можно работать с образцами от 46 до 50,
от 52 до 60, 69, 71, от 74 до 77 и от 81 до 97.
Для достижения наилучших результатов осторожно
перемещайте и направляйте ткань при работе с
декоративными стежками.
При необходимости используйте отрывной стабилизатор.
43
Cross Stitch
q Stitch Pattern:
70
w Thread tension dial:
3 to 6
e Presser foot:
Satin stitch foot: F
* Stitch patterns 61 to 63 can also be used.
You can make beautiful designs with this embroidery stitch
pattern, in half the time it would take if embroidered by
hand. You can also combine cross stitches with the other
decorative patterns and letters or numbers for attractive
samplers and other sewing projects.
• To sew
z Choose a plain close weave fabric such as linen or wool
flannel for the background fabric. If you choose light
weight fabric, use a tear away backing for support.
x Adjust the stitch width and length as you desire to
match the pattern.
c Find the center of the design, or if the design is a
border, choose a starting point.
v Count the cross stitches from the center up and
program the number. Use auto-lock to begin and end.
For example: For 2 cross stitches, press
Press the clear button to reprogram.
Use the placement arrow “ ” on foot F to insure straight,
even rows.
Sand Stitch
q Stitch Pattern:
78
w Thread tension dial:
1 to 4
e Presser foot:
Satin stitch foot: F
The sand stitch fills in outlined embroidery designs
• To sew
z Outline the pattern with satin stitch 4.
Set stitch length and width as you desire.
x Fill in the design with the sand stitch.
c Decrease the stitch width to fill in small spaces.
v Sew in rows, starting at the edge, until the pattern is
filled in.
70
98
98
q
w
e
q
w
e
q
w
e
Decorative Stitch
q Stitch pattern:
95
w Thread tension dial:
3 to 6
e
Presser foot:
Satin stitch foot: F
* Stitch pattern 46 to 50, 52 to 60, 69, 71, 74 to 77, and
81 to 97 can also be used.
For the best sewing results, carefully align and guide the
fabric when you sew with decorative stitches.
Use a tear-way backing if necessary.
43
Cross Stitch
q Stitch Pattern:
70
w Thread tension dial:
3 to 6
e Presser foot:
Satin stitch foot: F
* Stitch patterns 61 to 63 can also be used.
You can make beautiful designs with this embroidery stitch
pattern, in half the time it would take if embroidered by
hand. You can also combine cross stitches with the other
decorative patterns and letters or numbers for attractive
samplers and other sewing projects.
• To sew
z Choose a plain close weave fabric such as linen or wool
flannel for the background fabric. If you choose light
weight fabric, use a tear away backing for support.
x Adjust the stitch width and length as you desire to
match the pattern.
c Find the center of the design, or if the design is a
border, choose a starting point.
v Count the cross stitches from the center up and
program the number. Use auto-lock to begin and end.
For example: For 2 cross stitches, press
Press the clear button to reprogram.
Use the placement arrow “ ” on foot F to insure straight,
even rows.
Sand Stitch
q Stitch Pattern:
78
w Thread tension dial:
1 to 4
e Presser foot:
Satin stitch foot: F
The sand stitch fills in outlined embroidery designs
• To sew
z Outline the pattern with satin stitch 4.
Set stitch length and width as you desire.
x Fill in the design with the sand stitch.
c Decrease the stitch width to fill in small spaces.
v Sew in rows, starting at the edge, until the pattern is
filled in.
70
98
98
q
w
e
q
w
e
q
w
e
Decorative Stitch
q Stitch pattern:
95
w Thread tension dial:
3 to 6
e
Presser foot:
Satin stitch foot: F
* Stitch pattern 46 to 50, 52 to 60, 69, 71, 74 to 77, and
81 to 97 can also be used.
For the best sewing results, carefully align and guide the
fabric when you sew with decorative stitches.
Use a tear-way backing if necessary.
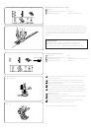
1
3
2
1
3
2
1
3
2
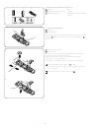
1
2
3
4
1
2
3
4