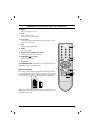
Basic operation
On and off
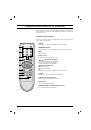
1. Press the main power button to switch the set
on.
2. If the set is in standby mode, press the
POWER
,
D
D
/
E
E
,
TV/AV
or NUMBER buttons
on the remote control handset to switch it on
fully.
3. Press
the
POWER
button on the remote con-
trol handset.
The set reverts to standby mode.
4. Press the main power button again to switch
the set off.
Note :
If, while the set is switched on, the mains
plug is disconnected the set will switch to standby
or power on when the mains plug is replaced in
the mains power socket.
Programme selection
You can select a programme number with the
D
D
/
E
E
or NUMBER buttons.
Volume adjustment
Press the
F
F
/
G
G
button to adjust the volume.
Quick view
Press the
Q.VIEW
button to view the previous
programme you were watching.
Mute function
Press the
MUTE
button. The sound is switched off
and the display
>
appears.
You can cancel it by pressing the
MUTE
,
F
F
/
G
G
,
SSM/
*
,
I/II/
*
,
TURBO SOUND
button.
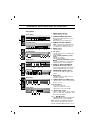
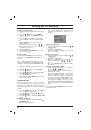
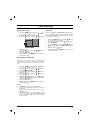
On screen language selection (option)
The menu can be displayed on the screen in
desired language. First select your language.
1. Press
the
MENU
button and then
D
D
/
E
E
but-
ton to select the Special menu.
2. Press the
G
G
button to select
Language
.
3. Press the
G
G
button and then
D
D
/
E
E
button to
select your desired language.
All the on screen displays will appear in the
selected language.
Press the
OK
or
F
F
button to select the
Special menu.
4. Repeatedly press the
MENU
button to return
to normal TV viewing.
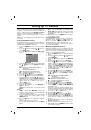
8
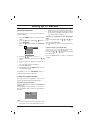
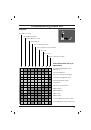
The dialogue between you and your set takes
place on screen with an operator menu. The but-
tons required for the operating steps are also dis-
played.
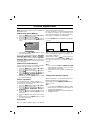
Menu selection
1.
Press the
MENU
button and then
D
D
/
E
E
button to
display each menu.
2. Press the
G
G
button and then
D
D
/
E
E
button to
select a menu item.
3.
Press the
G
G
button to display the sub menu or
the pull-down menu.
4. Change the setting of an item in the sub or
pull-down menu with
F
F
/
G
G
or
D
D
/
E
E
.
You can move to the higher level menu with
OK
or
F
F
button and to move to the lower level
menu press the
G
G
button.
Note :
a. In mono models, the Sound menu does not
appear.
b. In some models,
Turbo Pic.
will not display in
the Picture menu.
c.
In some models,
Turbo.Snd.
,
AVL
,
Balance
,
Woofer
,
X-WAVE
or
Treble
,
Bass
will not dis-
play in the Sound menu.
d. In some models,
Language
,
Blue back
,
Game
,
Booster
will not display in the Special
menu.
On screen menus