u
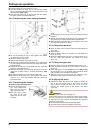
Clean drain hole: Remove deposits
with a narrow instrument, e.g. a
cotton bud.
u
Clean items of equipment by hand with lukewarm water
and a little washing-up liquid.
u
Remove the support rails for the half glass shelves for
cleaning.
u
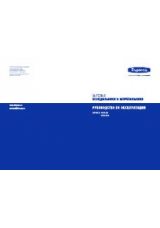
To dismantle the shelves: remove trims and side parts.*
*
u
To dismantle door racks: Pull off
protective film from the decorative
trims.*
*
u
Remove boxes and covers by
lifting up and out.*
*
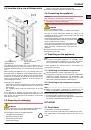
u
Empty water collect tray: remove
water tank. Carefully unlatch tray
at front and then remove from
below.*
*
After cleaning:
u
Wipe dry the appliance and items of equipment.
u
Connect the appliance and switch it on again.
u
Switch on SuperFrost (see 5.4.4) .
When the temperature is sufficiently cold:
u
Put the food back inside.
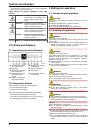
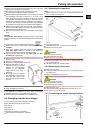
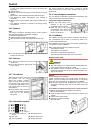
6.3 Cleaning the IceMaker*
Fig. 13
The IceMaker has to be switched on.
u
Pull out the drawer and remove the ice cubes.
u
Clean the drawer with warm water and mild washing-up
liquid.
u
When the drawer is pulled out, hold down the On/Off button
(about 10 seconds).
w
After about 1 s the LED goes out, the IceMaker is switched
off.
w
After about 10 s the LED flashes for about 60 s.
u
Slide in the drawer while the LED is flashing.
w
The ice-cube tray of the IceMaker turns to a skew position.
u
Remove the drawer.
u
Clean the ice cube tray with warm water. If necessary, use
mild washing-up liquid. Then rinse.
Switch the IceMaker on again.
u
Press the ON/OFF button until the LED shines, then slide in
the drawer.
w
The IceMaker starts producing ice cubes.
If washing-up liquid was used:
u
throw away the first three loads of ice cubes to get rid of any
remaining washing-up liquid.
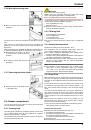
6.4 Changing the interior light with bulb
Bulb data
max. 25 W
Fitting: E14
Type of current and voltage must conform with the details on
the type plate
u
Switch off the appliance.
u
Pull out the power plug or
switch off the fuse.
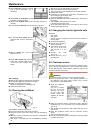
u
Take holder of the cover
Fig. 14 (1)
at the front
and unhook it at the
back.
u
Change
the
bulb
Fig. 14 (2)
.
u
Put the cover
Fig. 14 (1)
back in place.
Fig. 14
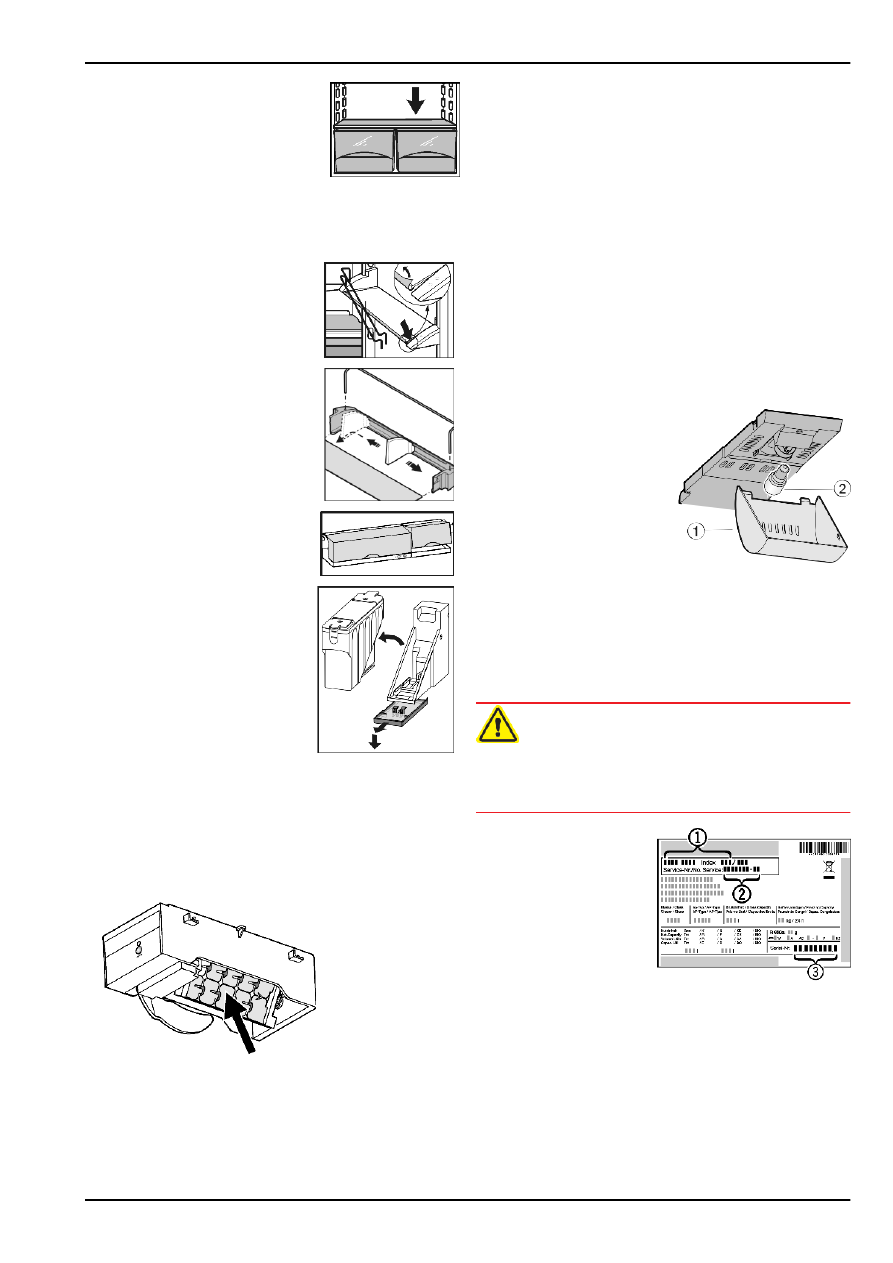
6.5 Customer service
First check whether you can correct the fault yourself by refer-
ence to the list (see Malfunction). If this is not the case, please
contact the customer service whose address is given in the
enclosed customer service list.
WARNING
Risk of injury if repair work is not carried out professionally!
u
Have any repairs and action - not expressly specified - on
the appliance and mains cable carried out by service
personnel only. (see Maintenance)
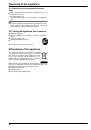
u
Read the appliance
designation
Fig. 15 (1)
, service
No.
Fig. 15 (2)
and
serial No.
Fig. 15 (3)
off the type plate
located inside the
appliance on the left-
hand side.
Fig. 15
u
Notify the customer service, specifying the fault, appliance
designation
Fig. 15 (1)
, service No.
Fig. 15 (2)
and serial No.
Fig. 15 (3)
.
w
This will help us to provide you with a faster and more accu-
rate service.
u
Keep the appliance closed until the customer service
arrives.
w
The food will stay cool longer.
u
Pull out the mains plug (not by pulling the connecting cable)
or switch off the fuse.
Maintenance
12