q
Always stand the appliance backed directly to the wall using
the enclosed wall spacers (see below).
q
The appliance may be moved only when it is empty.
q
Do not install the appliance without assistance.
q
Standard EN 378 specifies that the room in which you install
your appliance must have a volume of 1 m
2
per 8 g of R
600a refrigerant used in the appliance. If the room in which
the appliance is installed is too small, a flammable gas-air
mixture may form in the event of a leakage in the refrigera-
tion circuit. The quantity of refrigerant used in your appliance
is indicated on the type plate on the inside of the appliance.
u
Detach the connecting cable from the rear of the appliance,
removing the cable holder at the same time because other-
wise there will be vibratory noise!
u
Remove the protective film from the outside of the appli-
ance.*
NOTICE
The stainless steel doors are finished with a high quality
surface coating and must not be treated with the enclosed care
product,
as otherwise the surface coating will be damaged.
u
Please only use a soft clean cloth to wipe the coated door
surfaces.
u
Only use a stainless steel care product on the stainless
steel side walls, applying it evenly in the direction of
polishing. Subsequent cleaning will then be easier.
u
Use only a soft clean cloth to wipe side walls and door
surfaces with a paint finish.
u
Remove the protective film from the decorative trims and
drawer fronts.*
u
Remove all transit supports.
u
Dispose of packaging material (see 4.5) .
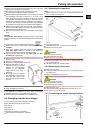
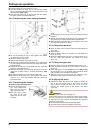
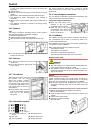
u
Align the appliance so that it
stands firmly and on a level by
applying the accompanying
spanner to the adjustable-
height feet (A) and using a
spirit level.
u
Then support the door: Extend
the adjustable foot at the turn
hinge (B) until it rests on the
floor and then make a further
90° turn.
Note
u
Clean the appliance (see 6.2) .
If the appliance is installed in a very damp environment,
condensate may form on the outside of the appliance.
u
Always see to good ventilation at the installation site.
4.3 Changing over the door hinges
You can change over the door hinges if necessary.
Ensure that the following tools are to hand:
q
Torx® 25
q
Torx® 15
q
Screwdriver
q
Cordless screwdriver, if necessary
q
Second person for fitting work, if needed
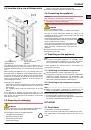
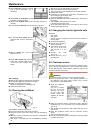
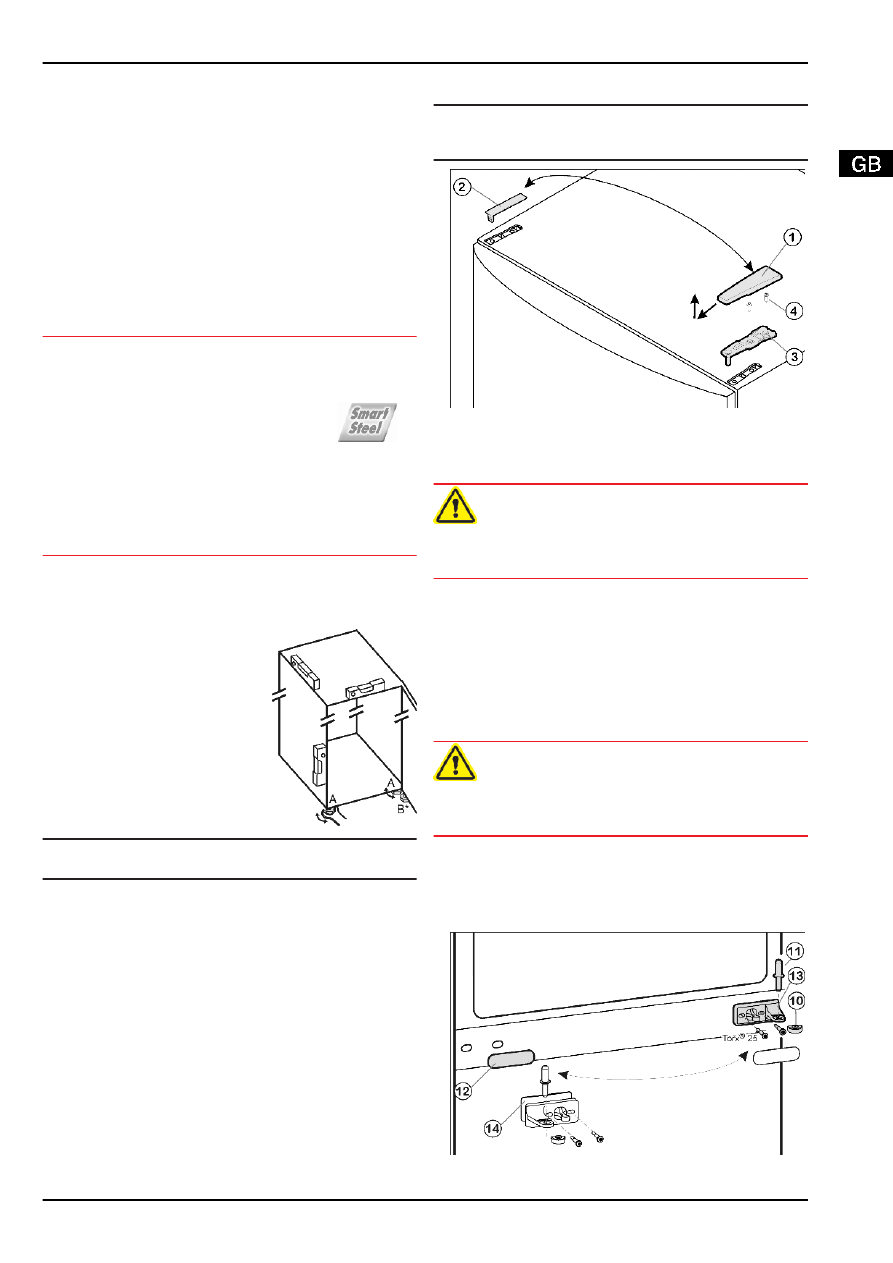
4.3.1 Detaching the upper door
Note
u
Remove any food from the door racks before removing the
door, so that no food falls out.
Fig. 4
u
Close the upper door.
u
Pull off the cover
Fig. 4 (1)
forwards and upwards.
u
Lift off the cover
Fig. 4 (2)
.
CAUTION
Risk of injury if the door tips!
u
Take good hold of the door.
u
Set down the door carefully.
u
Unscrew the upper turn hinge
Fig. 4 (3)
(2x Torx® 25)
Fig. 4 (4)
and lift it off.
u
Lift up the upper door and set it aside.
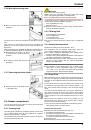
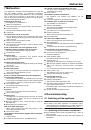
4.3.2 Detaching the lower door
u
Close the lower door.
u
Draw the middle bearing pin
Fig. 5 (11)
out of the turn hinge
and lower door.
u
Remove the plastic cap
Fig. 5 (10)
.
CAUTION
Risk of injury if the door tips!
u
Take good hold of the door.
u
Set down the door carefully.
u
Open the lower door.
u
Unscrew the middle turn hinge (2x Torx® 25).
Fig. 5 (13)
u
Lift up the door and set it aside.
4.3.3 Transferring the middle bearing elements
Fig. 5
Putting into operation
5