39
English
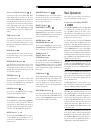
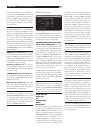
GROUP DELAY:
Also known as “lip-sync”
delay, this setting delays the audio signal for
an input by the specified amount to match
the video input. This feature can be useful
when the video signal is delayed more than
the audio signal as sometimes happens with
upconverted digital TV processors or when
trying to match a radio broadcast with the
video from a sports event.
The range of available settings is from 0ms
to 500ms, in 5ms increments. The setting is
individually stored for each input and is the
default group delay each time that input is
selected. The setting can be temporarily over-
ridden from the front panel or the remote.
OPTIONS:
This selection is only visible when
Pro Logic II or Neo:6 surround mode is se-
lected. Highlight this line and press ENTER to
go to submenus with additional options for
these surround modes. See below.
To return to the MAIN menu from the INPUT
SETUP menu (except when Dolby Pro Log-
ic II or DTS Neo:6 is selected in the SURR
MODE field), press the ENTER button. Press
the MENU/OSD button on the remote to
cancel the menu display and return to nor-
mal operation.
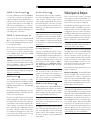
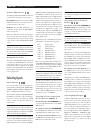
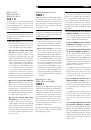
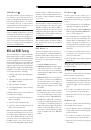
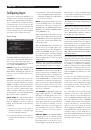
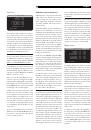
Multi Input Setup
INPUT SETUP
LISTEN:
Multi Input
VID INPUT:Video 1
INPUT LABEL:_______
12V TRIGGER:1
LFE REDIRECT:On
MAIN MENU
When the MULTI INPUT source is selected
on the INPUT SETUP menu, the available
options change to reflect the fact that these
inputs are direct analog inputs and bypass
the RSX-1057’s digital processing. The INPUT,
CINEMA EQ, and DEFAULT MODE options
are not available since these are all digitally
implemented features.
The VID INPUT, INPUT LABEL, and 12V TRIG-
GER options are still available and work as
described on the previous menu.
One additional option, LFE REDIRECT, pro-
vides an alternative bass management con-
figuration. Typically, the eight channels of the
MULTI INPUT are configured as pure analog
bypass signals, going straight from the inputs
to the volume control and the preamp outputs,
bypassing all of the digital processing. There
are no crossovers and no bass management;
therefore, whatever signal goes into the sub-
woofer channel will be sent to the subwoofer
preamp output.
This configuration may not be ideal for mul-
tichannel systems configured with high-pass
speakers, redirecting bass to a powered
subwoofer. An option, called LFE REDIRECT,
sends the seven main channels directly to
the outputs as usual. In addition, it takes
a duplicate copy of these seven channels,
combines them into mono, and routes them
through a 100 Hz analog low-pass cross-
over to the subwoofer preamp output. This
creates a summed mono subwoofer signal,
derived from the seven main channels of the
MULTI INPUT.
Use the LFE REDIRECT off for the pure ana-
log bypass configuration. Use the LFE REDI-
RECT on setting to derive the mono summed
subwoofer output.
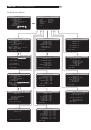
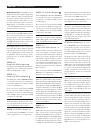
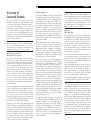
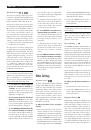
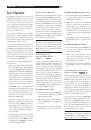
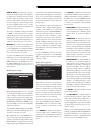
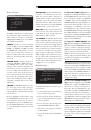
Dolby Pro Logic IIx
������������������������
������
���������������������������
�
�����������������������
����������������
��������������
��������������
��
������������������
���
When Dolby Pro Logic IIx is selected as the
default surround mode on the INPUT SETUP
menu, there are additional settings and pa-
rameters to optimize the surround decoding
for music or movie soundtracks. Dolby Pro
Logic II uses matrix decoding algorithms to
derive a center channel and surround chan-
nels from 2-channel source material.
The first line of the Dolby Pro Logic IIx sub-
menu selects CINEMA, MUSIC, GAME, or
PRO LOGIC modes for matrix decoding.
Use the +/– buttons on the remote to select
a mode.
Select
CINEMA
to optimize for Dolby Sur-
round encoded movie soundtracks includ-
ing increased surround separation and full-
bandwidth surround channel frequency re-
sponse.
Select
MUSIC
to optimize for musical record-
ings. When the MUSIC mode is selected, three
additional parameters will be available on
the OSD screen. Use the UP/DOWN buttons
on the remote to select a parameter. Use the
+/– buttons to change the selected param-
eter as follows:
• PANORAMA:
The Panorama option ex-
tends the front stereo image to include the
surround speakers for a dramatic “wrap-
around” effect. The options are OFF or
ON.
• DIMENSION:
The Dimension option al-
lows you to gradually adjust the sound-
field towards the front or towards the rear.
There are seven incremental settings from
0 to 6. A setting of 0 shifts the soundfield
towards the rear for maximum surround ef-
fect. A setting of 6 shifts the soundfield to
the front for minimum surround effect. The
default setting of 3 provides a “neutral”
balance between the two extremes.
• CENTER WIDTH:
The Center Width op-
tion allows you to spread the signal in-
tended for the center speaker to the left
and right front speakers, widening the
perceived soundfield. There are eight in-
cremental settings from 0 to 7. With the
default setting of 0, there is no center width
spreading and all of the center channel
information is sent to the center speaker.
The maximum setting of 7 shifts all of the
center channel signal to the left and right
speakers, essentially muting the center
speaker and maximizing the soundfield
width. Other settings provide incremental
steps between the two extremes.
Select
GAME
to optimize for Dolby Surround
encoded video games.
Select
PRO LOGIC
for original Dolby Pro
Logic decoding. Typically, Pro Logic II (Cin-
ema or Music modes) will provide better sur-
round performance, even with older source
material. Original Pro Logic mode provides
5.1 channel surround sound, even on 6.1/7.1
channel systems.
When you have completed all the desired ad-
justments, highlight the INPUT SETUP MENU
line at the bottom of the screen and press the
ENTER button to return to the INPUT SETUP
menu (or just press the ENTER button).