65
GW29-016_v01
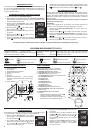
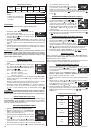
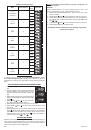
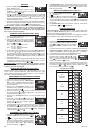
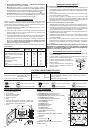
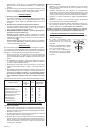
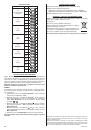
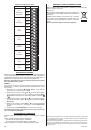
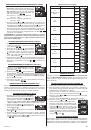
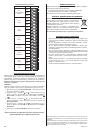
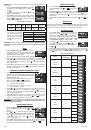
Kitchen utensils
Microwaves
Grill
Combination
mode
Heat-resistant glass
Non-heat-resistant glass
Heat-resistant ceramic utensils
Microwave safe plastic dishes
Parchment paper
Metal tray
Metal gridiron
Aluminum foil and foil containers
Yes
No
Yes
Yes
Yes
No
No
No
Yes
No
Yes
No
No
Yes
Yes
Yes
Yes
No
Yes
No
No
No
No
No
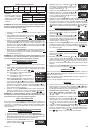
BEFORE YOU CONTACT THE SERVICE CENTER
Normal situation:
1. The operation of the microwave oven may cause radio and TV inter-
ference. This interference is similar to interference caused by small
electrical appliances such as: a food processor, a fan, a vacuum
cleaner etc.
2. While cooking at low microwave power the inside light of the micro-
wave oven may be dull.
3. Water vapor wafts during cooking. Most of the water vapor escapes
through the ventilation openings. However, condensed water vapor
may appear on the cool parts of the oven (e.g. on the door).
If the oven does not work:
1. Make sure the oven is properly plugged in. If not, unplug the appli-
ance, wait 10 seconds and plug it in again.
2. Check if the fuse is not blown or the circuit breaker tripped. If the
above function properly check the electrical outlet by plugging a dif-
ferent electrical appliance.
3. Check if the control panel is properly programmed and the time set.
4. Check if the door is properly closed and latched. The microwave en-
ergy shall not be otherwise supplied to the oven.
5. If the glass tray is noisy during operation check if the bottom of the
oven and the turntable ring assembly are clean. Clean according to
the information in chapter “CLEANING AND MAINTANENCE”.
If after performing the above actions the oven still does not work con-
tact the service center. A microwave oven should never be adjusted
or repaired by a ‘do-it-yourself’ repair person.
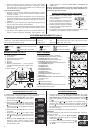
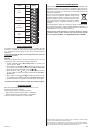
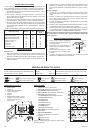
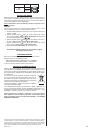
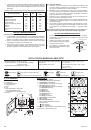
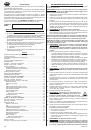
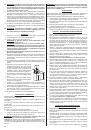
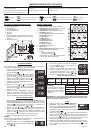
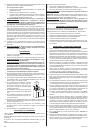
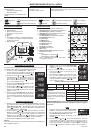
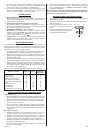
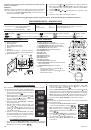
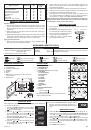
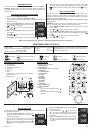
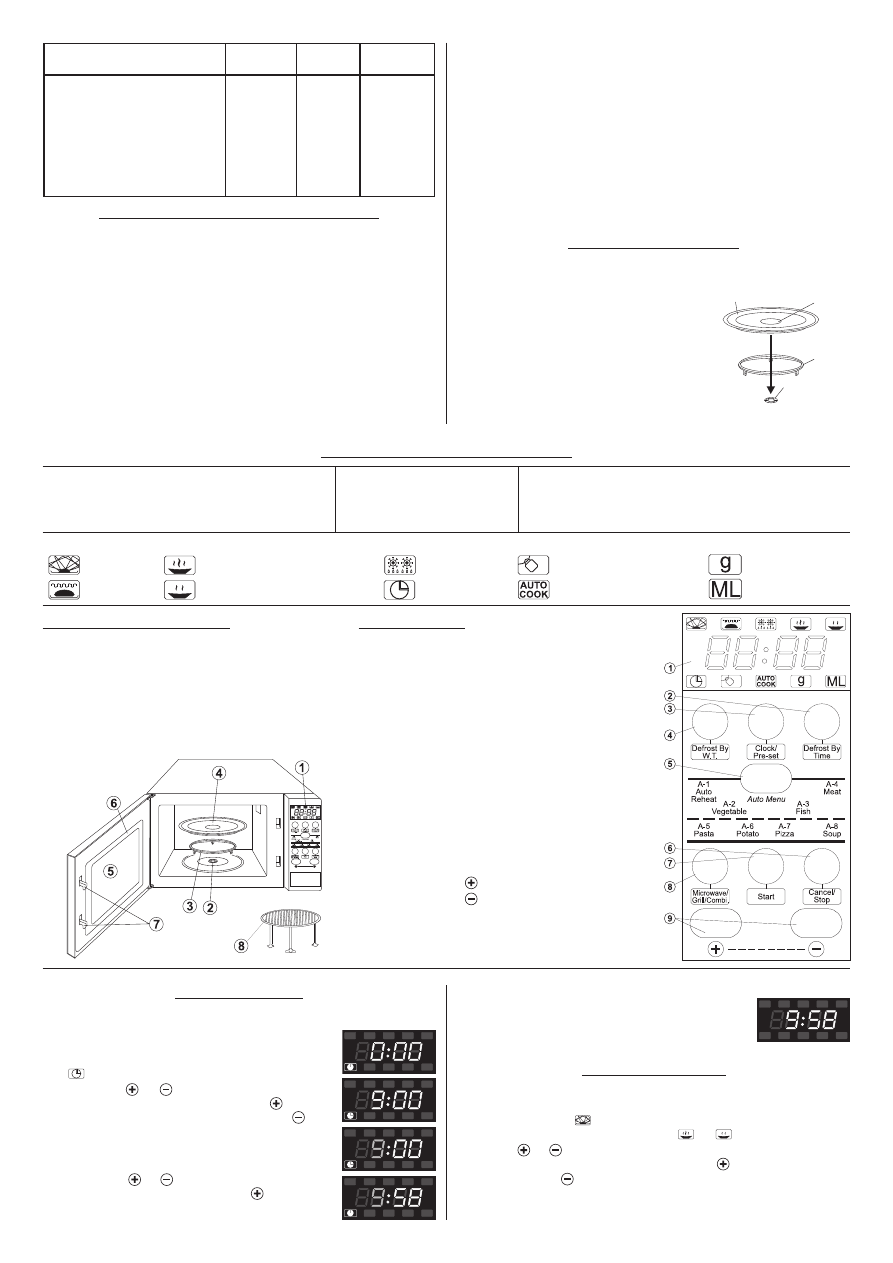
TURNTABLE INSTALLATION
1. Never place the glass tray upside down. The glass tray should never
be restricted.
2. Both glass tray and turntable ring assem-
bly must always be used during cooking.
3. All food and food containers should al-
ways be placed on the glass tray.
4. If glass tray cracks or breaks contact
your nearest service center.
Glass tray
Hub (underside)
Turntable
ring
assembly
Turntable
shaft
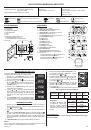
MICROWAVE OVEN TYPE 29Z012
Rated voltage:
230-240 V~ 50 Hz
Energy consumption: 1200-1250 W–Microwaves;
950-1000 W–Grill
Rated input power (microwaves) 800 W
Microwave frequency: 2450 MHz
Capacity: 23
l
Turntable:
Ø 270 mm
External dimensions. (H x W xD.) 287 mm x 485 mm x 410 mm
Internal dimensions. (H x W x D.) 221 mm x 314 mm x 347 mm
Net weight : about 13.2 kg
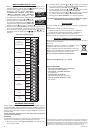
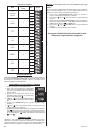
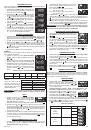
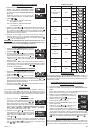
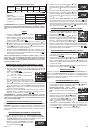
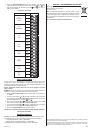
Display: indicators – signalling
Microwaves
Very high and high power
Defrosting
Child lock
Weight in grams
Grill
Very low and low power
Clock
Automatic cooking
Capacity in ml
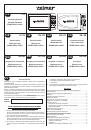
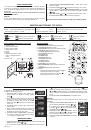
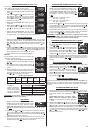
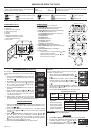
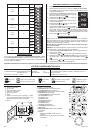
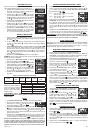
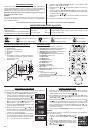
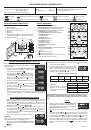
MICROVAVE OVEN FEATURES:
1. Control panel
2. Turntable shaft
3. Turntable ring assembly
4. Glass tray
5. Window
6. Door
7. Safety block – cuts off power if door is opened
during operation
8. Metal gridiron
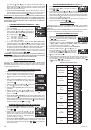
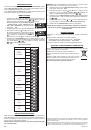
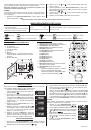
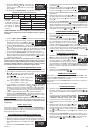
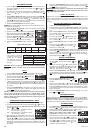
CONTROL PANEL
1. Display:clock + indicators
2.
Defrost By Time
3.
Clock/Pre-Set
4.
Defrost By W.T.
(Defrost by weight)
5.
Auto Menu
A-1:
Auto
Reheat
A-2:
Vegetable
A-3:
Fish
A-4:
Meat
A-5:
Pasta
A-6:
Potato
A-7:
Pizza
A-8:
Soup
6.
Cancel/Stop
7.
Start
8.
Microwave/Grill/Combi.
9. Buttons:
–
value
increase
–
value
increase
By leaps by pressing the button several times or
fl
u-
ently by holding the button.
SETTING THE CLOCK
After plugging the microwave oven you will see “
0:00
” on the display and
you will hear a single beep.
1. Press the
Clock/Pre-Set
button, the hour indica-
tor will start
fl
ashing and the clock control lamp
will light on the display.
2. Press the
or , button to set the hour. You
can set the digits from 0 to 23. Press , the dis-
play will show digits from 0 to 23. Press , the
display will show digits from 23 to 0.
3. Press the
Clock/Pre-Set
button, the minute indi-
cator will begin to
fl
ash.
4. Press the
or , to set the minutes. You can
set the digits from 0 to 59. Press , the display
will show digits from 1 to 59.
5. Press the
Clock/Pre-Set
button to
fi
nish setting
the time. The clock control lamp will light out. “
:
”
will start
fl
ashing and the display will show the set
time.
MICROWAVE COOKING
1. Press the
Microwave/Grill/Combi
. several times to select the re-
quired power level. The display will show
P100, P80, P50, P30, P10
– see table. The
control lamp and the cooking symbol depending
on the selected microwave power –
, or
will light.
2. Press
or to set the cooking time. The cooking time can be set
from 0:05 and can be increased by pressing , to decrease the cook-
ing time press . Decreasing starts from 95:00. The maximum cook-
ing time is 95 minutes.
3. Press
Start
to start cooking.