67
GW29-016_v01
fl
ash. If the door is closed, after the set time is reached, you will hear
two beeps, the cooking will start automatically, the clock control lamp
will light out and the cooking control lamps will light:
and e.g.
.
MULTI STAGE COOKING
You can set up to 3 cooking stages. In case of multi stage cooking, if de-
frosting is one of the cooking stages, the defrosting program will be auto-
matically turned on as the
fi
rst one. After a stage is
fi
nished, you will hear
a beep and the next stage will start.
Notice: Automatic cooking cannot be one of the programs of multi
stage cooking.
EXAMPLE:
To set the cooking for 10 minutes at 100% microwave power
and for 15 minutes at 80% microwave power do the following:
1. Press the
Microwave/Grill /Combi
. button to select 100% microwave
power –
P100
.
2. Press or to set the cooking time for 10 minutes.
3. Press the
Microwave/Grill /Combi
. button twice to set the microwave
power at 80% –
P80
. The display will show
P80
and the symbols
and
.
4. Press or to set the cooking time for 12 minutes.
5. Press
Start
to start cooking.
CHECKING THE MODE
While cooking using the
Microwave/Grill /Combi
. mode, press the
Micro-
wave/Grill /Combi
. button, the current microwave power will appear on
the display for 4 seconds. After 4 seconds the indicators will return to the
previous state.
SETTING THE PROGRAM AT A GIVEN TIME
1. Set the clock (see
Setting the clock.
)
2. Enter a cooking program (see:
Microwave cooking
).
You can set up to 3 stages. The defrosting program should always be
set as the
fi
rst one.
3. Press the
Clock/Pre-Set
button, the digits of the
hour will start to
fl
ash and the clock control lamp
will appear on the display.
4. Press or to set the hour. You can select dig-
its from 0 to 23.
5. Press the
Clock/Pre-Set
button, the digits will
start to
fl
ash.
6. Press or to set the minutes. You can select
digits from 0 to 59.
7. Press
Start
to
fi
nish setting. The clock control lamp
will start to
Each time a mode ends you will hear a beep which indicates the end of operation.
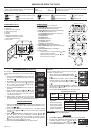
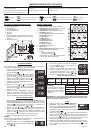
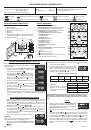
MICROWAVE OVEN TYPE 29Z013
Rated voltage:
230-240 V~ 50 Hz
Energy consumption: 1200-1250 W–Microwaves;
950-1000 W–Grill
Rated input power (microwaves) 800 W
Microwave frequency: 2450 MHz
Capacity: 23
l
Turntable:
Ø 270 mm
External dimensions. (H x W xD.) 287 mm x 485 mm x 390 mm
Internal dimensions. (H x W x D.) 221 mm x 314 mm x 347 mm
Net weight : about 13.3 kg
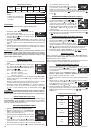
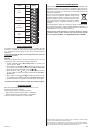
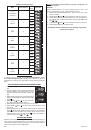
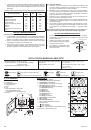
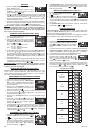
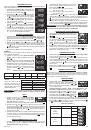
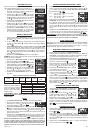
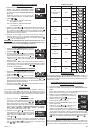
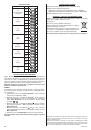
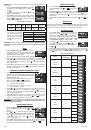
Display: indicators – signalling
Microwaves
Very high and high power
Defrosting
Child lock
Weight in grams
Grill
Very low and low power
Clock
Automatic cooking
Capacity in ml
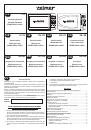
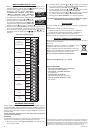
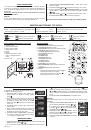
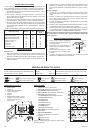
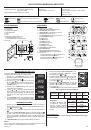
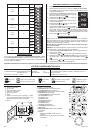
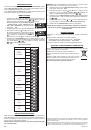
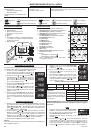
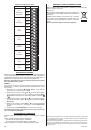
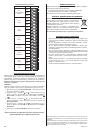
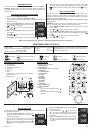
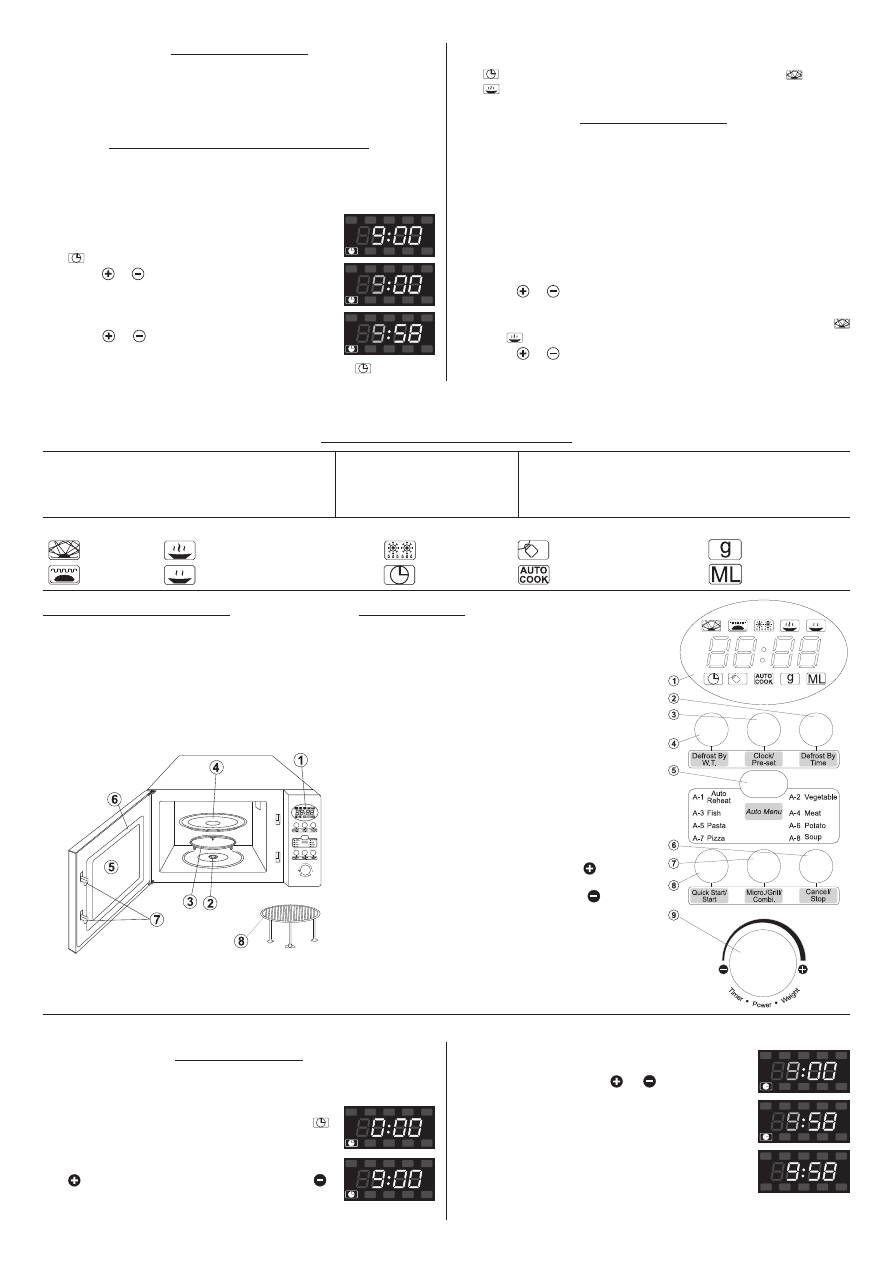
MICROWAVE OVEN FEATURES
1. Control panel
2. Turntable shaft
3. Turntable ring assembly
4. Glass tray
5. Window
6. Door
7. Safety block – cuts off power if door is opened
during operation
8. Metal gridiron
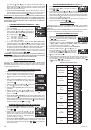
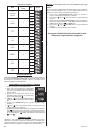
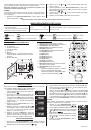
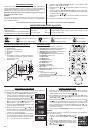
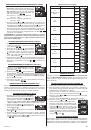
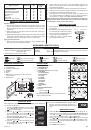
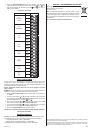
CONTROL PANEL
1. Display: clock + indicators
2.
Defrost By Time
3.
Clock/Pre-Set
4.
Defrost By W.T.
(Defrost by weight)
5.
Auto Menu
A-1:
Auto
Reheat
A-2:
Vegetable
A-3:
Fish
A-4:
Meat
A-5:
Pasta
A-6:
Potato
A-7:
Pizza
A-8:
Soup
6.
Cancel/Stop
7.
Micro./Grill/Combi.
8.
Quick Start/Start
9. Knob:
value increase towards the symbol
–
,
clockwise
value decrease towards the symbol
–
,
clockwise
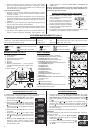
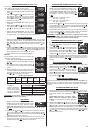
SETTING THE CLOCK
After plugging the microwave oven you will see “
0:00
” on the display and
you will hear a single beep.
1. Press the
Clock/Pre-Set
button, the hour digits
will start to
fl
ash and the clock control lamp
will light on the display.
2. Turn the knob to set the hour. You can set the
digits from 0 to 23 by turning the knob towards
or from 23 to 0 by turning the knob towards .
The display will show digits from 0 to 23 or from
23 to 0.
3. Press the
Clock/Pre-Set
button, the minute digits
will begin to
fl
ash.
4. Turn the knob towards or , to set the min-
utes. You can set the digits from 0-59 and from
59-0. The display will show digits from 1 to 59 or
from 59 to 1.
5. Press the
Clock/Pre-Set
button to
fi
nish setting
the time. The clock control lamp will light out. The
“
:
” symbol will light and the time will appear on
the display.